Overview
In the previous article, we learned how to develop, test, and deploy our first Mule Application. In this tutorial, we are going to learn how to configure TLS with a Keystore to enable HTTPS on our Mule Application.
If you haven’t already, make sure to signup for a free Anypoint Platform account to create your first API. Also, checkout the Hello Mule tutorial to learn how to build your first API in Anypoint Studio.
Already have an account? Sign in.
Build an HTTPS Service
In order to enable HTTPS on your localhost and CloudHub endpoint, you need to generate a keystore.jks file using the JDK keytool utility on the command line. You must also specify the hostname on the command line to generate a self-signed certificate.
Go to your Terminal or Command line, and type in the following command to generate your keystore.jks file. You need to save your keystore file in your Anypoint Studio Mule applications src/main/resources folder. If you CD into your folder before running the below command, it will generate the file right into your folder.
keytool -genkey -alias key-alias -keystore keystore-name.jks -keyalg RSA -storetype JKS
For more information and details on how to generate your keystore, please click here to go to the MuleSoft Documentation.
Next, go into Anypoint Studio, and select your HTTP Listener and click on the Connector Configuration. Select the Protocol to HTTPS and switch your port to 8082. Then, under the TLS tab enter your keystore path, alias and password. Make sure that you enter the same credentials as you defined in the above command when generating the keystore.
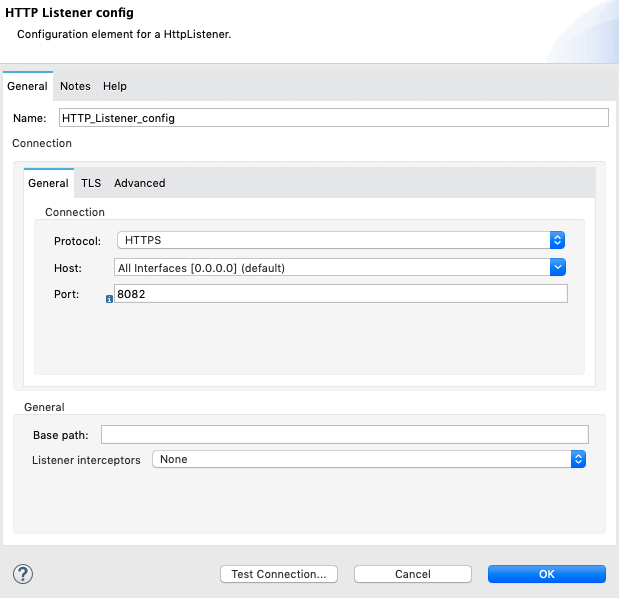

Click the Test Connection button to verify that you have setup your keystore configuration properly.
Test your HTTPS enabled Mule Application
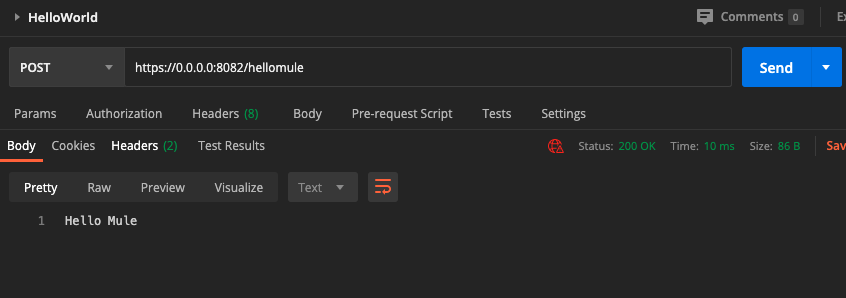
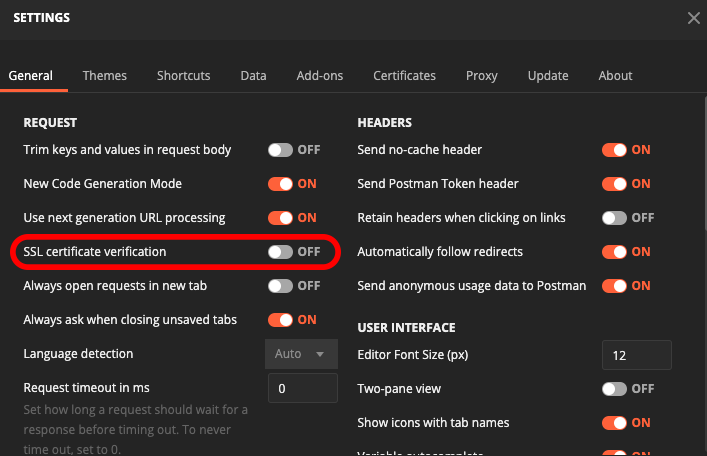
Once you have configured your keystore configuration, go to your REST client such as Postman, and enter in the endpoint of your Mule Application. Don’t forget to include HTTPS in the URL and the correct port 8082. When you make a POST request to your Hello Mule application using HTTPS, it should return with a 200 OK response. If your request fails, make sure that you have SSL certification verification turned off in Postman or your other favorite REST client.
Congratulations on configuring HTTPS
You did it! You successfully configured HTTPS in your Mule Application. In the next article, we will show you how to secure properties for deployment. If you found this tutorial helpful, please give it a rating below.


Try Anypoint Platform for free
Start your 30-day free trial of the #1 platform for integration, APIs, and automation. No credit card required. No software to install.
Questions? Ask an expert.
