This tutorial was updated in October 2022 and is based on Flex Gateway 1.2.0.
When you install Flex Gateway in local mode, you can edit all the gateway configurations from a .yaml file. Such as your API instances and security policies. Once you have installed, registered, and started your gateway in local mode, you can now secure your APIs using a configuration file.
In this tutorial, you’ll learn how to:
- Add a new API in the configuration file
- Test the gateway
- Change the base path
- Apply a basic authentication policy to the API
- Apply a rate-limiting policy to the API
- Manage several upstream services
This tutorial focuses on the local configuration for Docker and Linux. The configuration for Kubernetes can be found here.
Prerequisites
- curl - A command-line tool to make calls to the APIs. You can download it here. If you prefer a GUI over a command line, install a REST Client instead.
- REST client - If you’re unfamiliar with curl, you can also install Advanced REST Client, Postman, or any other app of your choice to make calls to the APIs using a GUI.
- Install Flex Gateway in local mode - You must install, register, and start Flex Gateway in local mode. To do that, follow this tutorial first:
Add a new API in the config file
1 - Create a new .yaml file in the same folder where you installed Flex Gateway (where the registration.yaml file was created). The name can be whatever you choose. We’ll call it config.yaml in this tutorial.
2 - Copy the following snippet and paste it in the new config.yaml file. We will be connecting to the jsonplaceholder API through the port 8081.
1
2
3
4
5
6
7
8
9
apiVersion: gateway.mulesoft.com/v1alpha1
kind: ApiInstance
metadata:
  name: config
spec:
  address: http://0.0.0.0:8081
  services:
    jsonplaceholder:
      address: https://jsonplaceholder.typicode.com/
Test the gateway
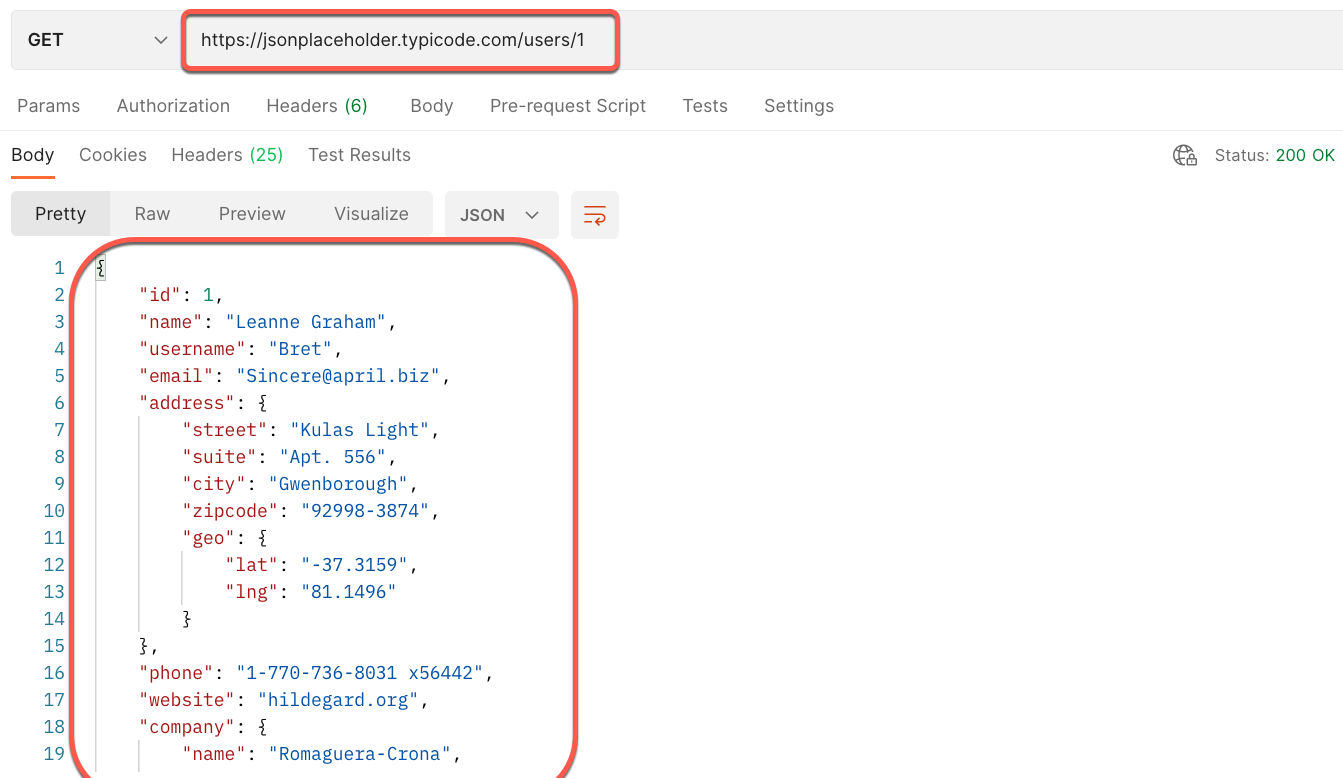
1 - Go to your command line or your REST Client and make a call to the following URL. This is only to verify the original API’s URL is working before we try to hit it from the gateway.
URL:
https://jsonplaceholder.typicode.com/users/1curl command:
1
curl https://jsonplaceholder.typicode.com/users/1
Postman:
Now let’s see what is the URL we need to use to call the API through our newly set up Flex Gateway. We should use the gateway’s host and port, like so: http://<host>:<port>/users/1.
2 - If you installed it as a Docker container or as a Linux service on your local machine, you can use localhost and port 8081.
http://localhost:8081/users/13 - Once you know which URL you need to use, call it using either curl or Postman. The response should be the same one you get when calling the API directly.
1
2
3
4
5
6
7
8
9
10
11
12
13
14
15
16
17
18
19
20
21
22
23
{
  "id": 1,
  "name": "Leanne Graham",
  "username": "Bret",
  "email": "Sincere@april.biz",
  "address": {
    "street": "Kulas Light",
    "suite": "Apt. 556",
    "city": "Gwenborough",
    "zipcode": "92998-3874",
    "geo": {
      "lat": "-37.3159",
      "lng": "81.1496"
    }
  },
  "phone": "1-770-736-8031 x56442",
  "website": "hildegard.org",
  "company": {
    "name": "Romaguera-Crona",
    "catchPhrase": "Multi-layered client-server neural-net",
    "bs": "harness real-time e-markets"
  }
}
We have verified we are connected to the API through our gateway. You will use this host and port from now on for the rest of the tutorial.
Make sure the port you use in the URL matches the one you set up in the config.yaml file.
If you run the curl command with the -v argument, you will be able to see at least one envoy header being returned in the response. For example, curl -v <URL>. The gateway adds this. You can also see it in Postman from the Headers tab in the response section.
Change the base path
Now that we know our gateway is connected to the API, let’s do some changes to the config file to see them reflected almost immediately.
1 - Replace the contents in the config.yaml file with the following snippet. This will essentially add a new base path of /api to call the API through the gateway. Save the file.
1
2
3
4
5
6
7
8
9
10
11
12
apiVersion: gateway.mulesoft.com/v1alpha1
kind: ApiInstance
metadata:
  name: config
spec:
  address: http://0.0.0.0:8081
  services:
    jsonplaceholder:
      address: https://jsonplaceholder.typicode.com/
      routes:
        - rules:
            - path: /api(/.*)
2 - You won’t be able to send requests to the previous URI in a couple of seconds (or in less than a second). The base path now has to include /api. Use curl or Postman to test the new URI. You should receive the same response as before. For example:
Before:
http://localhost:8081/users/1After:
http://localhost:8081/api/users/1Postman sometimes caches the response. If you do not see changes after a while, try using curl or your browser instead.
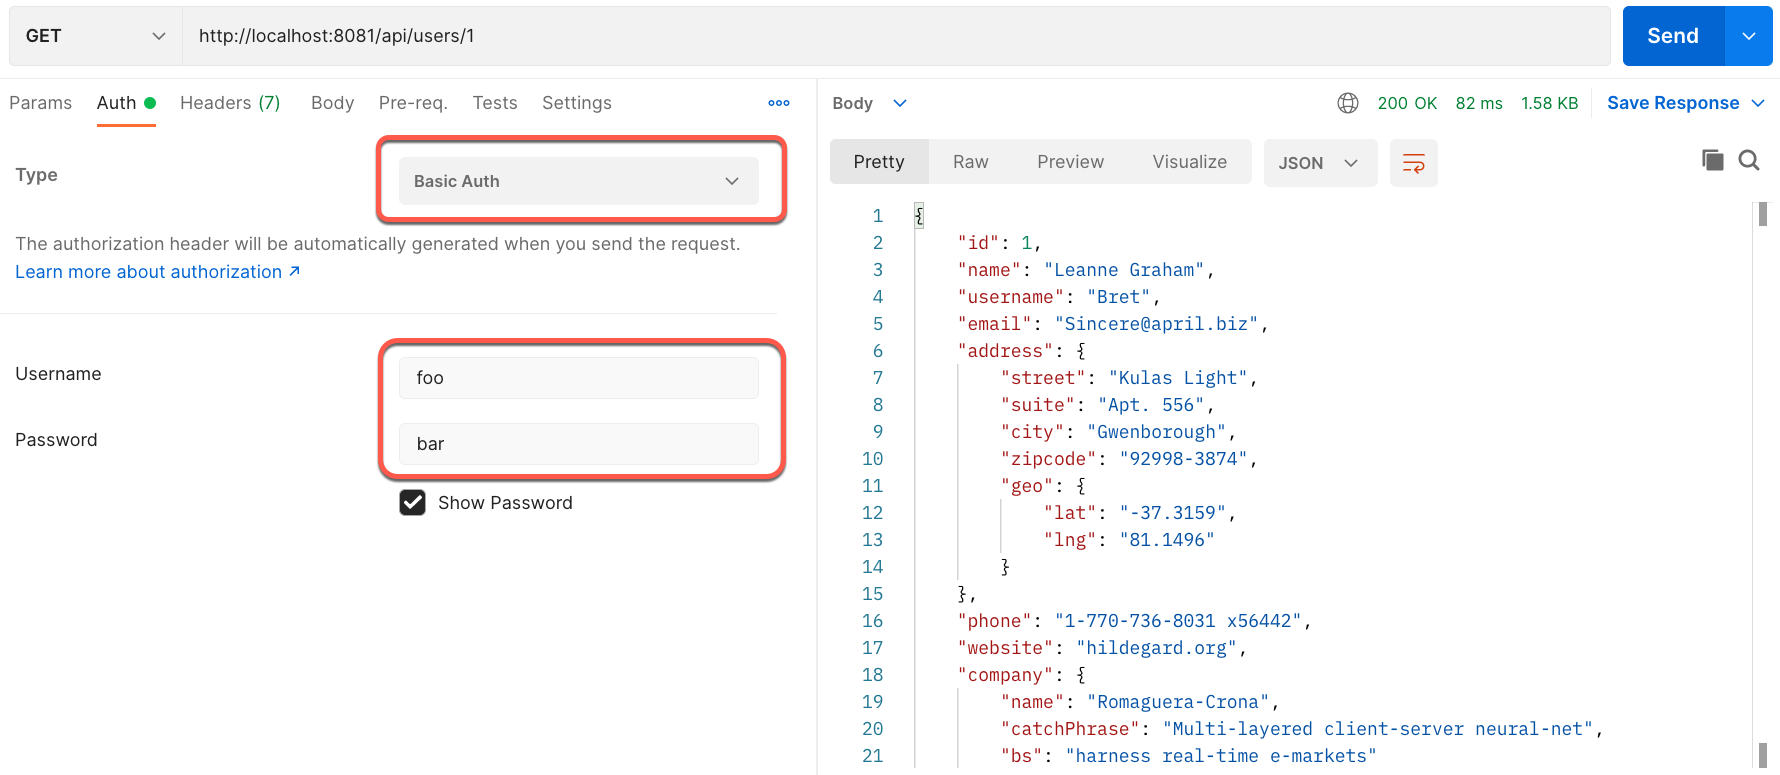
Apply a basic authentication policy
1 - Replace the contents in the config.yaml file with the following snippet. This will apply the basic authentication policy with the given credentials of foo/bar. Save the file.
1
2
3
4
5
6
7
8
9
10
11
12
13
14
15
16
17
18
apiVersion: gateway.mulesoft.com/v1alpha1
kind: ApiInstance
metadata:
  name: config
spec:
  address: http://0.0.0.0:8081
  services:
    jsonplaceholder:
      address: https://jsonplaceholder.typicode.com/
      routes:
        - rules:
            - path: /api(/.*)
  policies:
    - policyRef:
        name: http-basic-authentication-flex
      config:
        username: foo
        password: bar
2 - You won’t be able to send requests to the previous URI. The request now has to include this basic auth. Once you add these, you should receive the same response as before. For example:
curl command:
1
curl -u foo:bar http://localhost:8081/api/users/1
Postman:
From Postman, click on View > Toggle Two-Pane View to see your request on the left side of the screen and your response on the right side.
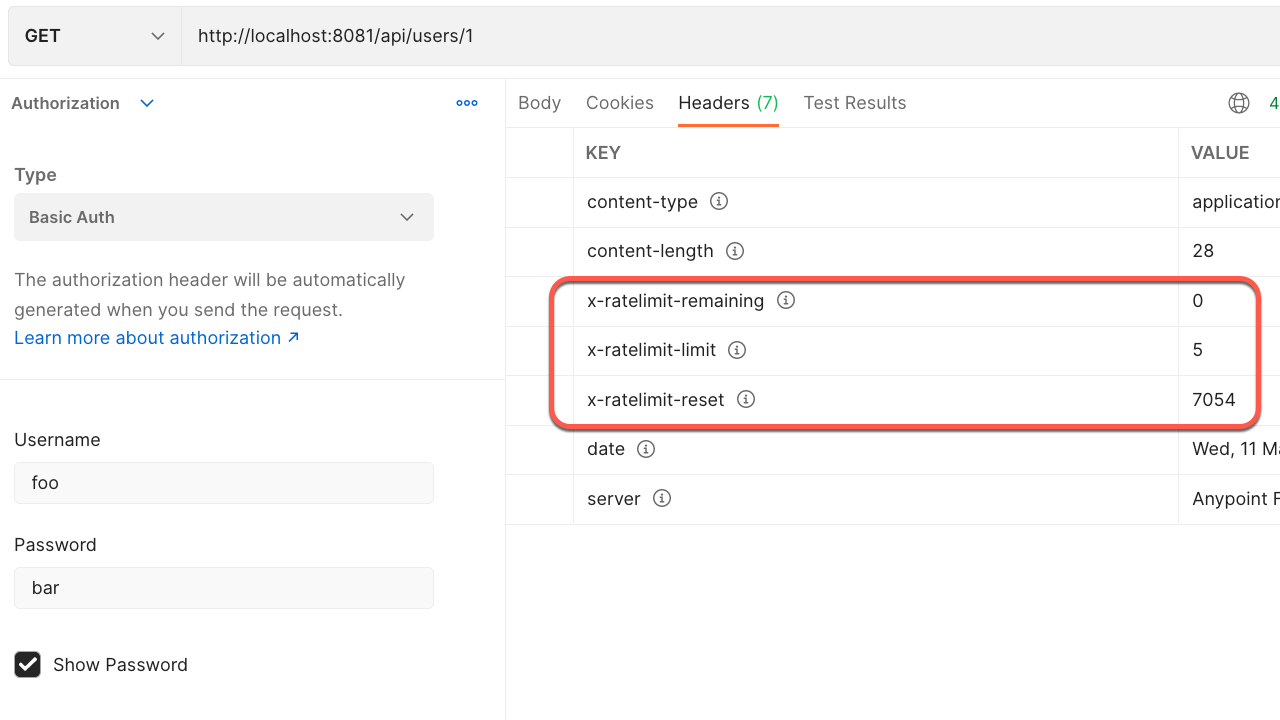
Apply a rate-limiting policy
1 - Replace the contents in the config.yaml file with the following snippet. This will apply the Rate Limiting policy for 5 requests per 10,000 milliseconds (10 seconds) and will expose the associated headers in the response. Save the file.
1
2
3
4
5
6
7
8
9
10
11
12
13
14
15
16
17
18
19
20
21
22
23
24
25
apiVersion: gateway.mulesoft.com/v1alpha1
kind: ApiInstance
metadata:
  name: config
spec:
  address: http://0.0.0.0:8081
  services:
    jsonplaceholder:
      address: https://jsonplaceholder.typicode.com/
      routes:
        - rules:
            - path: /api(/.*)
  policies:
    - policyRef:
        name: http-basic-authentication-flex
      config:
        username: foo
        password: bar
    - policyRef:
        name: rate-limiting-flex
      config:
        exposeHeaders: true
        rateLimits:
          - maximumRequests: 5
            timePeriodInMilliseconds: 10000
2a - You can try to send several requests from Postman and you’ll eventually get a 429 Too Many Requests status code. You can take a look at the response headers to see the 3 rate-limiting headers and their values.
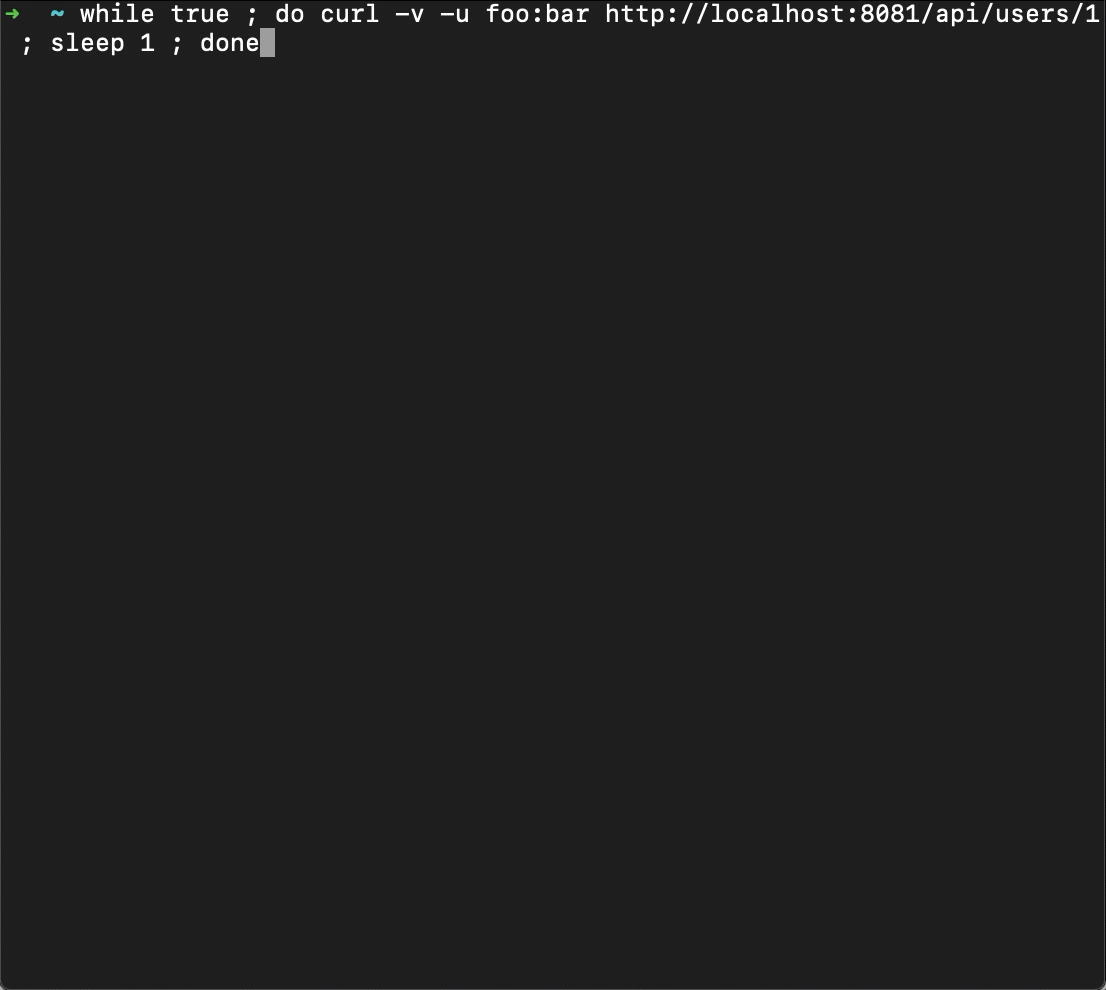
2b - If you’re using curl, you can use the following command to send one request per second until you get the "Too many requests" response. This is helpful to visualize the response headers easier. Make sure to replace the given URI example with your own.
1
while true ; do curl -v -u foo:bar http://localhost:8081/api/users/1 ; sleep 1 ; done
Manage several upstream services
1 - Replace the contents in the config.yaml file with the following snippet. This will add a new service with a different address. Note that each API must have a different base path so the gateway can route each call appropriately. Save the file.
1
2
3
4
5
6
7
8
9
10
11
12
13
14
15
16
17
18
19
20
21
22
23
24
25
26
27
28
29
30
apiVersion: gateway.mulesoft.com/v1alpha1
kind: ApiInstance
metadata:
  name: config
spec:
  address: http://0.0.0.0:8081
  services:
    jsonplaceholder:
      address: https://jsonplaceholder.typicode.com/
      routes:
        - rules:
            - path: /jsonapi(/.*)
    jokes:
      address: https://v2.jokeapi.dev/
      routes:
        - rules:
            - path: /jokesapi(/.*)
  policies:
    - policyRef:
        name: http-basic-authentication-flex
      config:
        username: foo
        password: bar
    - policyRef:
        name: rate-limiting-flex
      config:
        exposeHeaders: true
        rateLimits:
          - maximumRequests: 5
            timePeriodInMilliseconds: 10000
2 - With this configuration, you can call your first service using the following URI.
localhost:8081/jsonapi/users/13 - To call the second service, you can use the following URI.
localhost:8081/jokesapi/joke/AnyNext Steps
In this tutorial, you learned how to:
- Add a new API in the configuration file
- Test the gateway
- Change the base path
- Apply a basic authentication policy to the API
- Apply a rate-limiting policy to the API
- Manage several upstream services
If you want to learn more about the different configuration options for your file, see Managing Flex Gateway in Local Mode. To see the definition of each field in the configuration file, see Declarative Configuration Reference Guide.
If you want to add more policies to your gateways, make sure they’re compatible with Flex Gateway first. See Included Policies Directory.
Remember to visit our other Flex Gateway tutorials to learn how to install it in different deployment options: in local mode, as a Linux service, as a Docker container, or as a Kubernetes ingress controller. You can find the list of other Flex Gateway tutorials here.


Try Anypoint Platform for free
Start your 30-day free trial of the #1 platform for integration, APIs, and automation. No credit card required. No software to install.
Questions? Ask an expert.
