Overview
MongoDB Atlas is a global cloud database service for modern applications. You can deploy your fully managed MongoDB database across, AWS, Google Cloud, and Azure which allows your database to scale as your application grows. Setting up MongoDB using MuleSoft’s Anypoint Studio is simple! The MongoDB Connector is available for download on Anypoint Exchange, click here to download and view the dependency snippets.
If you haven’t already, make sure to sign up for a free Anypoint Platform account.
Already have an account? Sign in.
Step 1: Setup your MongoDB project
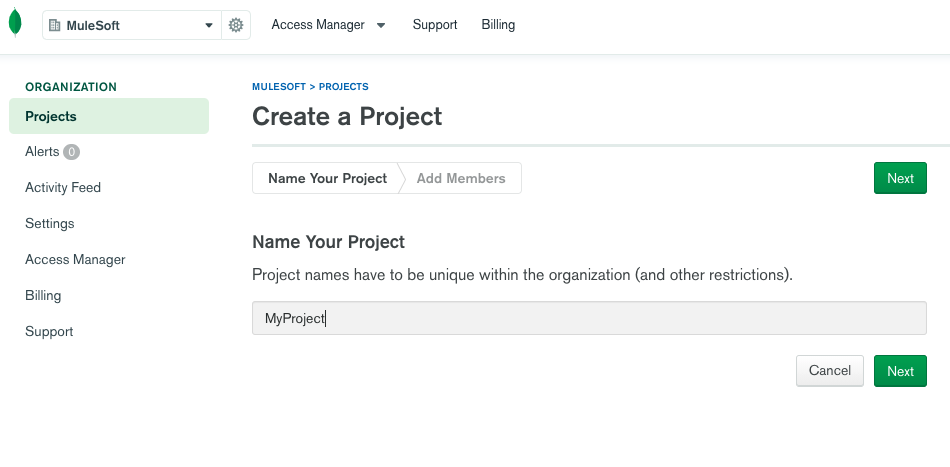
Start by navigating to the MongoDB website and create a free account. Create a new project and name it whatever you wish.
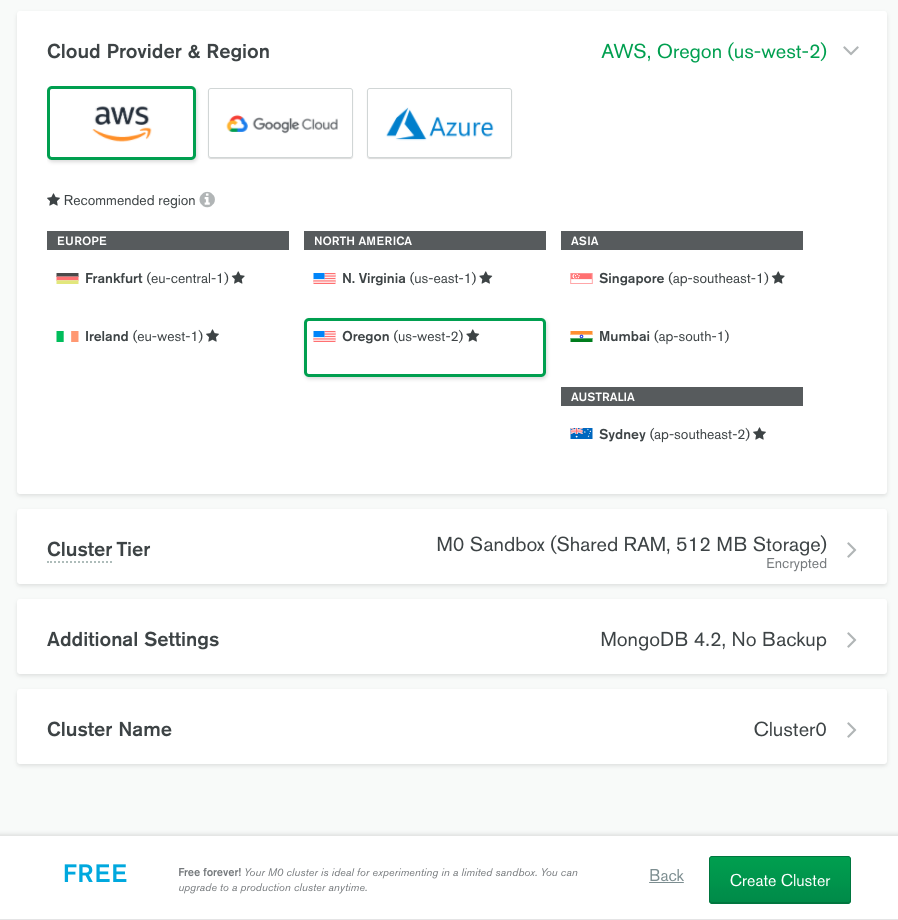
After you have created your project, select the cloud hosting provider you would like your database to be hosted on. Once you have selected your preferred hosting, click Create Cluster.
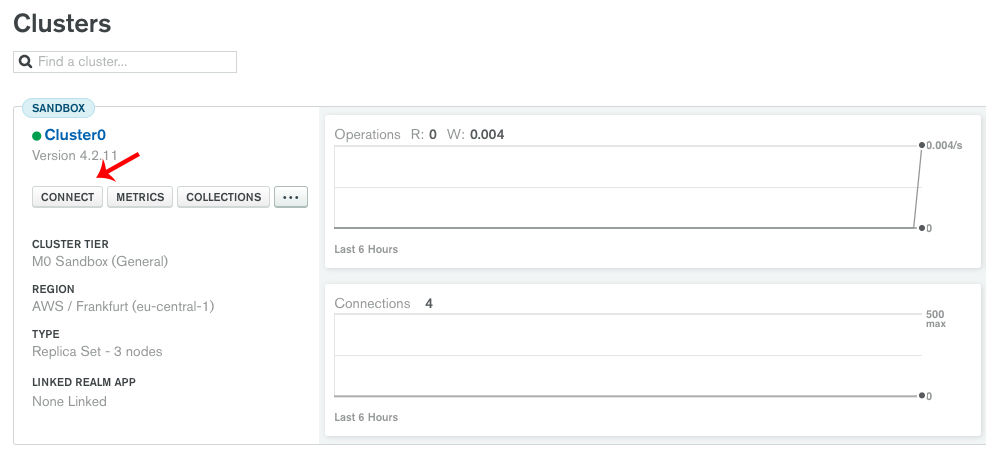
Once your cluster has been provisioned, click on the CONNECT button to view your connection credentials.
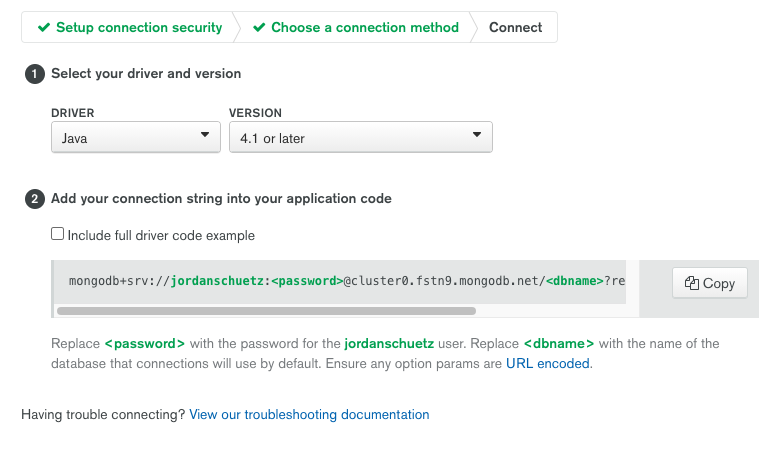
The connection string below will be what you will need to copy and paste into your Anypoint Studio project. You will need to add your username, password, and database name to the connection string. Don’t worry about URL encoding your password in Anypoint Studio, it will handle that for you when sending the request.
Step 2: Create your MongoDB Anypoint Studio project

We’ve created a simple flow in Anypoint Studio using the MongoDB Connector. In this flow, we have an HTTP Listener that’s listening for an HTTP request containing the collection name, and the following keys we want to store in the database: name, ingredients, prepTimeInMinutes.
1
2
3
4
5
6
7
8
9
10
11
12
13
{
"collection": "recipes",
"name": "loco moco",
"ingredients": [
"ground beef",
"butter",
"onion",
"egg",
"bread bun",
"mushrooms"
],
"prepTimeInMinutes": 54
}
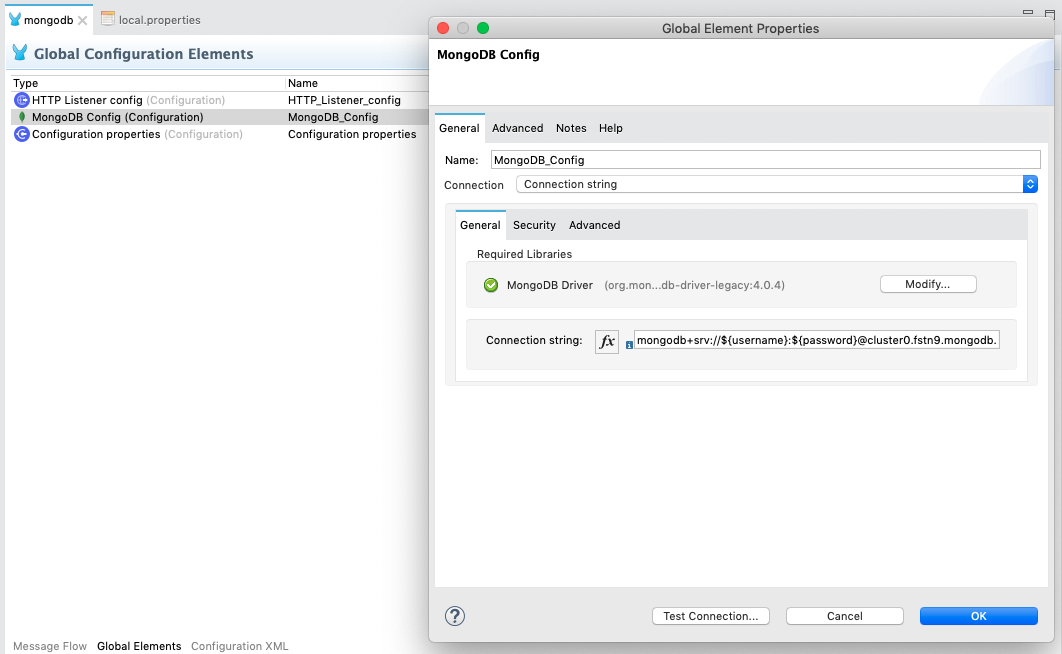
When importing the MongoDB connector, select Add Recommended Libraries for the driver, and add the connection string found in Step 1. Make sure to insert your own username, password and database name in the connection string. You can use a local.properties file to store your credentials. Learn how to secure properties by following this tutorial.
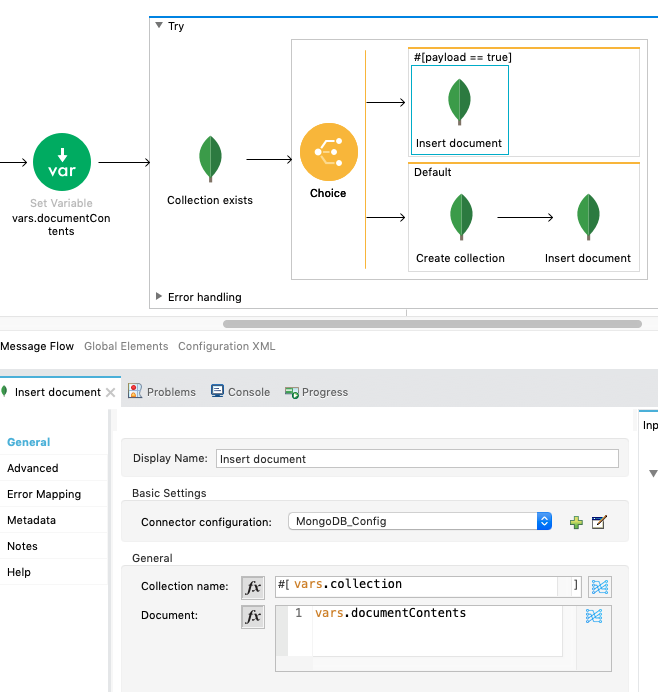
In the flow, we check to see if a Collection exists on MongoDB. If the Collection is equal to true, insert the data from the request as a new entry in the Collection. If the name of the Collection does not match, then create a new Collection and insert the data from the request as a new entry in the Collection.
Step 3: Test your MongoDB Connection
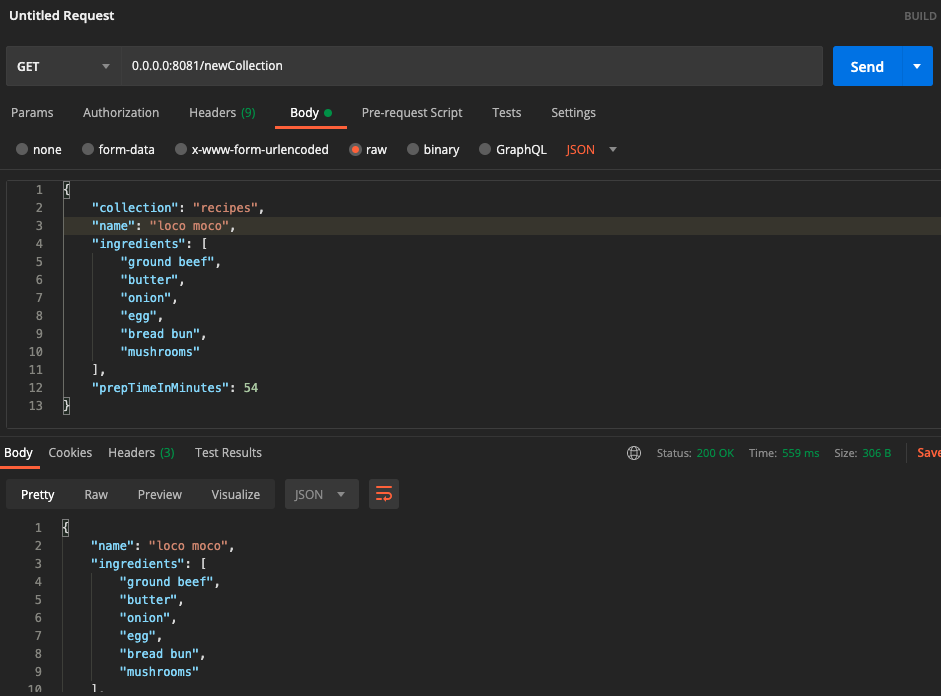
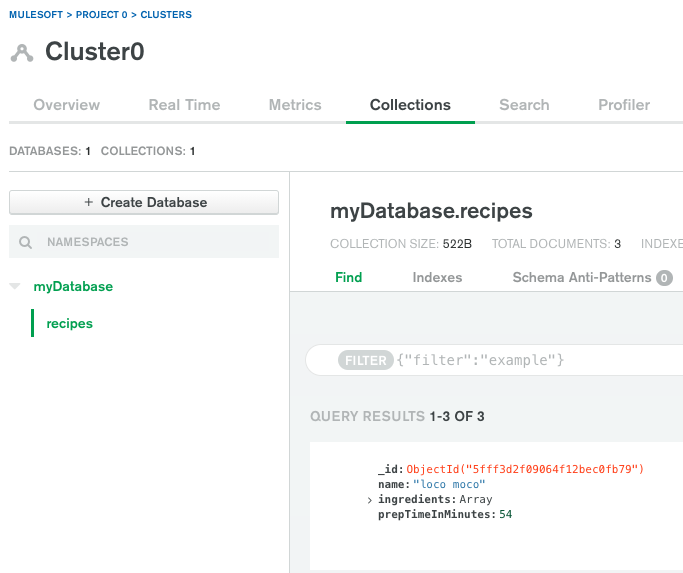
Now that we’ve successfully created our flow, let’s try to add our first payload to the Collection. Format your HTTP Request and send a request to your API endpoint. If a Collection doesn’t exist, it will create a new Collection on your cluster. If your Collection already exists, it will add your payload as a new document in the Collection.
Conclusion
Nice job setting up the MongoDB connector! As you can see from the above example, setting up the MongoDB connector in Anypoint Studio is easy! To read more tutorials on how to get started with MuleSoft, please visit the developer tutorials homepage. If you found this tutorial helpful you can continue expanding your knowledge by taking a training course.
Try Anypoint Platform for free
Start your 30-day free trial of the #1 platform for integration, APIs, and automation. No credit card required. No software to install.
Questions? Ask an expert.
