We would like to thank MuleSoft Ambassador, Miguel Martinez for his contribution to this developer tutorial.
Overview
APIs are powering up the largest, most disruptive, and fastest-growing organizations in the world. They are at the center of tactical initiatives including integrating new systems aimed at optimizing and scaling internal operations, unlocking reusable digital assets to promote innovation and speed of development, facilitating the integration with new customers and vendors, and providing unified data for improved user experiences.
MuleSoft’s Anypoint Platform provides many features to secure your APIs, and while there are many security measures to take into consideration, I want to address the topic of identity and access control with OAuth 2.0 and OpenID Connect, integrating your AnyPoint platform with a OpenID Connect Provider, also referred to as an External Identity Provider (IDP).
OAuth 2.0 is a highly extensible authorization framework and is the industry-standard protocol for authorization. In fact, it’s a key security consideration for implementing healthcare APIs.
OpenID Connect is an identity layer on top of the OAuth 2.0 protocol and it has all the OAuth 2.0 capabilities integrated with the protocol itself.
In order to leverage AnyPoint’s out of the box capabilities to secure you APIs with OAuth 2.0 and OpenID Connect, your organization must have:
- An Anypoint Platinum or Titanium subscription license
- The API manager component
- An OpenID Connect-compliant provider that supports OpenID Connect Dynamic Client Registration such as PingFederate, OpenAM, or Okta.
You must also have administrator privileges to the Master Organization in Anypoint. The external IDP configuration can only be set up at the Master Organization level.
In this article we are going to use Okta as our IDP.
Before we begin the tutorial, don’t forget to signup for a free trial so we can walk through the steps together.
Already have an account? Sign in.
API Manager
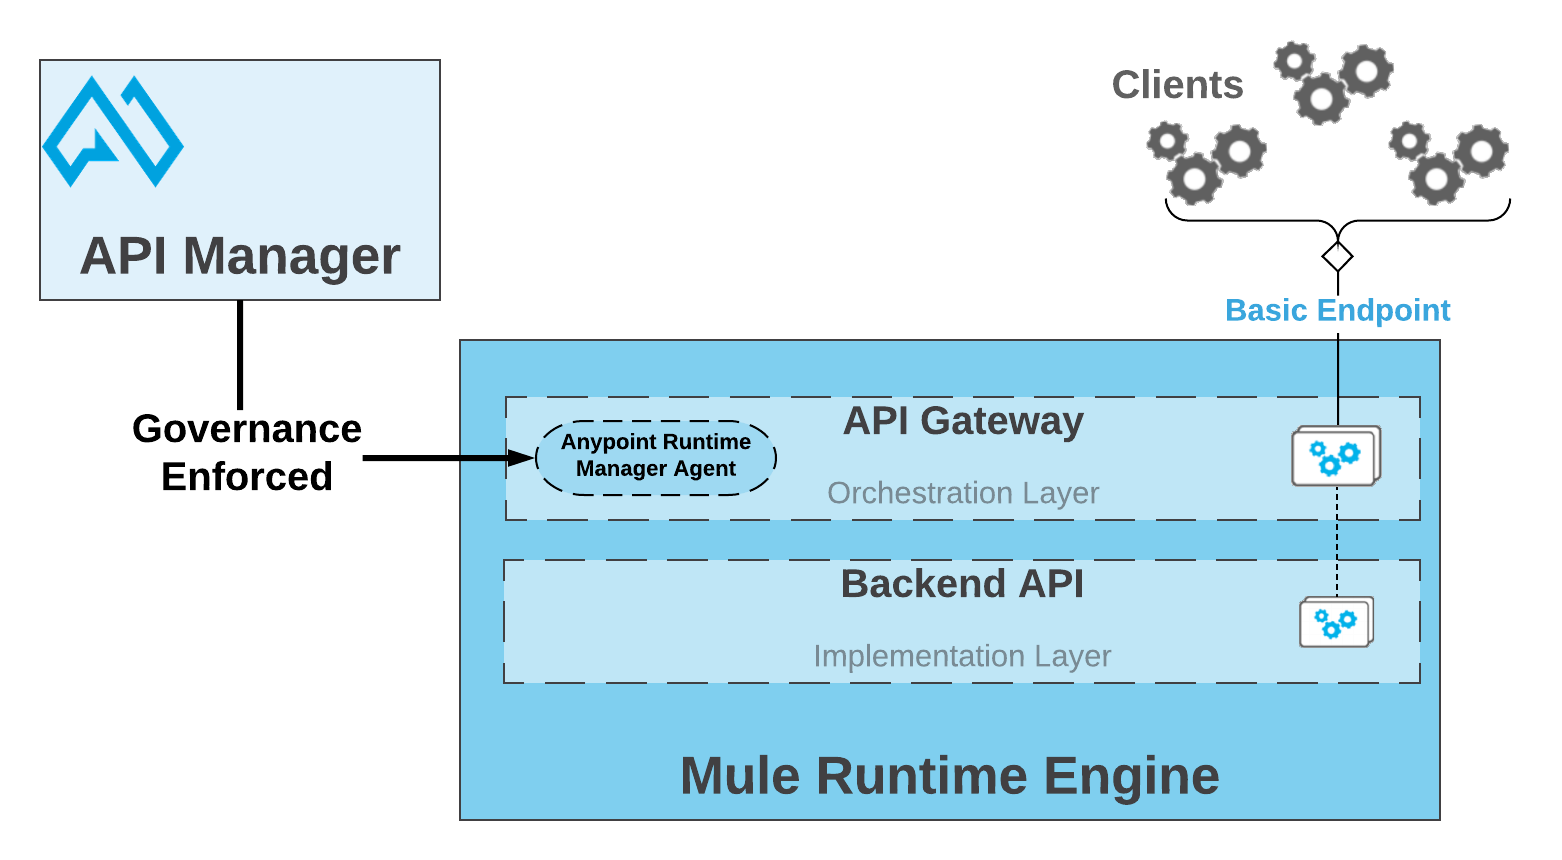
The Anypoint API Manager allows you to apply prebuilt security policies for OAuth 2.0 and OpenID Connect. These policies work out of the box with any of the supported OpenID Connect-compliant providers.
The advantage of using API Manager is that policies are configured and applied in the API manager and then injected into the Mule Runtime embedded API Gateway where your application is deployed. The policy enforcement takes place in the embedded API Gateway. Please see the image below taken from the MuleSoft documentation.
OpenID Connect Provider
I’ve seen the terms OpenID Connect Provider, External Identity Provider (IDP), OAuth Authentication server, OAuth 2.0 Authorization server with IDP, etc., used interchangeably. An OpenID Connect Provider provides authorization and authentication capabilities.
An Authorization Server uses an Identity Provider (IDP) to authenticate a resource owner (a user or application that owns the data or function provided by the API resource) in order to grant an access token to the client application. When it functions as an OpenID Connect provider, the identity information obtained from the authentication process is passed in the OpenID Connect token.
OpenID Connect Providers like Okta provide OAuth 2.0 Authorization Servers and it can also be integrated with your own Identity Providers like Azure AD or any other AD.
Can we implement our own OpenID Connect Provider or OAuth 2.0 Provider?
Do you have the time and resources, including security experts, to implement and maintain a provider compliant with the respective OpenID Connect and OAuth 2.0 specifications? Can you provide and maintain a secure and highly available infrastructure?
There are some free open source implementations, but you still have to own the configuration and also handle the infrastructure concern - using a secure cloud could be an option. Click here to view a list of certified OpenID Connect Provider Servers and Services.
There is also a Mule OAuth 2.0 Provider that you can download and deploy, but it’s a very lightweight version of the OAuth 2.0 protocol and it misses many of the enterprise capabilities of a commercial OAuth 2.0 provider.
I’ve seen teams implement their own JWT token validation service who call it an OAuth 2.0 service when it is not an OAuth 2.0 service. A well-implemented JWT token validation service will add additional security to your application, but it has limitations, for example, you would have to implement a way to prevent CSRF attacks and you have to manage the token creation, distribution, expiration, etc. If you take this route, just make sure your security and governance teams approve the validation service.
My recommendation is to take advantage of the pre-built capabilities in Anypoint and get an OpenID Connect-compliant provider that supports OpenID Connect Dynamic Client Registration. Of course, if you take another route just make sure you take into account all the pros and cons and proceed accordingly.
OAuth 2.0 Authorization Grant Types
An authorization grant is the credentials presented by the client application on behalf of the resource owner to the authorization server, in order to obtain an access token to access the resource. In the context of Mule APIs the resource is the API resource e.g. “/Customers”. Each grant type follows a different process flow to obtain an access token, for example, in the Client Credentials grant type, the resource owner is the client application itself. In the Authorization Code grant type, the resource owner is a user and as part of the flow the user needs to delegate access to the client app.
The OAuth 2.0 spec defines four grant types: Authorization Code, Implicit, Resource Owner Password Credentials, and Client Credentials.
In the Client Credentials grant type flow, the resource owner is a client application registered in the Authorization Server that has permission to obtain an access token to access the target API resource. This is the correct grant type to be used to authorize client applications when there is no user involved.
Client Credentials Grant Type Flow
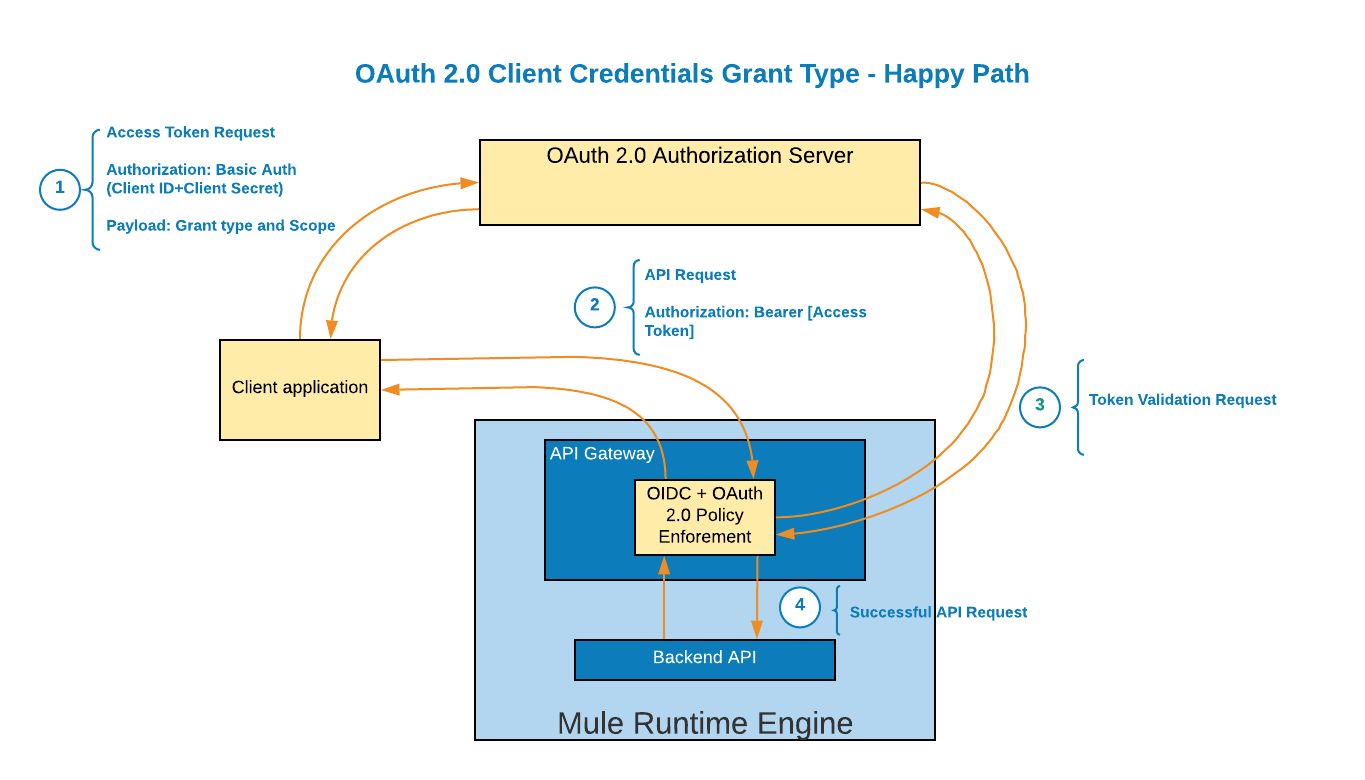
Here is an explanation to the diagram shown below:
- The client application makes a request to a token endpoint in the Authorization Server using its Client ID and Client Secret, previously provided at the time of its registration with the Authorization Server. In the same request, it also sends a payload with the grant type that it’s authorized to use and the scope it’s requesting access too. Scopes allow the provision of fine grained access controls, for example, a read scope, or a view_contacts scope, etc., depending on the use case. If everything checks, the Authorization Server replies with an access token.
- The access token is used as a Bearer security token in the request to the target API resource.
- The request is intercepted by the OAuth 2.0 policy or OICD policy in the API Gateway to validate the token. As part of the validation process, a request is made to a token introspection endpoint in the Authorization Server.
- If the access token is a valid token and the scope used has access to the target API resource and method, the request is allowed to reach the back end API.
How to Set up the External IDP in Anypoint
Now it’s time to set up the External IDP in Anypoint.
- In Anypoint, click the top left menu and go to Access Management.
- Go to External Identity.
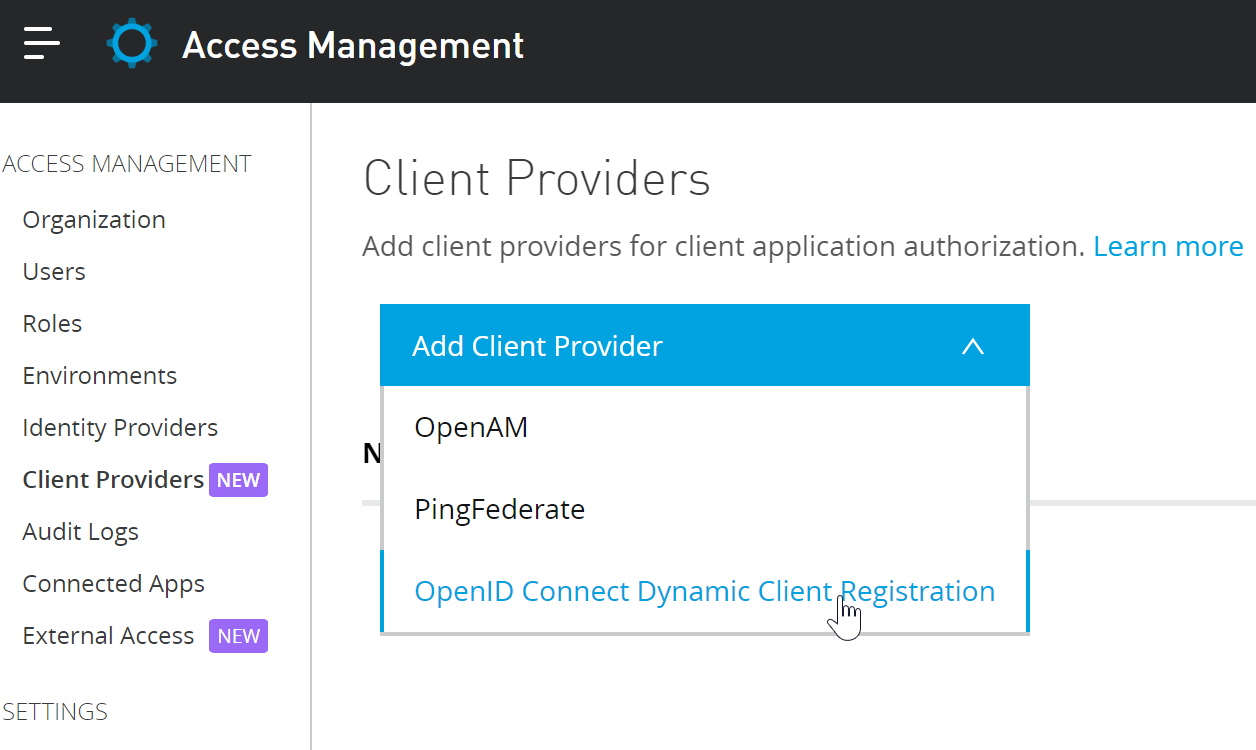
- Select Client Management
- Select OpenID Connect Dynamic Client Registration.
To fill out the form, you’ll need Authorization Server metadata from Okta.
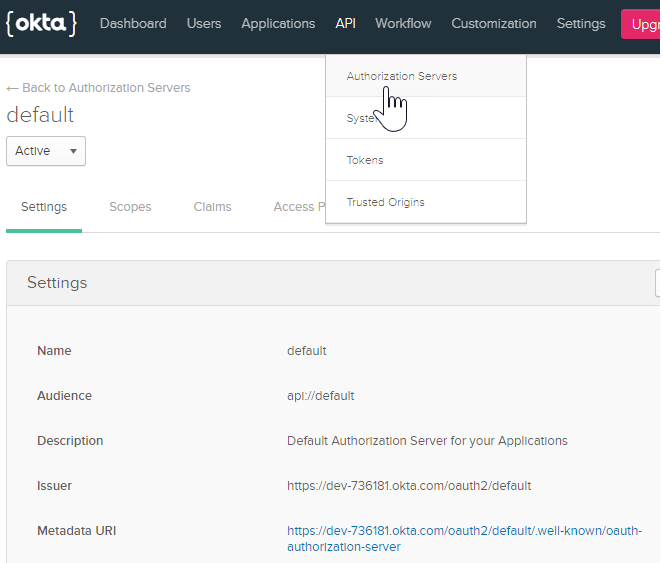
- In Okta, go to the API menu.
- Select Authorization Servers.
- Click on your authorization server name.
- Click the Metadata URI link.
The Metadata URI link will return a JSON with the issuer, authorization_endpoint, token_endpoint, and registration_endpoint values needed to fill out the registration form in Anypoint.
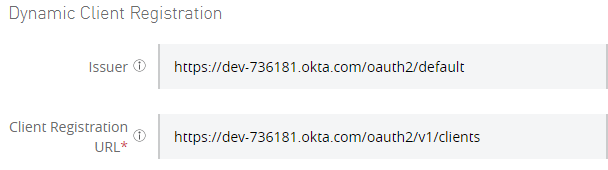
Fill Out the form with the corresponding values provided in the metadata.
- Issuer = issuer.
- Client Registration URL = registration_endpoint.
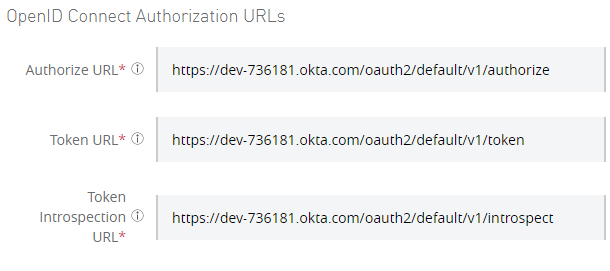
Let’s skip the Advanced settings and the Token Introspection Client for a moment to continue to fill out the rest of the form with the information obtained in the metadata.
- Authorize URL = authorization_endpoint.
- Token URL = token_endpoint.
- Token Introspection UR = introspection_endpoint.
Going back to the Advanced settings, the Authorization Header is the Single Sign-On Web System (SSWS) token that allows Anypoint to make API requests to the authorization server. It’s used to create clients in the authorization server dynamically.
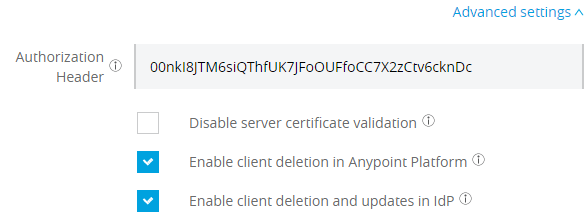
To obtain the SSWS token:
- In Okta go to the API menu.
- Select Authorization Servers.
- Go to the Tokens tab
- Click on Create Token
- Enter a name for the token and click create token.
Follow the instructions displayed: “Please make a note of this token as it will be the only time that you will be able to view it. After this, it will be stored as a hash for your protection.” Now let’s cover the Token Introspection Client section.
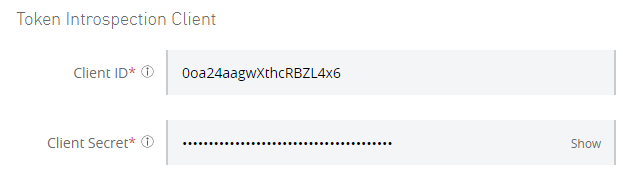
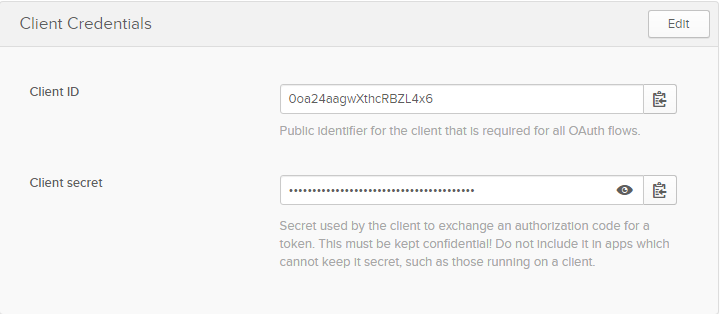
To obtain the Client ID and Client Secret, client applications must be registered in the authorization server. Let’s register the Token Introspection Client:
- In Okta, click on the Applications Menu.
- Click on Add Application.
- Select Web.
- Enter any name, preferably a name that matches the client app, for example, Token Introspection Client.
- Check the Client Credentials grant type.
- Click Done
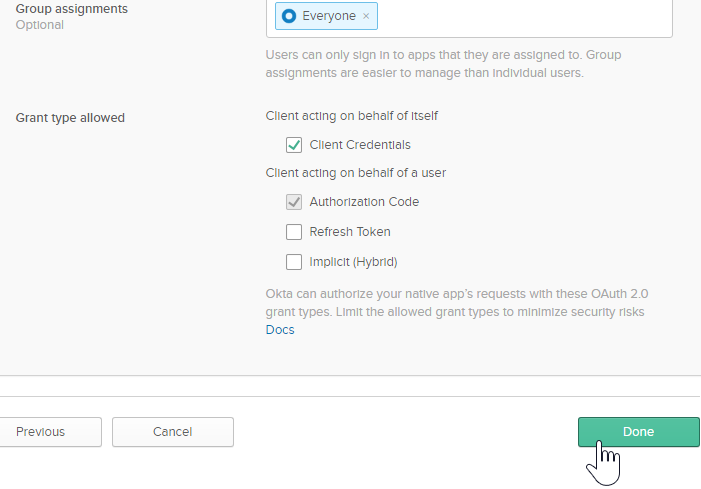
After you click Done, the client credentials will appear at the bottom of the new page.
At this point you have completed filling out the form and you can Save the changes. Now let’s apply the OpenID Connect access token enforcement policy in the API manager to protect your API.
Apply the OpenID Policy in the API Manager
- In Anypoint, click the top left menu and, under Management Center, go to the API Manager.
- Locate your API and click on the API version you want to secure.
- On the left side menu, click on Policies.
- Under API level Policies click Apply New Policy.
- In the Select Policy window, click All Categories and select Security.
- Below, select the OpenId Connect access token enforcement.
- Select the latest policy version compatible with your runtime version.
- Click Configure Policy
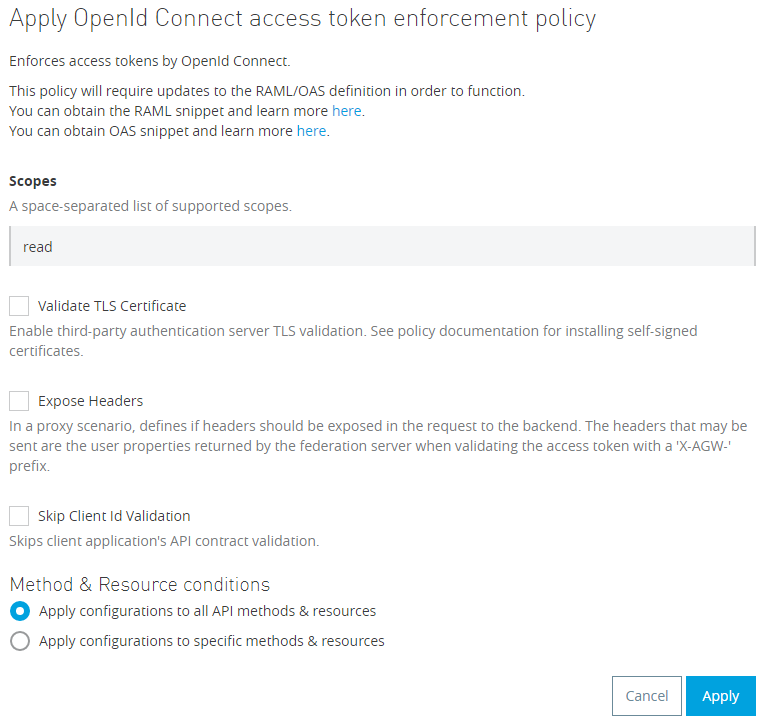
- Add a scope to provide fine grained access control. In this example, the read scope is just an arbitrary scope I chose.
- Apply configurations to all API methods and Resources, or you can also Apply the configurations to specific methods and resources for a finer grained access control.
- Click Apply.
After you apply the policy, make sure to update your RAML with the correct API Specification security snippet. You can get it from the link next to the newly applied policy.
{ "error": "Access token was not provided" }
Nice work, your API is now protected. Now you have to register your client application with the authorization server to obtain the credentials needed to request an Access Token.
Grant Client Applications Access to our API
Since Anypoint Platform is now integrated with your OpenID provider, you can grant client applications access to your API directly from Anypoint Exchange.
- In Anypoint, click the top left menu and go to Exchange.
- Search your API in our organization assets and click on it.
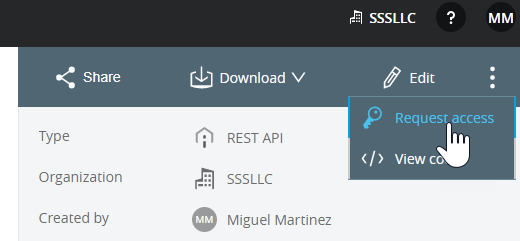
- Click the vertical ellipses menu on the top right and select Request access
- Select the API instance.
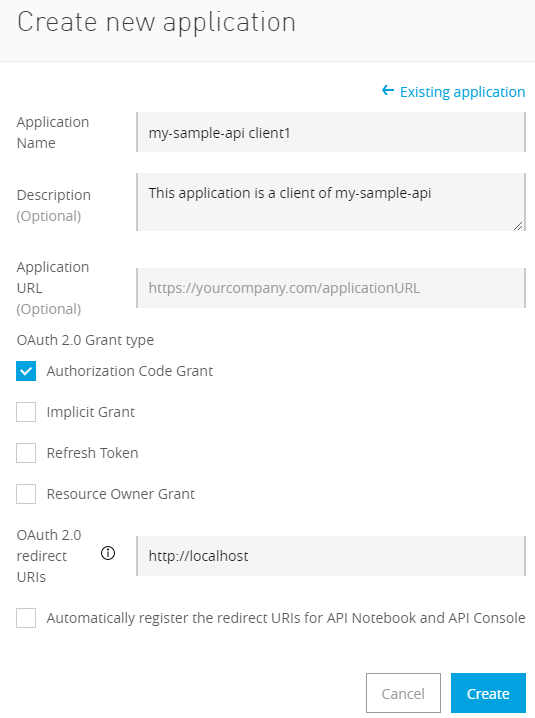
- Create a new application to register an application in the Authorization Server.
- Enter an Application Name.
- Check Authorization Code Grant and enter a URL in the OAuth 2.0 redirect URLs.
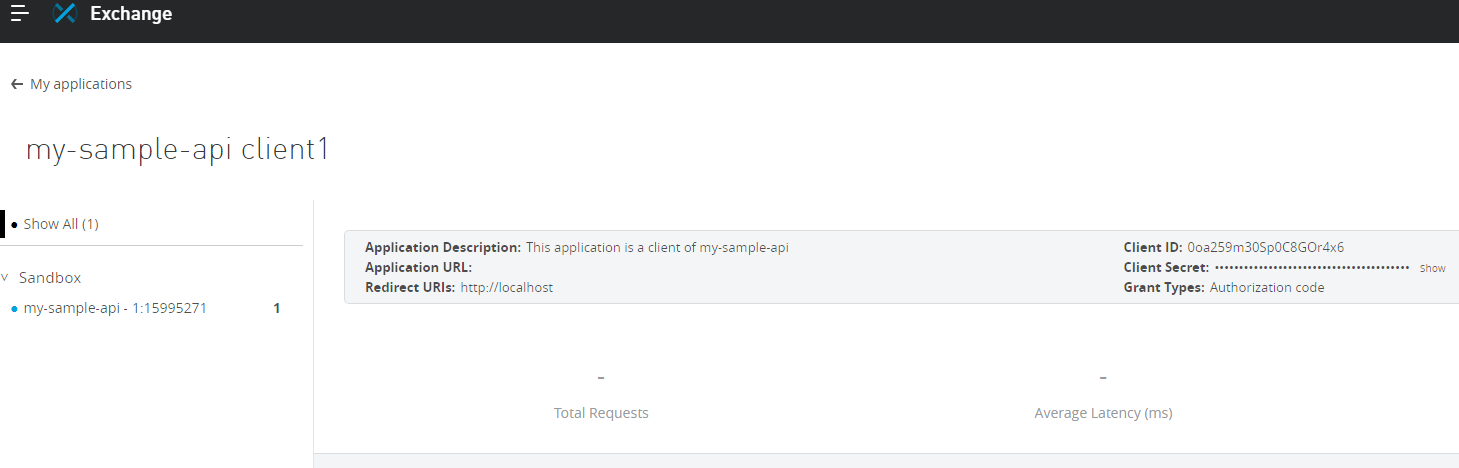
Once the application is created, click on Request access, and that will generate an application Client ID and Client Secret.
Make a additional changes in your IDP
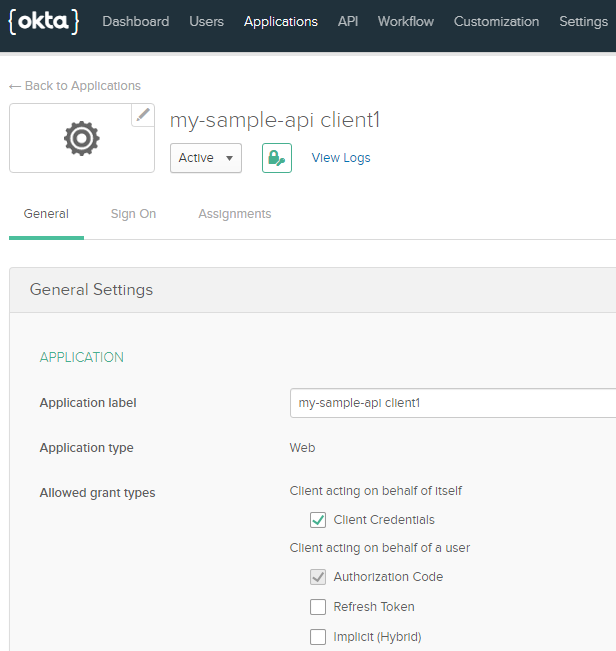
Since it was not possible to select the Client Credentials Grant Type directly from Anypoint Exchange, you have to enable it manually in your IDP.
- In Okta, click on the Applications Menu.
- Click on the application you just registered.
- Click on the General tab.
- Click on EDIT in General Settings.
- Check the Client Credentials box.
- Click Save.
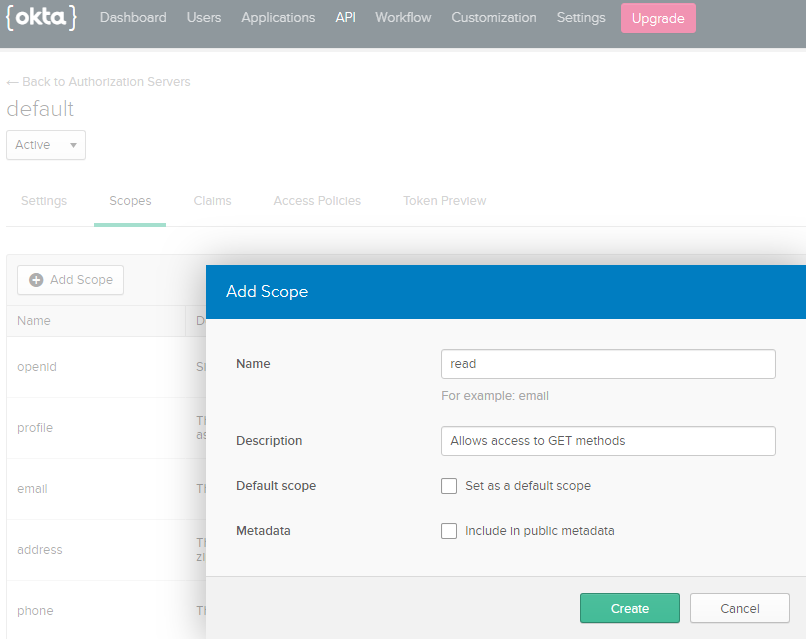
Now you have to create the ‘read’ scope in the Authorization server.
- In Okta, click on the API Menu and select Authorization Servers.
- Click on your authorization server name.
- Go to the Scopes Tab.
- Add Scope
- Fill Out the form and click Create.
Get an Access Token to Make Authorized Requests.
Now, you can use a client application like Postman to make a POST request to the IDP to get an access token.
- Use Basic Auth with username=Client id and password=Client Secret
- The content-type must be application/x-www-form-urlencoded
- Use the following keys to match the grant type and scope we configured:
- Grant_type = client_credentials
- Scope = read
The response will be an access token. Now you can use this access token as a bearer token to make authorized requests to your API.
Again, the OpenID connect token provides, in addition to the information needed by the OAuth 2.0 protocol an authentication layer. So you can retrieve the user id or application id making the requests and other additional information.
Conclusion
Thank you so much for reading this developer tutorial written by MuleSoft Ambassador Miguel Martinez. To read more developer tutorials, visit our tutorial home page to continue learning how to use MuleSoft. Your feedback is greatly appreciated, so please take a second to rate this tutorial below to let us know if it helped you or not. Thank you so much!


Try Anypoint Platform for free
Start your 30-day free trial of the #1 platform for integration, APIs, and automation. No credit card required. No software to install.
Questions? Ask an expert.
