This tutorial was updated in October 2022 and is based on Flex Gateway 1.2.0.
You can use Flex Gateway locally or in connected mode. If you use it locally, you will only be able to run it from your local machine, but you can’t manage the APIs from Anypoint Platform. In connected mode, you can view your gateways, your API instances, and policy configurations in API Manager. In this case, we’ll register and run Flex Gateway in connected mode using Flex Gateway as a Linux service.
In this tutorial, you’ll learn how to:
- Install the Flex Gateway Linux service
- Register the gateway in connected mode
- Start the gateway
- Remove the gateway
Prerequisites
- Anypoint Platform - We’ll need an Anypoint Platform account to manage our Flex Gateway. You can sign up for a free trial account here.
- Flex Gateway permissions - You shouldn’t need to assign any specific permissions to follow this tutorial when using a new free trial account. However, if you experience permission issues, please see Flex Gateway prerequisites.
- Linux - Make sure you’re using one of the Linux distributions supported by Flex Gateway. See Software Requirements for Linux Deployments for a complete list. You can confirm this by running
lsb_release --all. - Linux packages - The following packages need to be installed in your system before running the tutorial. You can install them with the following command:
sudo apt install curl gnupg2 lsb-release systemd- curl - A command line tool needed to install Flex Gateway in Linux.
- gnupg2 - A free implementation of the OpenPGP standard to encrypt and sign data.
- lsb-release - The command
lsb_releaseis used to print distribution information. - systemd - The command
systemctlis used to start/stop the Flex Gateway service.
- (Optional) Overview and introduction - If you want to first see an overview and introduction to Flex Gateway without a technical how-to, see this tutorial.
Set up Flex Gateway in Runtime Manager
1 - Log in to Anypoint Platform and navigate to Runtime Manager. Click on the Flex Gateways tab on the left and select Add Gateway.
If this is the first time you access Anypoint Platform, it may ask you to select an environment. Choose Sandbox.

2 - You will see different options to select where to set up your Flex Gateway. Let’s select Linux.
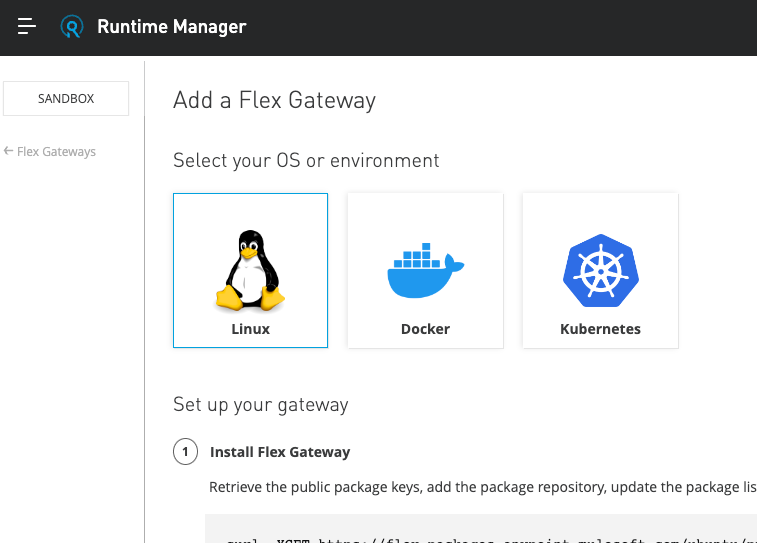
Install Flex Gateway in Linux
1 - To retrieve the public package keys, add the package repository, update the package list, and install the package, run the following commands.
1
2
3
4
5
curl -XGET https://flex-packages.anypoint.mulesoft.com/ubuntu/pubkey.gpg | sudo apt-key add -
echo "deb https://flex-packages.anypoint.mulesoft.com/ubuntu $(lsb_release -cs) main" \
  | sudo tee /etc/apt/sources.list.d/mulesoft.list
sudo apt update
sudo apt install -y flex-gateway
Make sure the commands were successful and no errors were received.
2 - Verify the package was correctly installed by running the following command.
Command:
1
flexctl help
Output:
1
2
3
4
5
6
7
8
Usage:
  flexctl [command]

Available Commands:
  completion  Generate the autocompletion script for the specified shell
  dump        Retrieve all gateway configuration
  help        Help about any command
...
Register the gateway in connected mode
1 - Copy the command from Runtime Manager to register your gateway. It already contains the token and organization ID you need to authenticate and connect the gateway with your Anypoint Platform account.
This command is using Auth Token as the authentication mechanism for registering the gateway. You can also choose to connect it using a Connected App or your Anypoint Platform Username and Password.
1
2
3
4
5
sudo flexctl register <gateway-name> \
--token=<your-token> \
--organization=<your-org-id> \
--connected=true \
--output-directory=/usr/local/share/mulesoft/flex-gateway/conf.d
2 - Replace <gateway-name> with your own name (i.e. my-gateway).
It’s better to run this command in a new folder or in a known location to quickly identify the files that will be created.
If you are in the Europe region, you will need to add the following flag to your command
--anypoint-url=https://eu1.anypoint.mulesoft.com
Your final command after substituting the values will look like this:
Command:
1
2
3
4
5
sudo flexctl register my-gateway \
  --token=35e1aa50-f2bb-453b-9dcf-cddfd7543e8d \
  --organization=371a3df1-1566-4775-b26d-932a04f9ce05 \
  --connected=true \
  --output-directory=/usr/local/share/mulesoft/flex-gateway/conf.d
Output:
1
2
Starting registration, please be patient.
Registration completed, the configuration files were written in directory "/usr/local/share/mulesoft/flex-gateway/conf.d". For security, modify the file permissions to restrict production scenario access to the user running flex.
3 - Verify there is a registration.yaml file in /usr/local/share/mulesoft/flex-gateway/conf.d.
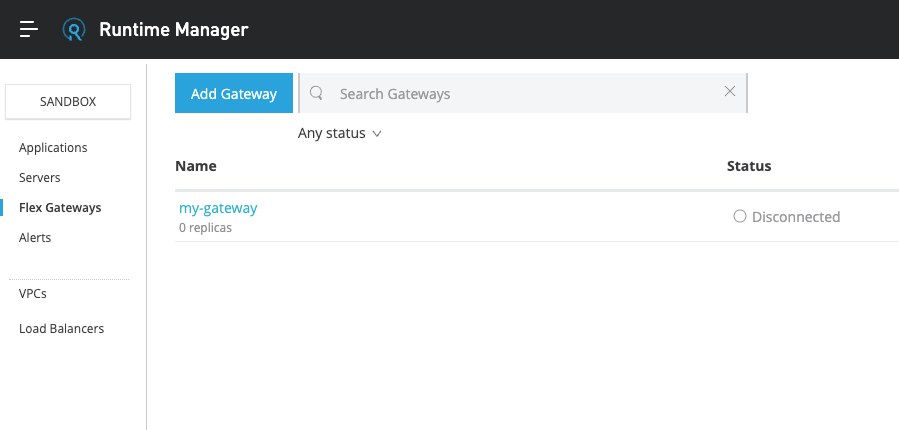
4 - If you check the Flex Gateway list in Runtime Manager, your should now see your new gateway (my-gateway) listed with a status of Disconnected.
Start the gateway
1 - Run the following command to start the Flex Gateway service.
1
sudo systemctl start flex-gateway
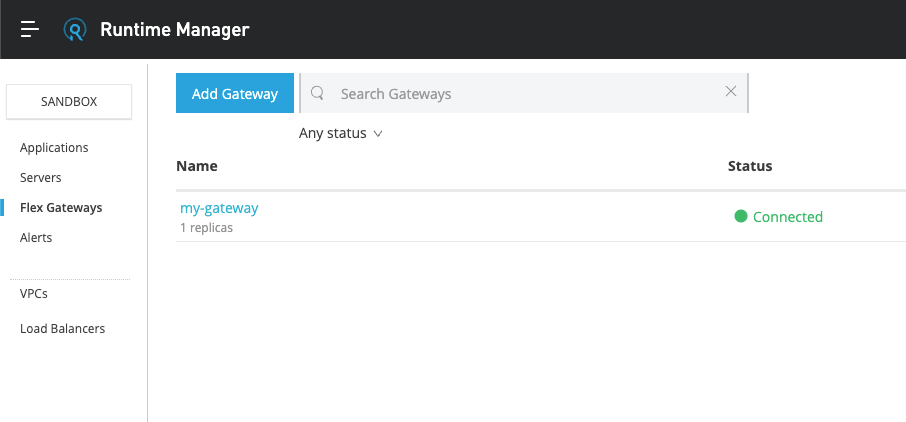
2 - If you check the Flex Gateways list in Runtime Manager, you should now see your new gateway (my-gateway) with a status of Connected.
3 - You can also verify that the service is running in your local with the following command.
Command:
1
systemctl list-units flex-gateway*
Output:
1
2
3
4
5
6
7
8
9
10
11
12
UNIT                        LOAD   ACTIVE SUB     DESCRIPTION
flex-gateway-agent.service  loaded active running flex-gateway-agent.service
flex-gateway-envoy.service  loaded active running flex-gateway-envoy.service
flex-gateway-fluent.service loaded active running flex-gateway-fluent.service
flex-gateway.service        loaded active exited  Application

LOAD   = Reflects whether the unit definition was properly loaded.
ACTIVE = The high-level unit activation state, i.e. generalization of SUB.
SUB    = The low-level unit activation state, values depend on unit type.

4 loaded units listed. Pass --all to see loaded but inactive units, too.
To show all installed unit files use 'systemctl list-unit-files'.
Remove a gateway
1 - To stop the gateway, you can run the following command.
1
sudo systemctl stop flex-gateway
The gateway might still be listed in Runtime Manager but will have a status of Disconnected if no replicas are connected.
2 - To delete a gateway from Runtime Manager, click on the 3-dot button next to the gateway and select Delete gateway.
The gateway will now have a status of Deleted and will be removed from the UI in 30 days. For more information, see Anypoint Flex Gateway.
Next Steps
In this tutorial, you learned how to:
- Install the Flex Gateway Linux service
- Register the gateway in connected mode
- Start the gateway
- Remove the gateway
In the next tutorial, you’ll learn how to manage your APIs from API Manager using the Flex Gateway you created in this tutorial.
Click on the Next button below to continue to the next tutorial.


Try Anypoint Platform for free
Start your 30-day free trial of the #1 platform for integration, APIs, and automation. No credit card required. No software to install.
Questions? Ask an expert.
