We would like to thank Sue Han for their contribution to this developer tutorial.
In the previous tutorial, we learned the basics of setting up a descriptor file to publish multiple assets to Anypoint Exchange using Anypoint Catalog CLI.
In this tutorial, we will set up Catalog CLI in a CI/CD pipeline so that when changes are made to APIs, it’s automatically updated in Anypoint Exchange.
To learn more about CI/CD pipelines, check out MuleSoft’s Continuous integration and continuous delivery (CI/CD) article.
In this tutorial, you’ll learn how to:
- Set up a workflow to publish APIs automatically
- Publish the repository to GitHub
- Configure secrets in your repository
- Publish assets using GitHub Actions
Prerequisites
- GitHub account - For this tutorial, we will be using GitHub as our repository platform and GitHub Actions as our CI/CD platform. You can sign up for a free account here.
- Git - You can download git here.
- Set up GitHub on Code Editor - If you are new to Visual Studio Code and GitHub, you will need to log into GitHub first. You can follow the steps here.
- Base setup and code - The base setup and base code were created in the previous tutorial. Make sure you go through it before starting this tutorial.
We are using GitHub Actions as it allows us to set up the CI/CD pipeline with minimal infrastructure work. However, we can implement Anypoint API Catalog CLI in any CI/CD platform. You would have to update the workflow file to meet a particular platform’s syntax.
Set up a workflow to publish APIs automatically
Just like how we created a descriptor file for Anypoint Catalog CLI to give information, we also need to create a workflow file for GitHub Actions. This allows the CI/CD pipeline to know what to do once changes are made to the repository.
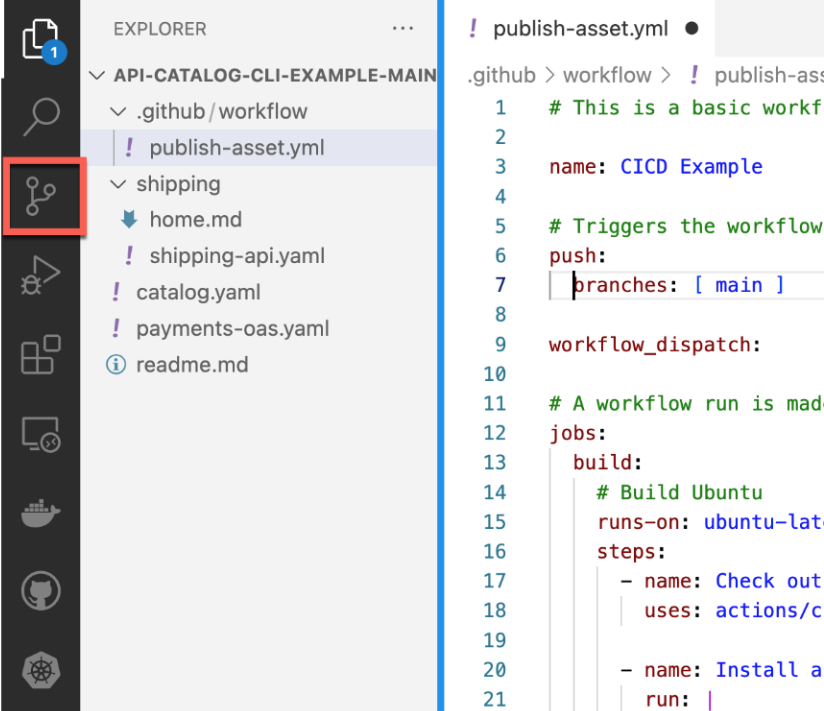
In the repository you copied from the previous tutorial, there is a folder path, .github/workflows. This is the file path GitHub looks for for the workflow file. And, within the folder, you should see the publish-asset.yml file. This is where we will create a job that publishes APIs to Anypoint Exchange when there’s a change to the repository.
You should currently only see the following in your folder. Let’s now set up the rest of the file.
1
2
3
4
5
6
7
8
9
10
# This is a basic workflow to help you get started with Actions

name: CICD Example

# Triggers the workflow on push or pull request events but only for the master branch
on:
  push:
    branches: [ master ]

  workflow_dispatch:
Each workflow has one or more jobs that can be run either parallel or sequentially. Today, we just have one job: publishing the APIs to Anypoint Exchange. Our job’s name is build. We also need to specify a runner, which defines the type of machine that will process a job in your workflow. GitHub has hosted runners that you can utilize. We will be using ubuntu by adding the following lines:
1
2
3
4
5
# A workflow run is made up of one or more jobs that can run sequentially or in parallel
jobs:
  build:
    # Build Ubuntu
    runs-on: ubuntu-latest
Next, we will specify the steps the job needs to take to publish the APIs. These steps can be added below the runs-on line. Step 1 checks out the repository code.
1
2
3
    steps:
      - name: Check out repository code
        uses: actions/checkout@v2
Step 2 installs the API Catalog CLI since the ubuntu machine is empty.
1
2
3
4
      - name: Install api-catalog cli
        run: |
          sudo apt-get update
          npm install -g api-catalog-cli@latest
And lastly, step 3 specifies environment variables for your Anypoint Platform’s username, password, and orgID and the publish asset command we used. We will set up the environment variables later on in this tutorial.
1
2
3
4
5
6
7
      - name: Publish API to Anypoint Exchange
        env:
          ANYPOINT_USERNAME: ${{ secrets.ANYPOINT_USERNAME }}
          ANYPOINT_PASSWORD: ${{ secrets.ANYPOINT_PASSWORD }}
          ANYPOINT_ORG_ID: ${{ secrets.ANYPOINT_ORGID }}
        run: |
          api-catalog publish-asset --organization="$ANYPOINT_ORG_ID" --username="$ANYPOINT_USERNAME" --password="$ANYPOINT_PASSWORD"
Your full publish-asset.yml file should now look like this:
1
2
3
4
5
6
7
8
9
10
11
12
13
14
15
16
17
18
19
20
21
22
23
24
25
26
27
28
29
30
31
32
# This is a basic workflow to help you get started with Actions

name: CICD Example

# Triggers the workflow on push or pull request events but only for the master branch
on:
  push:
    branches: [ master ]

  workflow_dispatch:

# A workflow run is made up of one or more jobs that can run sequentially or in parallel
jobs:
  build:
    # Build Ubuntu
    runs-on: ubuntu-latest
    steps:
      - name: Check out repository code
        uses: actions/checkout@v2

      - name: Install api-catalog cli
        run: |
          sudo apt-get update
          npm install -g api-catalog-cli@latest

      - name: Publish API to Anypoint Exchange
        env:
          ANYPOINT_USERNAME: ${{ secrets.ANYPOINT_USERNAME }}
          ANYPOINT_PASSWORD: ${{ secrets.ANYPOINT_PASSWORD }}
          ANYPOINT_ORG_ID: ${{ secrets.ANYPOINT_ORGID }}
        run: |
          api-catalog publish-asset --organization="$ANYPOINT_ORG_ID" --username="$ANYPOINT_USERNAME" --password="$ANYPOINT_PASSWORD"
Save the file once done.
Make sure the branch you’re using in GitHub is master to match this yaml file. If your branch is different (like main), make sure to do that change in branches: [ master ] before continuing.
Publish the repository to GitHub
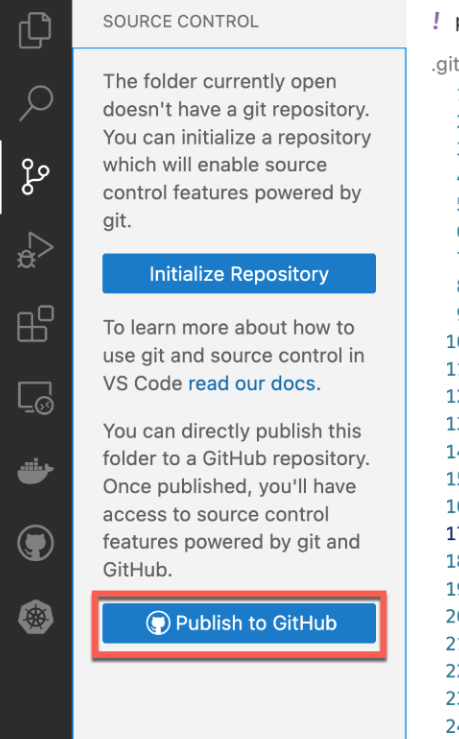
Now that the catalog file and the workflow file are both ready to go, let’s publish the repository to GitHub for the first time.
In Visual Studio Code, go to the Source Control panel.
Click Publish to GitHub.
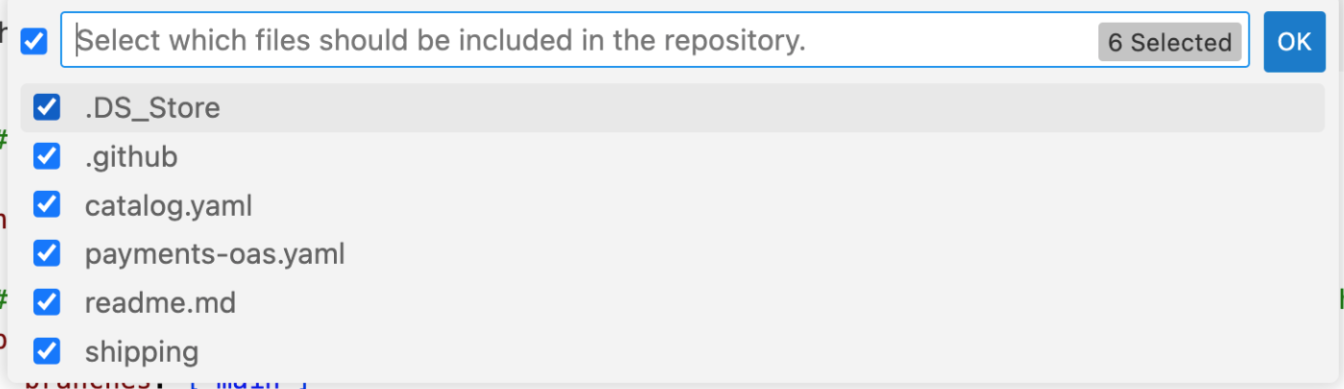
You can decide if you want your repository to be private or public.

Choose all the files and press OK.
Once done, click on Open on GitHub to go to the repository.
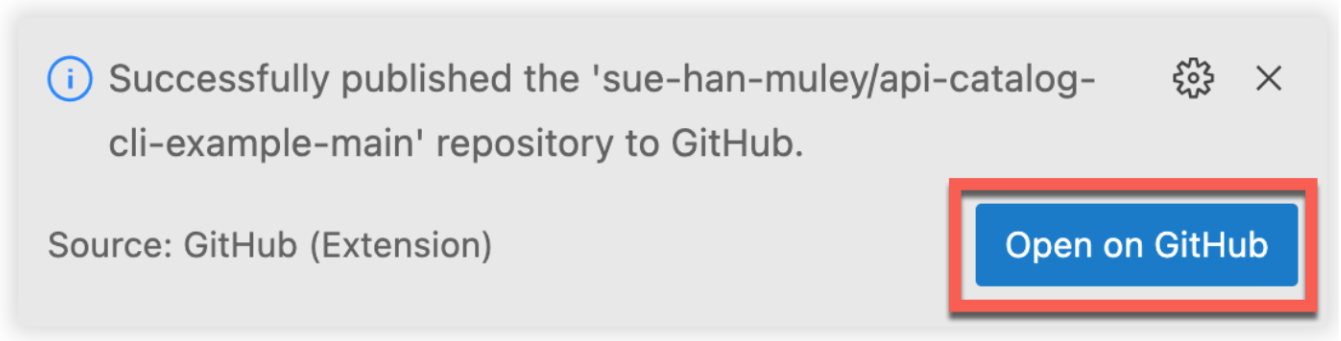
And that’s it! You should now be able to see the repository in your GitHub account.
Configure secrets in your repository
Now that we are ready to go with our GitHub repository, let’s now set up the environment variables mentioned in the Set up a workflow file to publish APIs automatically section. Environment variables allow us to store information we don’t want others to access. We will need to create a repository secret for each environment variable: ANYPOINT_USERNAME, ANYPOINT_PASSWORD, and ANYPOINT_ORGID.
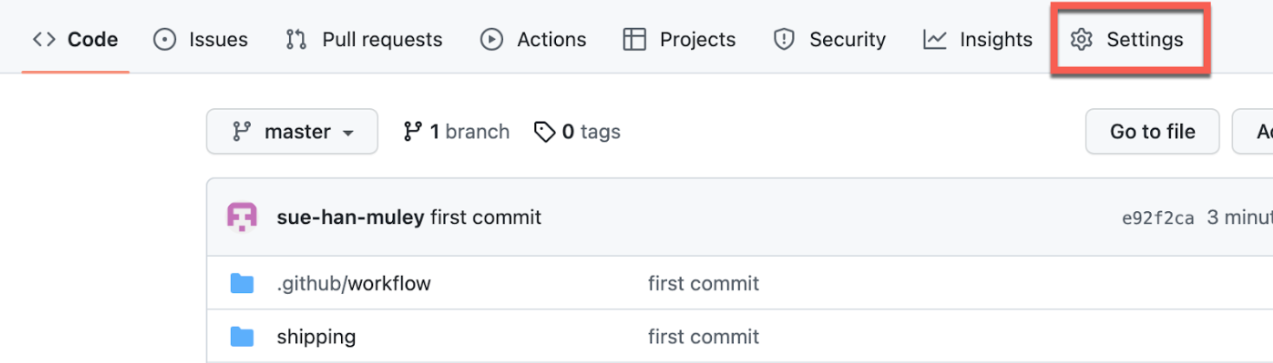
In your GitHub repository, go to Settings.
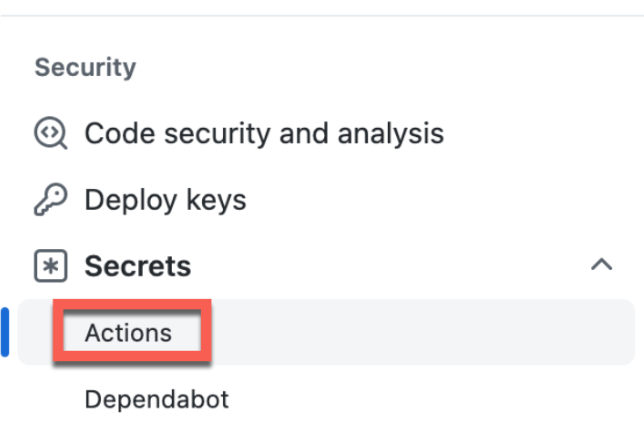
Under Security, click on Actions.
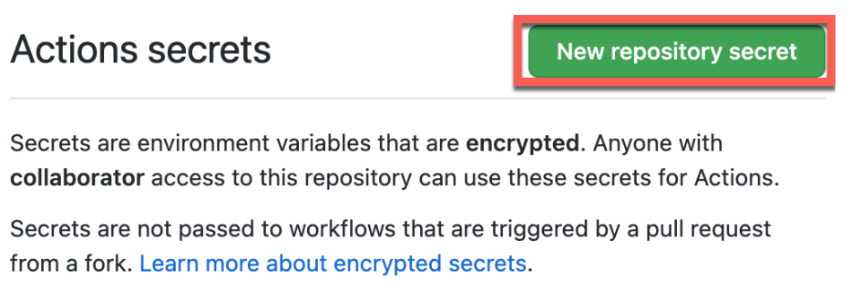
Click on New repository secret.
In the Name, place the variable name, ANYPOINT_USERNAME, and in the Secret, your Anypoint username. Click on Add Secret.
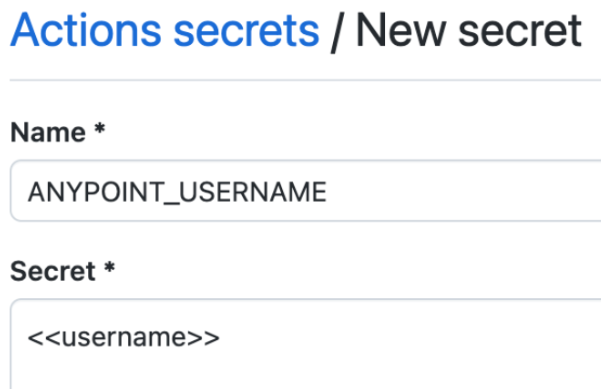
Repeat the same steps for ANYPOINT_PASSWORD (your Anypoint password) and ANYPOINT_ORGID (your Anypoint Organization ID).
Publish assets using GitHub Actions
We are all set to utilize the workflow! Since the APIs are already published in Anypoint Exchange, we will update the Shipping API so that the workflow can publish the updates.
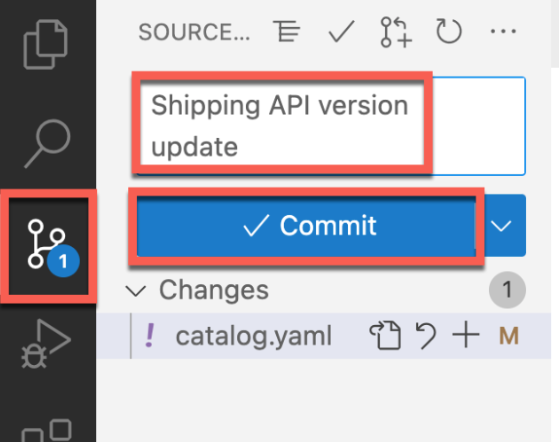
In Visual Studio Code, open the descriptor file, catalog.yaml. Update the Shipping API version to 1.0.1.
Go to the Source Control tab, write the commit comment “Shipping API version update”, and click Commit. Click Sync Changes.
Go back to the GitHub repository and go to the Actions tab. You should see that a workflow run named with the commit comment is in progress.

You can click on the run to see the logs in real-time. Like in the previous tutorial, once done, you should see a similar output:
1
2
3
4
5
6
7
8
9
10
11
12
13
14
15
16
17
18
19
=== Invoice Payment System API

Publishing to Exchange...
API skipped as content does not differ from the published asset... ⏩
Group ID:     ***
Asset ID:     invoice-payment-system-api
Version:      1.1.2
Exchange URL: https://anypoint.mulesoft.com/exchange/***/invoice-payment-system-api
=== Shipping API

Publishing to Exchange...
API successfully published... ✅
Group ID:     ***
Asset ID:     shipping-api
Version:      1.0.1
Exchange URL: https://anypoint.mulesoft.com/exchange/***/shipping-api

Successfully cataloged 1 APIs
1 APIs were skipped
Since there were no changes were made to invoice-payment-system-api, the CLI skipped the API.
In Anypoint Exchange, we can see that the version was indeed updated.

Next steps
And that’s all for the two-part series on Anypoint API Catalog CLI.
In this tutorial, you learned how to:
- Set up a workflow to publish APIs automatically
- Publish the repository to GitHub
- Configure secrets in your repository
- Publish assets using GitHub Actions
If you want to take a look at the final code, check out the Completed Tutorial folder in the GitHub repository below.
With Anypoint API Catalog CLI, you can also set up publish triggers so that your CI/CD workflow is triggered only when the updates meet the criteria.
To learn more about Anypoint API Catalog CLI, check out:
- Anypoint API Catalog CLI Product Spotlight Video (3 minutes)
- Anypoint API Catalog CLI Demonstration (13 minutes)
- Live stream: Exploring Anypoint API Catalog CLI with Alex! (1 hour)
- Documentation


Try Anypoint Platform for free
Start your 30-day free trial of the #1 platform for integration, APIs, and automation. No credit card required. No software to install.
Questions? Ask an expert.
