In the previous tutorial, we learned how to set up API Autodiscovery in Anypoint Studio to connect our Mule application to API Manager. This step is crucial to being able to apply policies to your application. If you haven’t set up API Autodiscovery for your Mule app, please go to the previous tutorial before starting this one. In this tutorial, we will learn to apply the Client ID enforcement policy to secure our Mule app with basic authentication.
Prerequisites
- Anypoint Platform - We’ll need an Anypoint Platform account to host our application on CloudHub. You can sign up for a free trial account here.
- Anypoint Studio - This is MuleSoft’s IDE! Anypoint Studio enables you to start building APIs and integrations quickly with hundreds of pre-built connectors, templates, and examples. Download Anypoint Studio here.
- REST Client - Download and install any REST Client of your choice. There are plenty of options out there for you to use, you can download MuleSoft’s Advanced REST Client, or you can use the popular REST Client Postman. We’ll be using Postman throughout these tutorials.
- Base code - There are two options for gathering the base code we will use for this tutorial: 1) Start from the first tutorial of this series to generate the base code on your own. 2) Download the base code here:
Set the Client ID enforcement policy in API Manager
Log in to Anypoint Platform and go to API Manager. Select the API you want to apply the policy to. In our case, the hellomule API. Next, click on Policies.
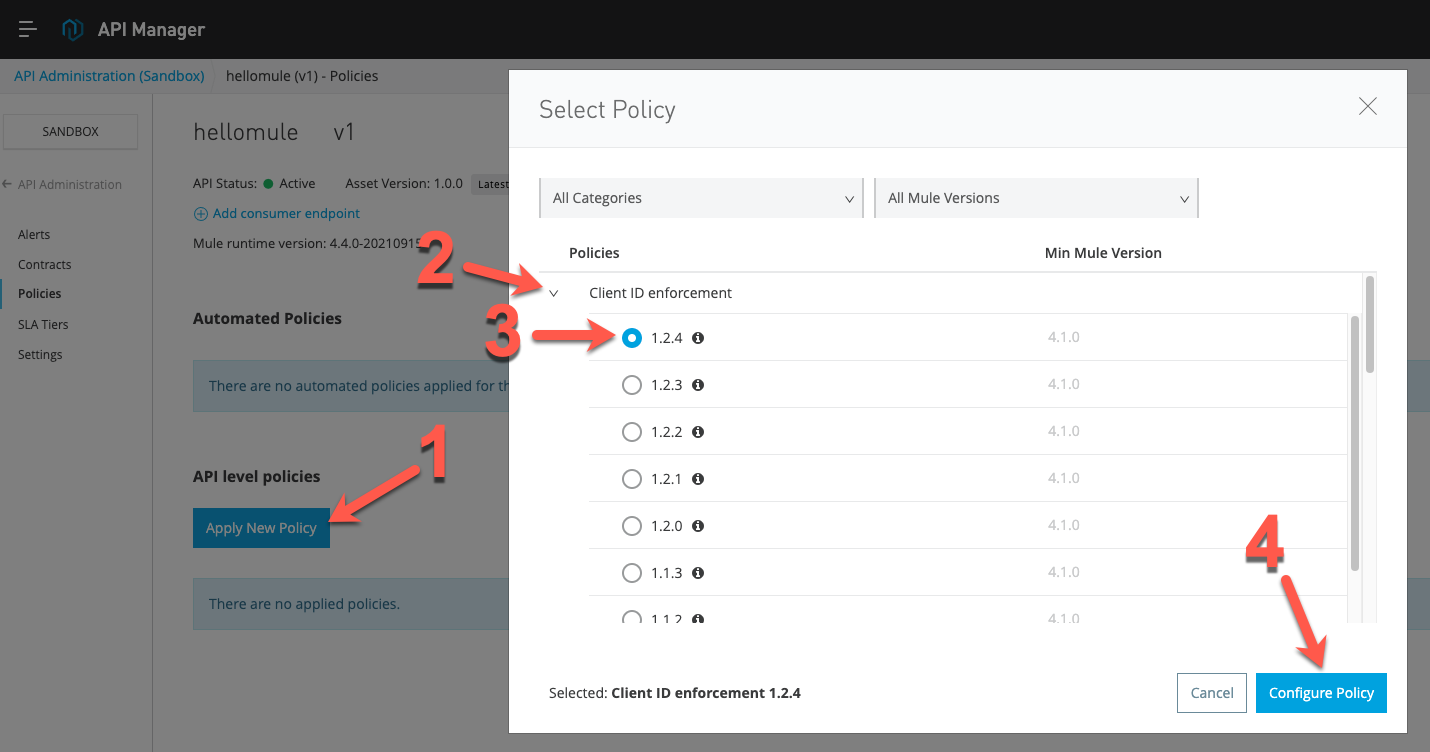
Once you’re on this page, click on the Apply New Policy button. Select the latest version of the Client ID enforcement policy and click on Configure Policy.
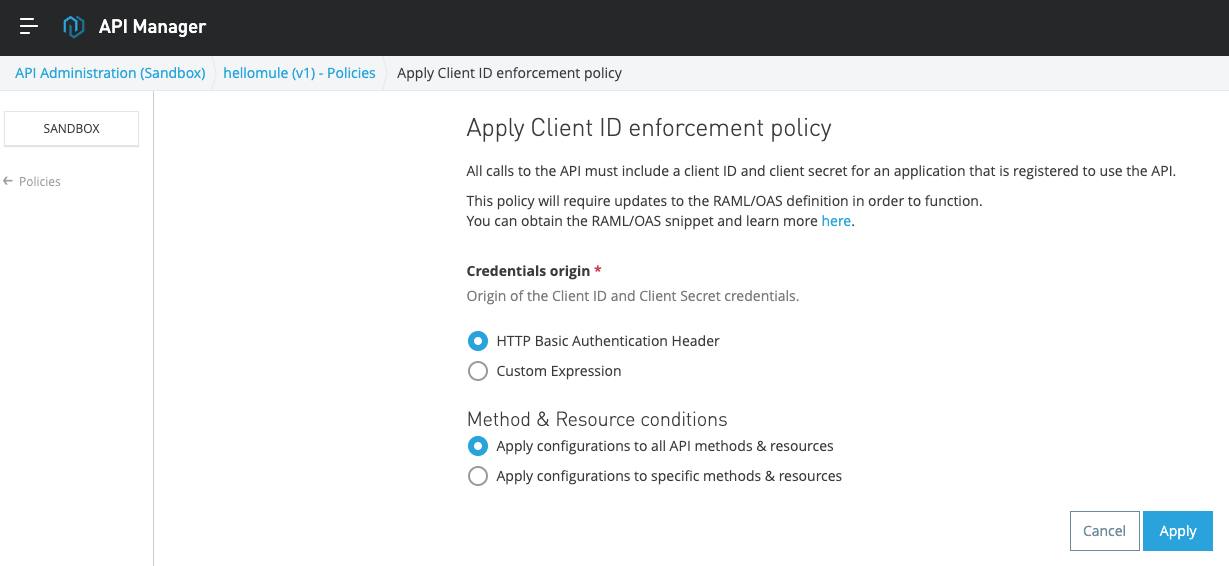
In this next screen, you can select how you want your API to receive the Client ID and Client Secret credentials. If you select Custom Expression, you can change the name of the fields, if they’ll be headers, query parameters, or even the request payload. For more information, please read the documentation. In our case, let’s select HTTP Basic Authentication Header and Apply configurations to all API methods & resources. Click Apply.
Go to your preferred REST Client like Postman and call your CloudHub application. If you don’t know your application’s URL, you can get it from Runtime Manager. It’s the URL ending in .cloudhub.io. In our case, it should be something like hellomule.us-e2.cloudhub.io/hellomule. You’ll notice now you receive a 401 Unauthorized response with the following payload:
1
2
3
{
    "error": "Authentication denied."
}
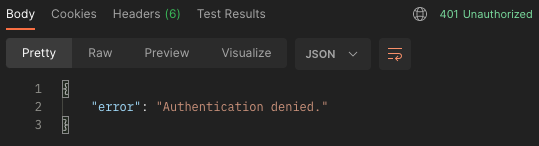
This means our newly added Client ID enforcement policy is working since we didn’t send any credentials with the request.
Generate the Client ID and Client Secret credentials
Go back to Anypoint Platform and go to Exchange. You’ll notice you have an HTTP API already published in your organization’s assets.
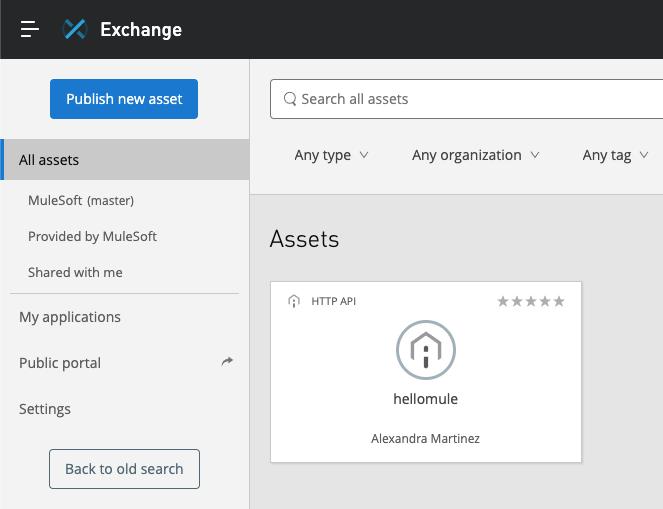
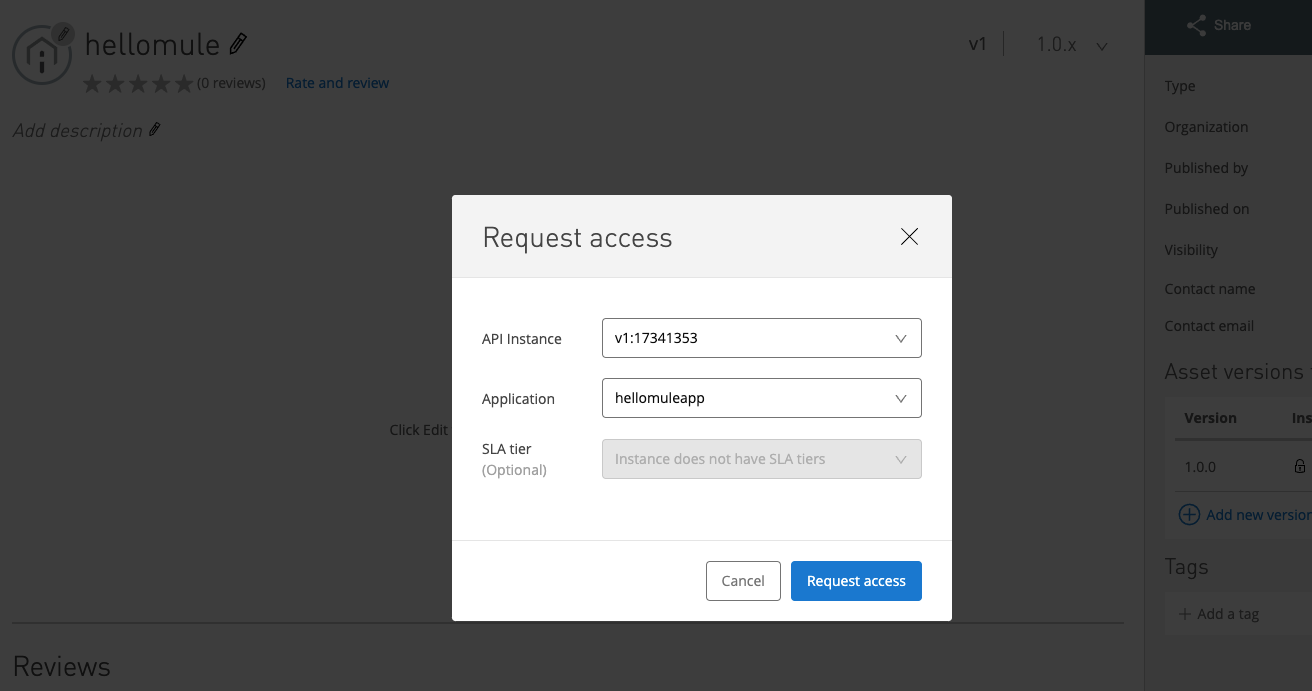
Click on your hellomule HTTP API asset. This will open your API’s preview. Click on Request access. Select your API Instance and open the Application dropdown. This will show a Create a new application link. Click on it.
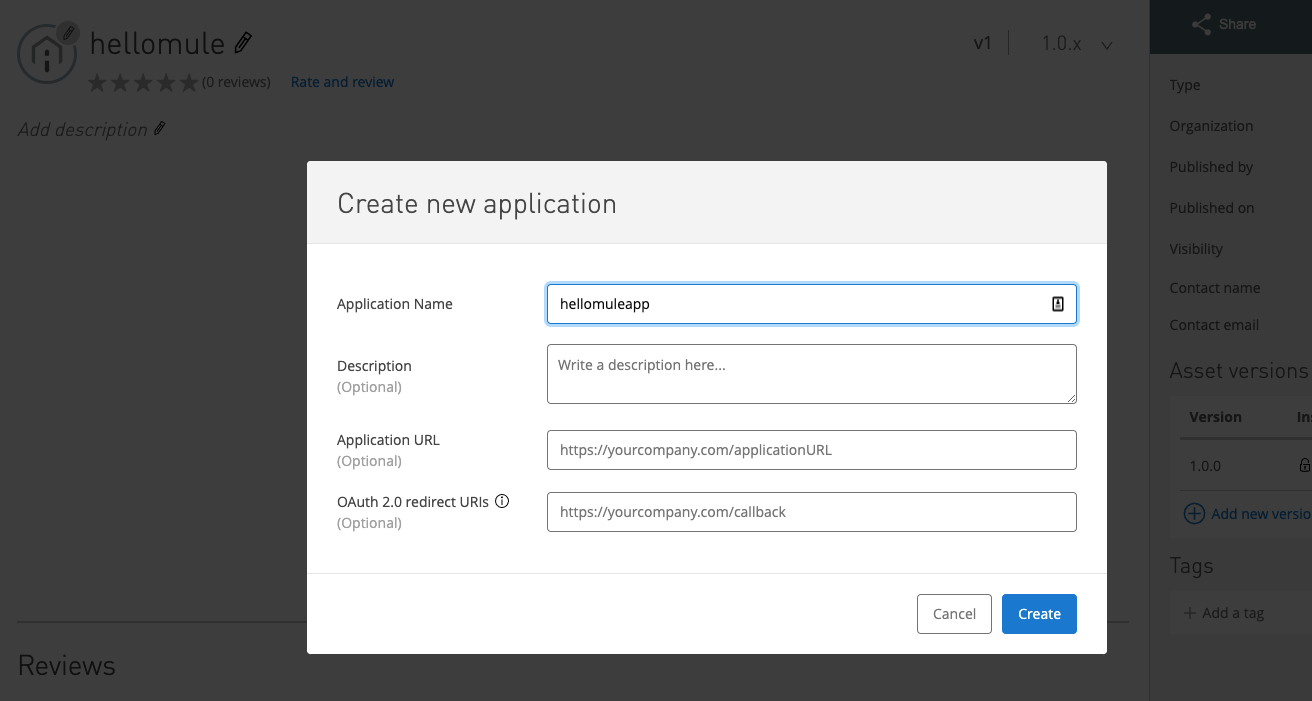
Add an application name, for example, hellomuleapp. Click Create and Request access.
You will now be able to see your Client ID and Client Secret. You will also see a new link to your own application page, where you can retrieve these credentials anytime you need them.
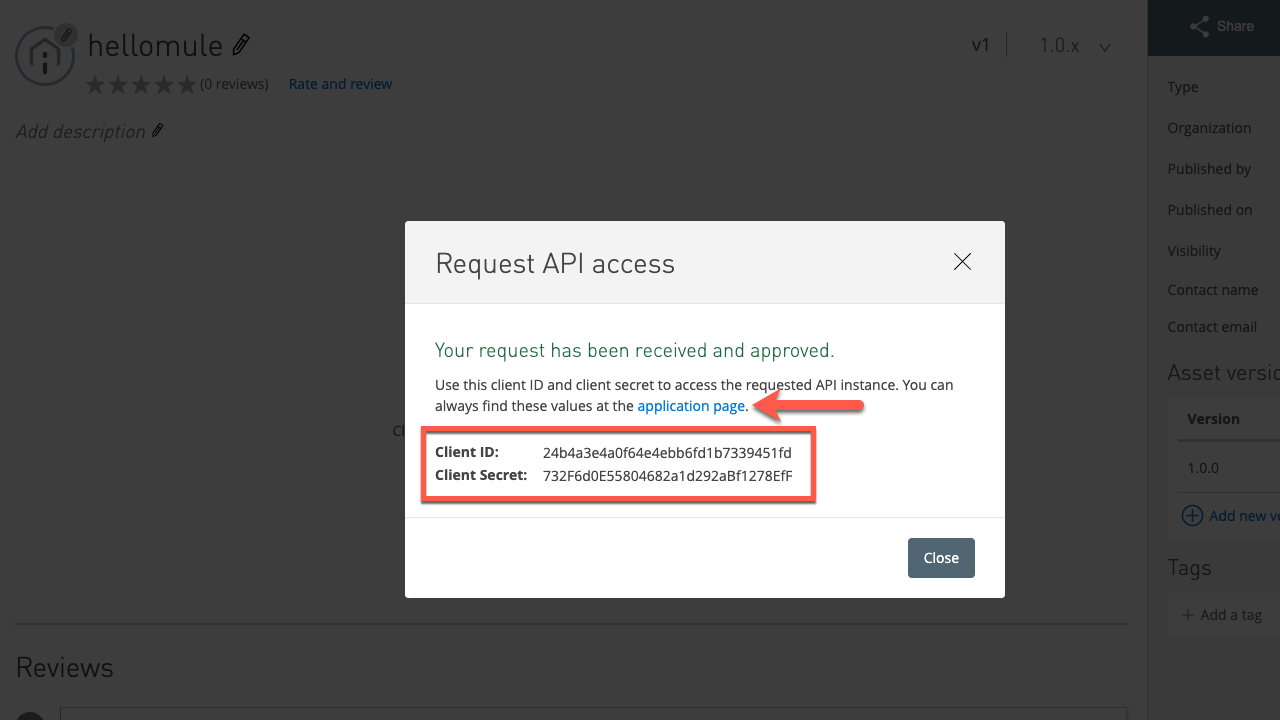
If you lose these credentials or the link to your application, you can go to Exchange and select My applications on the left side of the screen.
Add the credentials to the REST Client application
Go back to your REST Client application and add these credentials as basic authentication. In Postman, you have to go to the Authorization tab and select the Basic Auth option. Add your Client ID into the Username field and the Client Secret into the Password field. Send your request. You should now receive a 200 OK HTTP status with the Hello Mule payload.
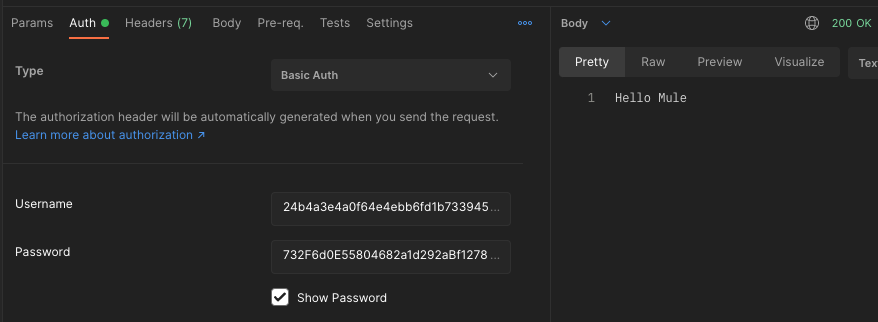
From Postman, click on View > Toggle Two-Pane View to see your request on the left side of the screen and your response on the right side.
Remember that we’re using Basic Authentication here because we selected the HTTP Basic Authentication Header option from API Manager. If we had selected the Custom Expression using headers or query parameters, then we’d have to send our request using those options in Postman instead. If you want to experiment with those options, you need to go back to API Manager and open the Policies tab. Then, on the Client ID enforcement option, select Actions > Edit to modify your selection.
Next Steps
Setting up credentials for your API is an additional step that you can do to keep your API secure from attackers. There are more policies that you can apply to add extra layers of security, but we need to go one step at a time. In the next tutorial, we’ll explain what an API is and why we need API Specifications.
Click on the Next button below to continue to the next tutorial.


Try Anypoint Platform for free
Start your 30-day free trial of the #1 platform for integration, APIs, and automation. No credit card required. No software to install.
Questions? Ask an expert.
