We would like to thank Sonali Shah for their contribution to this developer tutorial.
In this tutorial, we will walk through the process of publishing and using DataWeave libraries in Exchange and a Mule application. We will learn how to:
- Deploy your library to Anypoint Exchange
- Use the published DataWeave library in a Mule application
Prerequisites
- Anypoint Platform - We’ll need an Anypoint Platform account to publish our DataWeave library to Exchange. You can sign up for a free trial account here.
- Anypoint Studio - This is MuleSoft’s IDE. Anypoint Studio enables you to start building APIs and integrations quickly with hundreds of pre-built connectors, templates, examples, and libraries. Download Anypoint Studio here.
- Visual Studio Code - We will use this code editor to modify the DataWeave library. You can install the latest version here.
- DataWeave extension in VSCode - We will need the DataWeave extension in Visual Studio Code to create the DataWeave library project. Follow the previous tutorial to install it and understand its components.
- Acquire
Organization ID- You can get the necessary information via the following:- Log in to Anypoint Platform
- In the navigation bar or the main Anypoint Platform page, click Access Management
- Click the Business Groups (or Organization in the old UI) tab
- Click the name of your organization and go to Settings (or just click on the organization in the old UI)
- Copy the UUID from the Business Group ID (or Organization ID box in the old UI) and save it somewhere accessible for the tutorial
- Install Java and Maven - Ensure your Maven and Java versions are compatible with the latest version of the Mule Maven Plugin by running
java -versionandmvn -v. - Base code - There are two options for gathering the base code we will use for this tutorial: 1) Go through the previous tutorial to generate the DataWeave library project in VSCode on your own. 2) Download the base code here (the
Standard Date Formatsfolder):
Deploy your library to Anypoint Exchange
To deploy your new DataWeave library to Exchange, you can follow the next 3 steps:
- Update the
pom.xmlfile - Add your credentials in the
settings.xmlfile - Run the Maven command
Let’s see them in detail.
1. Update the pom.xml file
From Visual Studio Code, in the pom.xml file (located in the root folder of your DataWeave library), replace org.mycompany from the groupId field with your Organization ID which we acquired in the Prerequisites.

Uncomment the distributionManagement and the Exchange Repository details (inside the <repositories> tag).
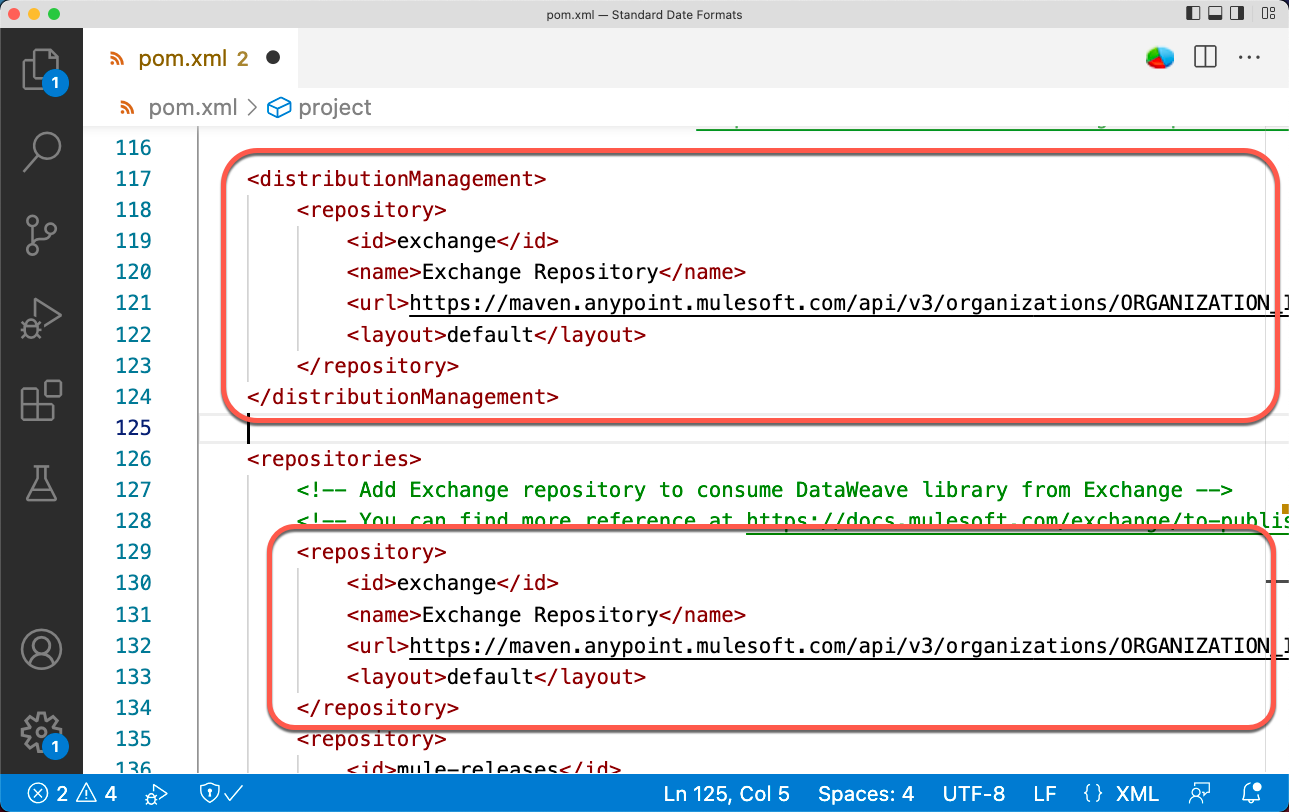
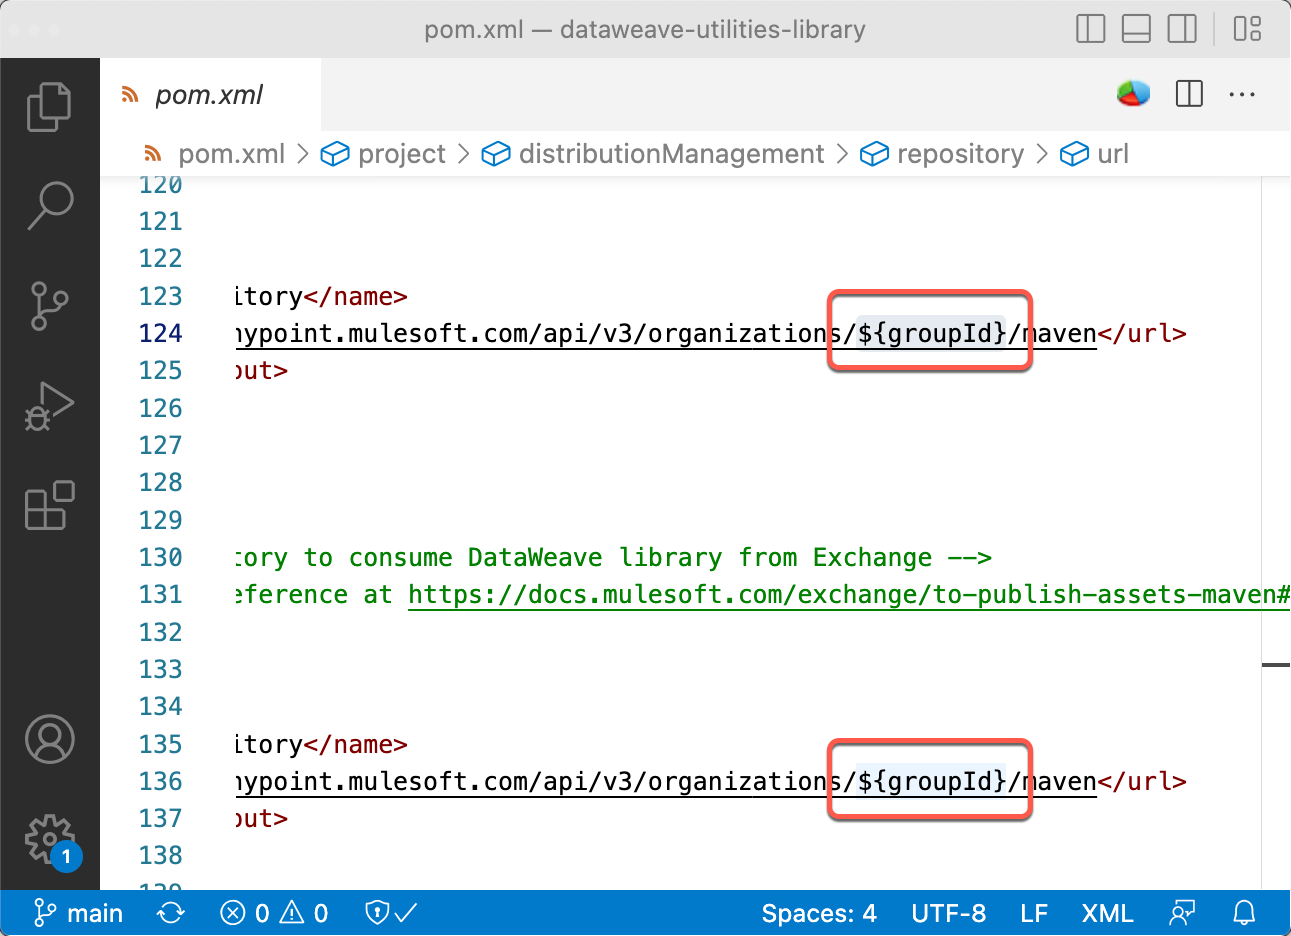
Replace ORGANIZATION_ID (in the <url> tag) with ${groupId} to take the value from the property we previously modified. Do this for both fields.
2. Add credentials in the settings.xml file
Open Maven’s settings.xml file which can be found in the .m2 directory.
- For Windows:
C:\Users\<user>\.m2 - For Mac:
${user.home}/.m2
If you don’t find this file in the .m2 folder, you can create it manually. You can take this settings.xml file as an example and just change the credentials.
Add the credentials you use to log in to Anypoint Platform to the servers section. It should look similar to this:
1
2
3
4
5
6
7
<servers>
  <server>
    <id>exchange</id>
    <username>your-Anypoint-Platform-username</username>
    <password>your-Anypoint-Platform-password</password>
  </server>
</servers>
Save your settings.xml file.
Make sure the <repository><id> in both the distributionManagement and repositories section in the pom.xml matches the <server><id> in the .m2/settings.xml. For example, <id>exchange</id> in all 3 places.
3. Run the Maven command
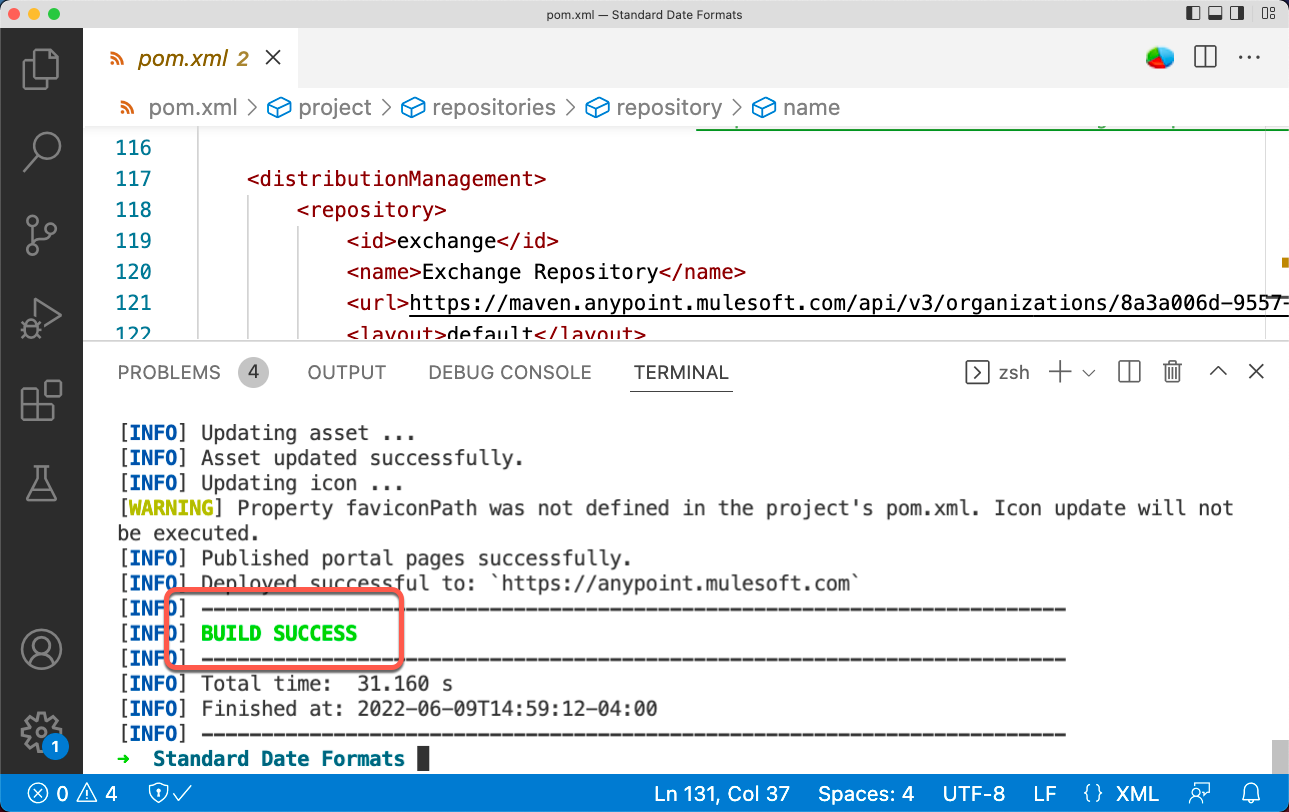
Run the following Maven command from the project’s root folder. Make sure it results in a BUILD SUCCESS. This command executes the unit tests, packages, installs and deploys the library.
1
mvn deploy
You can open a Terminal inside VSCode by selecting Terminal > New Terminal.
This will successfully create the library in Exchange.
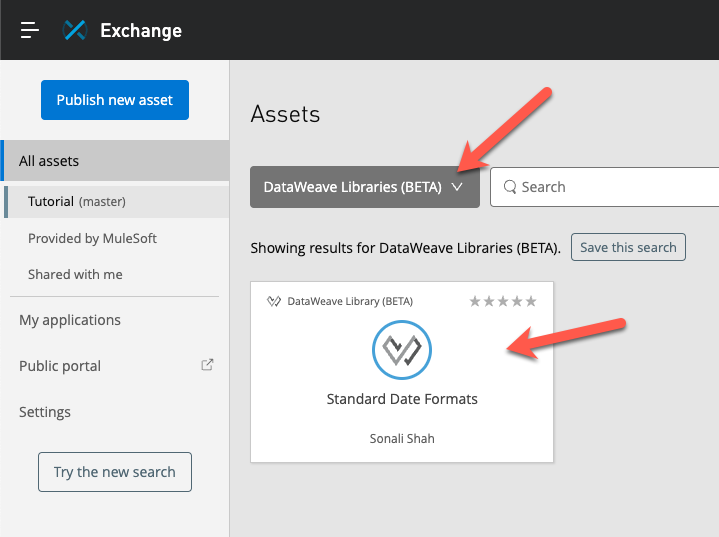
Log in to Anypoint Platform and navigate to Exchange (you can access it through the menu button on the top left of the screen). Click on All types > DataWeave Libraries. Select the DataWeave library you just deployed (Standard Date Formats).
The library also contains the documentation related to the modules present in it. To modify the documentation of a specific function, you can modify it in the corresponding file (under src/main/dw).

Use the DataWeave library in a Mule app
To use your new DataWeave library (deployed to Exchange) in a Mule application, you can follow the next 3 steps:
- Retrieve the Maven dependency from Exchange
- Add the Maven dependency to your Mule app
- Reference the DataWeave module/function
Let’s see them in detail.
1. Retrieve the Maven dependency from Exchange
From the DataWeave library published in Exchange, click on the Dependency Snippets button (or click on the three-dot button at the top-right of the screen if you’re on the old UI). Copy the Maven dependency. You can click on the Copy button.
2. Add the Maven dependency to your Mule app
Go to Anypoint Studio and create or open an existing Mule project.
If this is your first time opening Anypoint Studio, you can refer to this developer tutorial to understand the basics.
Open the pom.xml file and paste the Maven dependency you just copied from Exchange. Make sure it’s inside the <dependencies> tag and save your changes.
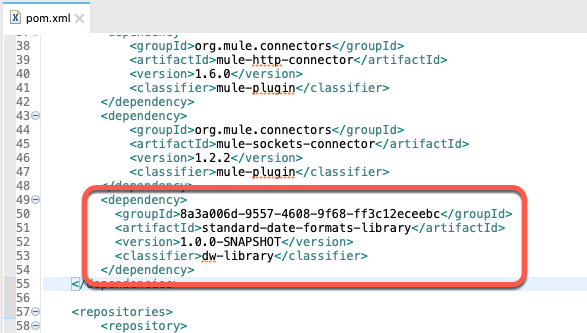
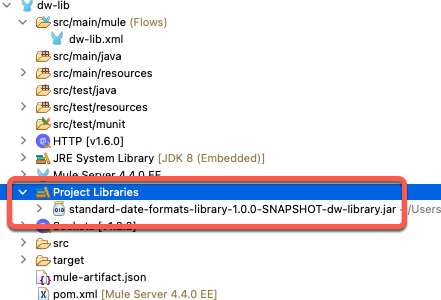
After you save, the jar should automatically be added to the Mule project, under Project Libraries.
3. Reference the DataWeave module/function
We can access the dateTimeConversion function from the DateFormatConversion module by adding the following code into a Transform Message component in your Mule flow.
1
2
3
4
5
%dw 2.0
output application/json
import dateTimeConversion from DateFormatConversion
---
dateTimeConversion(now(), "dd/MM/yy")
Click on the Preview button to test if the code is working properly.
Next Steps
Do you have any questions about the code? You can compare your DataWeave library with ours to make sure everything was set up correctly.
This tutorial taught us how to publish and use DataWeave libraries in Exchange and Mule applications. We learned how to:
- Deploy your library to Anypoint Exchange
- Use the published DataWeave library in a Mule application
Remember you can go through the previous tutorial for a more detailed explanation of the DataWeave extension for Visual Studio Code and the best practices for creating a new DataWeave library project.
Continue your development journey with the rest of the tutorials to become a master in DataWeave.

Try Anypoint Platform for free
Start your 30-day free trial of the #1 platform for integration, APIs, and automation. No credit card required. No software to install.
Questions? Ask an expert.
