The importance of real-time translation
Working with cross-functional teams in an organization can be challenging especially when team members are located in different parts of the globe or speak different languages. A common team collaboration tool used in cross-functional teams is Slack. A common problem on the platform is when two co-workers speak different languages, how do you communicate effectively? As the world becomes more connected, there’s becoming an increased demand for real-time translation in cross-functional organizations. Luckily, Slack has a potential solution to this problem: Slack Apps and Slash Commands. We can use the Microsoft Translator Text API and Slack to convert messages from English to Spanish, however, each API requires a different JSON payload output and input. To solve this integration issue between these systems, we will use the MuleSoft Anypoint Platform and Anypoint Studio to handle and host the integration.
Setup Anypoint Studio
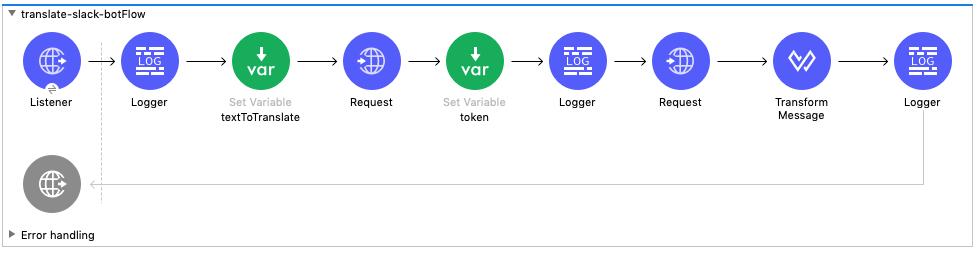
Download Anypoint Studio and create a new project and name it whatever you wish. Start by dragging an HTTP Listener from your Mule Palette onto the Message Flow canvas. For the Listener path, name it /slack and in the Advanced menu, add the Allowed Methods: POST
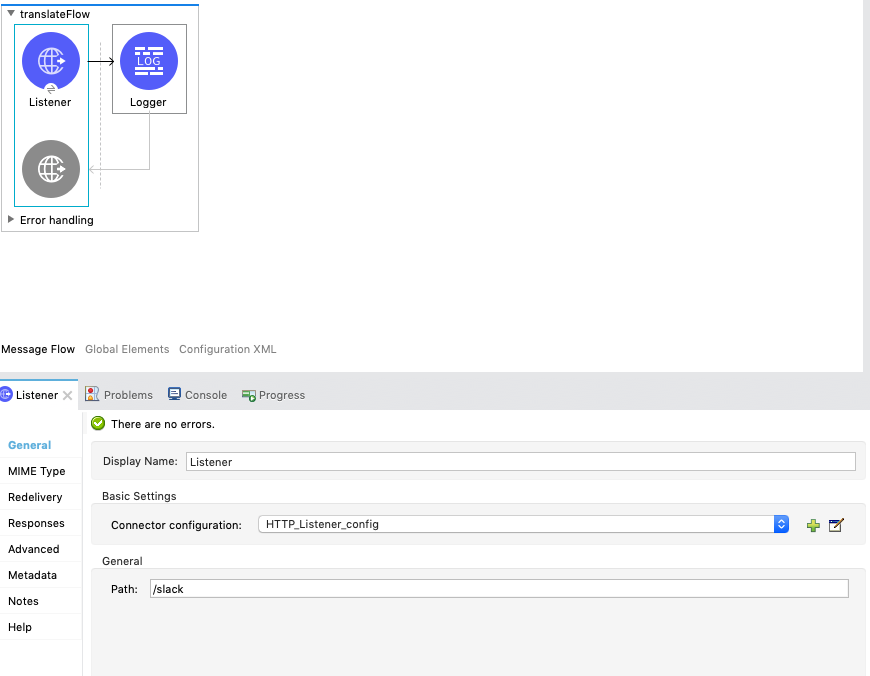
Next, add a Logger component to your flow by selecting it in the Mule Palette. Then select the fx button under Message and type out payload.text
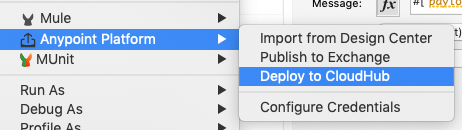
Next right-click on your main project folder in your Package Explorer, and go to Anypoint Platform, then click Deploy to Cloudhub.
Once deployed, navigate to the Anypoint Platform portal and go to Runtime Manager. Lastly, copy and paste your endpoint URL “xxx-xxx-xxx.us-e2.cloudhub.io/slack” for the next step.
Create your Slack app
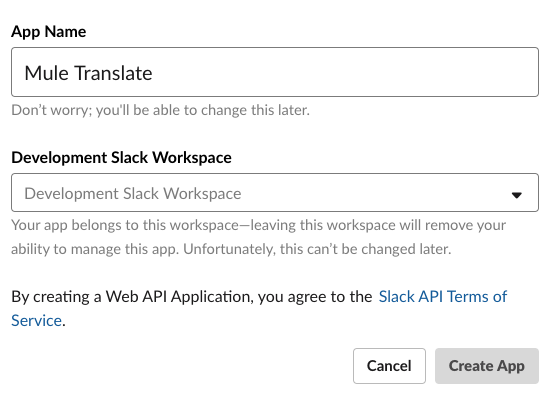
Now, let’s create a new application for our Slack workspace. Navigate to the Slack API apps page and sign in to your Slack account and workspace. Then click Create New App and name it whatever you wish.
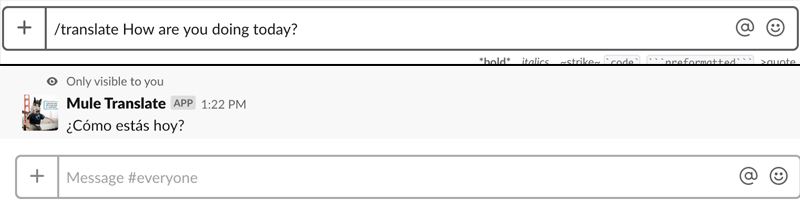
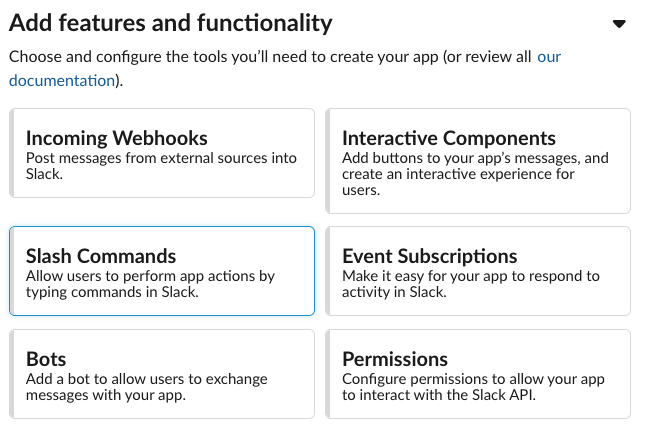
Then add the Slash Commands feature which allows users to perform application actions by typing commands in Slack. When selected, click New Command and enter /translate
Next paste your endpoint URL into the Request URL form in the Slack application configuration, and add a short description and usage hint as you see fit. Once the application is deployed to your Slack channel, feel free to test it out. When running the translate command, you should see the payload print in your Logs Live Console in Runtime Manager.
Integrate Microsoft Azure Translator Text API
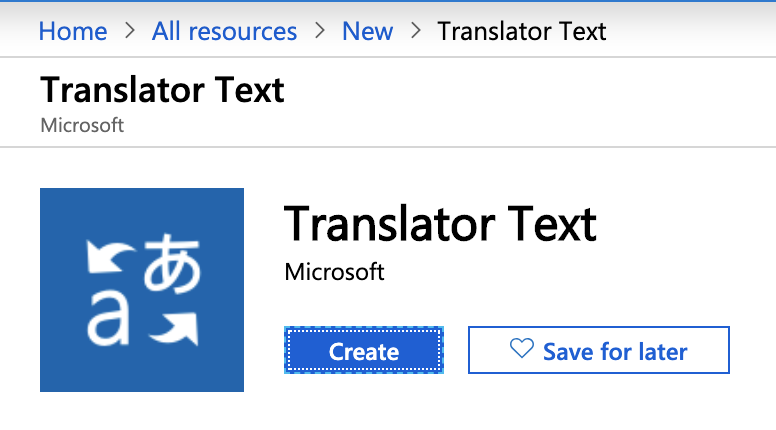
The next step to completing our Slack bot is to integrate the Microsoft Translator Text API into our Anypoint Studio project. To start, navigate to the Translator Text Signup signup and start a free trial. Once you are logged into the portal, go to All resources in the sidebar, click + Add and search the marketplace for Translator Text. Click the Create button as shown below and then grab your subscription keys.
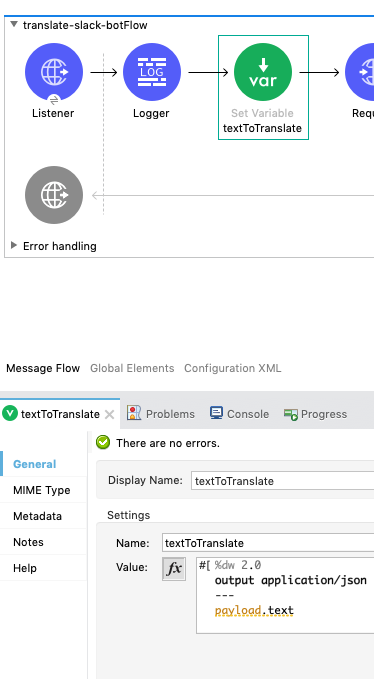
Navigate back to Anypoint Studio and add a Set Variable component to the flow from the Mule Palette. Name the variable textToTranslate and click the fx button and add DataWeave code to convert payload text message to JSON.
1
2
3
4
%dw 2.0
output application/json
---
payload.text
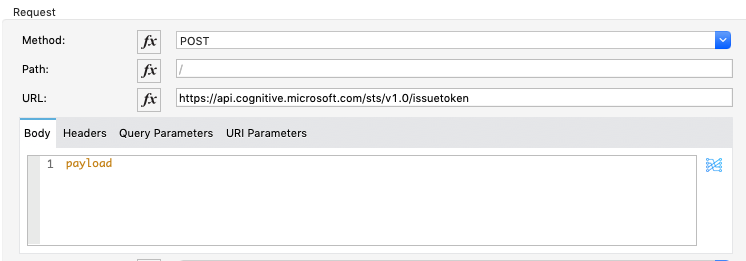
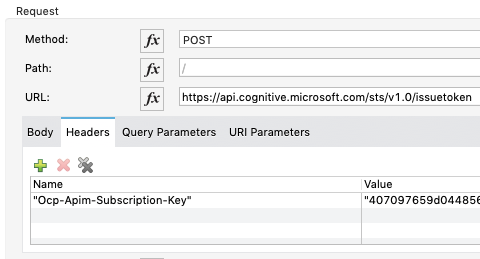
Once we have stored the payload text as a variable, let’s authenticate and grab a Bearer token from the Microsoft servers. This token is needed to send and receive API requests from the Translator API. First, drag the HTTP Request Connector from your Mule Palette and add it after your Set Variable component. Next, add the issue-token URL in the Request URL field, change your Method to POST, and make sure the body is set to payload. In your Headers, add your Ocp-Apim-Subscription-Key and set the value to Key 1 found in your Microsoft Azure portal.
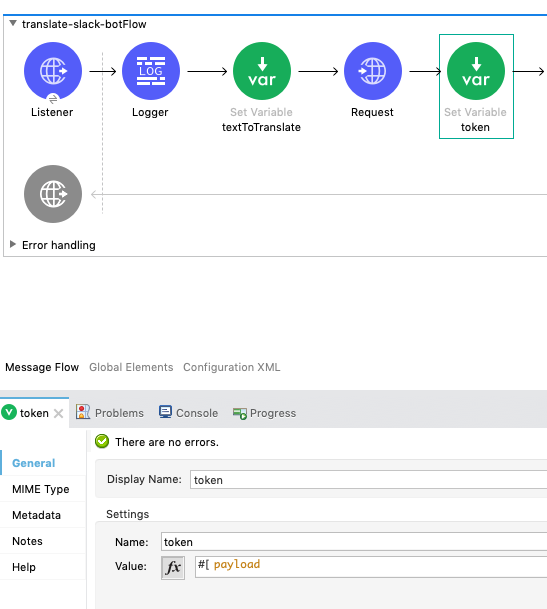
Now that we are fetching the Bearer token from the Azure servers, let’s set that token as a variable so we can use it later. Set the name to Token and set its value equal to the payload.
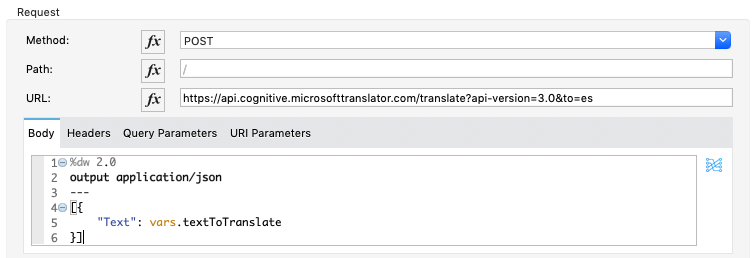
Next, add a new HTTP Request Connector to the flow. Make sure to include the API version and the to=* to whatever language you want the text to be translated to. In this case, we will be translating the input language to Spanish. In the Body, set the output to JSON and format the query in the correct format for the Microsoft Translator API to understand. Don’t forget to include your Bearer token in your Authorization header and set the Content-Type of the request to application/json.
1
2
3
4
5
6
%dw 2.0
output application/json
---
[{
"Text": vars.textToTranslate
}]

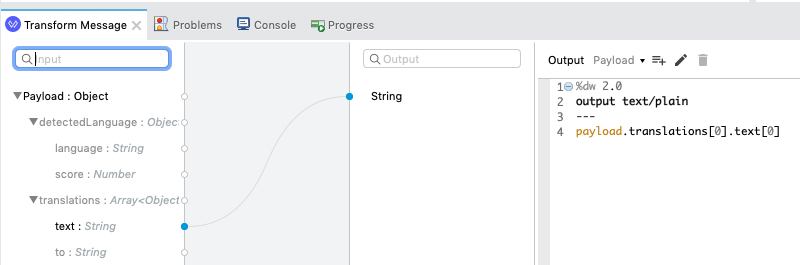
Lastly, let’s add a Transform Message Component from the Mule Palette to our current flow to take the output payload from the Translator API and convert it to a plain text message for slack. To do this, type the following code in DataWeave:
1
2
3
4
%dw 2.0
output text/plain
---
payload.translations[0].text[0]
Now that you have finished building your integration, make sure to right-click once again on the main project folder in your Package Explorer, and go to Anypoint Platform, then click Deploy to Cloudhub. You will need an update to the application you’ve already published since you just built an integration.
That’s it, folks! Once your application is deployed to CloudHub, you should have a fully working Slack bot that converts your current message into Spanish when you use the /translate command. You can further customize your application icon, title, and description in the Slack apps portal.

Thanks for reading this tutorial.


Try Anypoint Platform for free
Start your 30-day free trial of the #1 platform for integration, APIs, and automation. No credit card required. No software to install.
Questions? Ask an expert.
