In the previous tutorial, we learned how to secure our properties before deployment. In this tutorial, we will learn to set up API Autodiscovery. When you develop and deploy your APIs to MuleSoft’s Anypoint Platform, it’s important that you set up API Autodiscovery to enable critical features such as security policies. API Autodiscovery works by linking your Mule application deployed in CloudHub (Runtime Manager) with your application available in API Manager. You can then enable various policies in API Manager and see those working in real-time on your deployed Mule app.
Prerequisites
- Anypoint Platform - We’ll need an Anypoint Platform account to host our application on CloudHub. You can sign up for a free trial account here.
- Anypoint Studio - This is MuleSoft’s IDE! Anypoint Studio enables you to start building APIs and integrations quickly with hundreds of pre-built connectors, templates, and examples. Download Anypoint Studio here.
- REST Client - Download and install any REST Client of your choice. There are plenty of options out there for you to use, you can download MuleSoft’s Advanced REST Client, or you can use the popular REST Client Postman. We’ll be using Postman throughout these tutorials.
- Base code - There are two options for gathering the base code we will use for this tutorial: 1) Start from the first tutorial of this series to generate the base code on your own. 2) Download the base code here:
Create a new API in API Manager
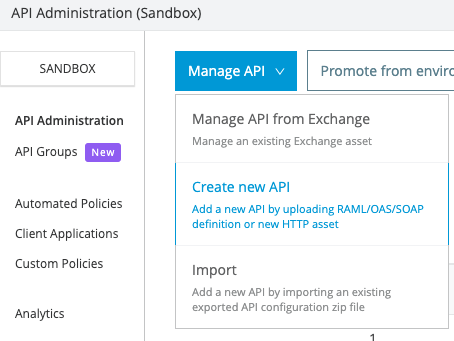
The first step to managing your API and enabling security policies is to create a new API in API Manager. To do this, log in or sign up for a free Anypoint Platform account and go to API Manager. Once you’re there, select Manage API > Create new API.
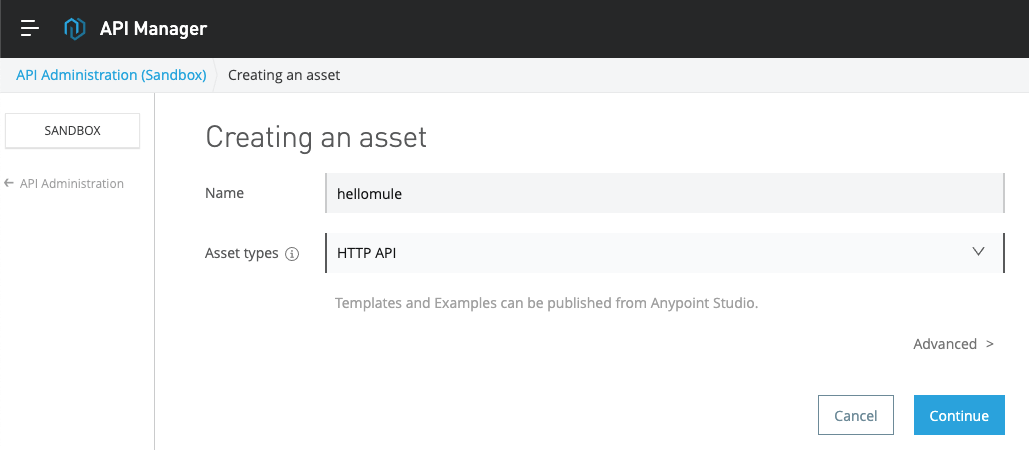
Add a name for your API and select HTTP API. Note that this name doesn’t need to be unique like the Runtime Manager one. Click on Continue.
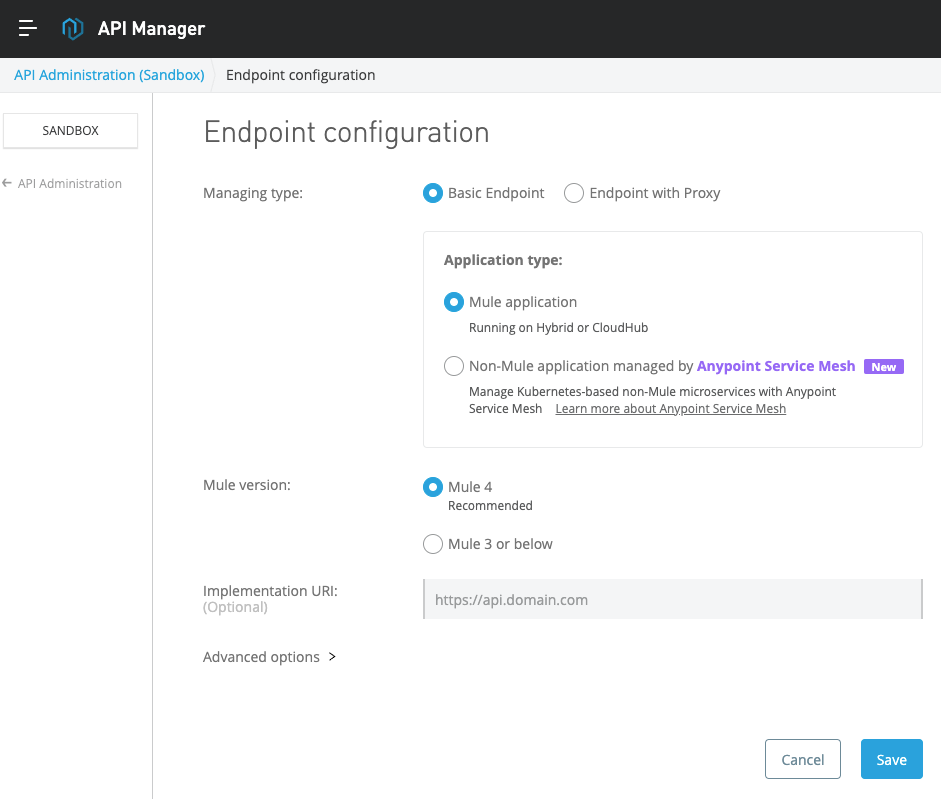
You can leave the default values selected and click on Save. In this case, we are using a basic endpoint and not a proxy, our application’s type is a Mule application, and we’re using Mule 4 as the runtime version. We don’t need to add an implementation URI right now.
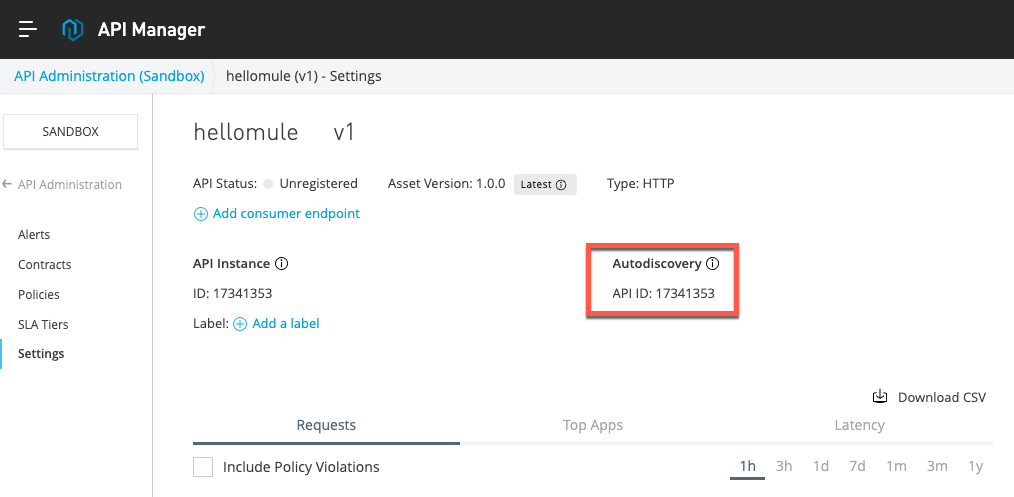
When you create your new API, you will be granted an API Autodiscory API ID. You will need to input your Autodiscovery API ID in Anypoint Studio to link your mule application with your API in API Manager. For now, just make a note of your API ID.
Create a new api.id property per environment
It’s always a best practice to keep our properties in external files instead of hardcoding the values in our components. In your Anypoint Studio project, open the local.properties and dev.properties files under src/main/resources. Add a new api.id property in both files with the API ID value you got from API Manager.
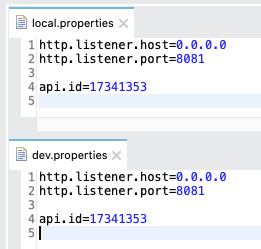
If you had more environments in API Manager like QA or PROD, your API ID would be different for each one and you would have to update your qa.properties or prod.properties files accordingly. In this case, we want to sync our API (from API Manager) to both our dev and local environments.
Configure Anypoint Studio with API Autodiscovery
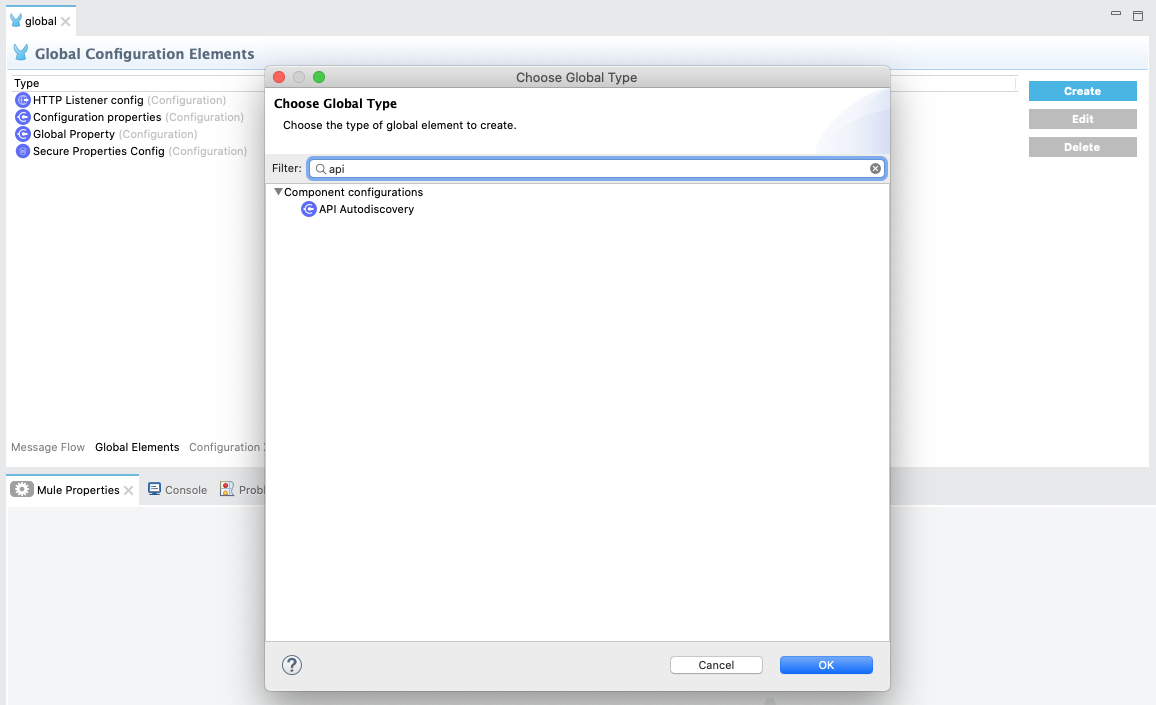
Go to your global.xml file and switch to the Global Elements view. Click the Create button, then select API Autodiscovery.
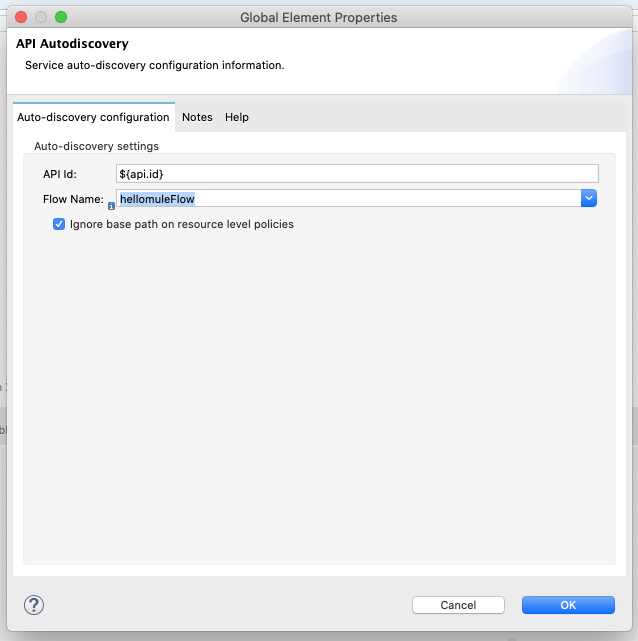
To link the API Id field to your new property, just reference to it using the following syntax:
${api.id}. For the flow name, you can just select the hellomuleFlow. Learn more by visiting the documentation.
Test your application on your local computer
Before we run the application, we need to add two more values to be able to connect to our API Manager. Navigate back to Anypoint Platform and go to Access Management. Go to your Environments, and select the Environment you are going to deploy to (in this case, Sandbox). You will need to copy and paste your Client ID and Client Secret and include those properties in your Deployment Properties and in Anypoint Studio.
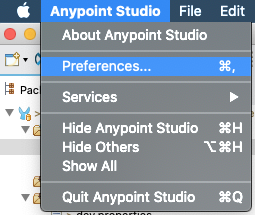
Go to your Anypoint Studio’s preferences or settings.
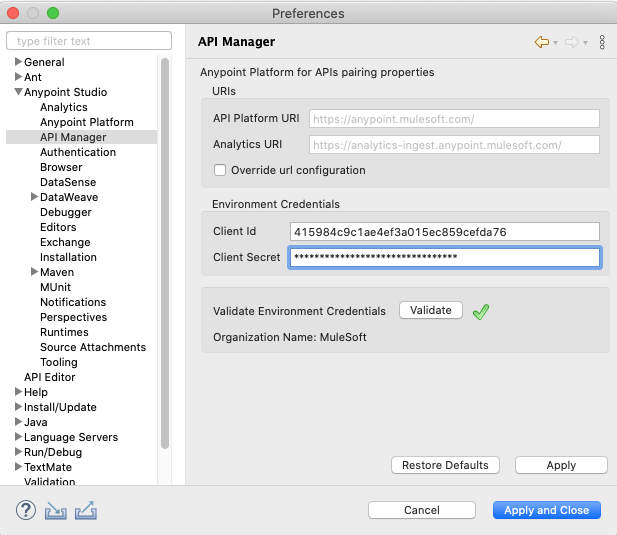
Navigate to Anypoint Studio > API Manager. Paste here the credentials you copied from Access Management (Client Id and Client Secret) and click Validate. The organization name should match what you have on the top-right corner of your Anypoint Platform account.
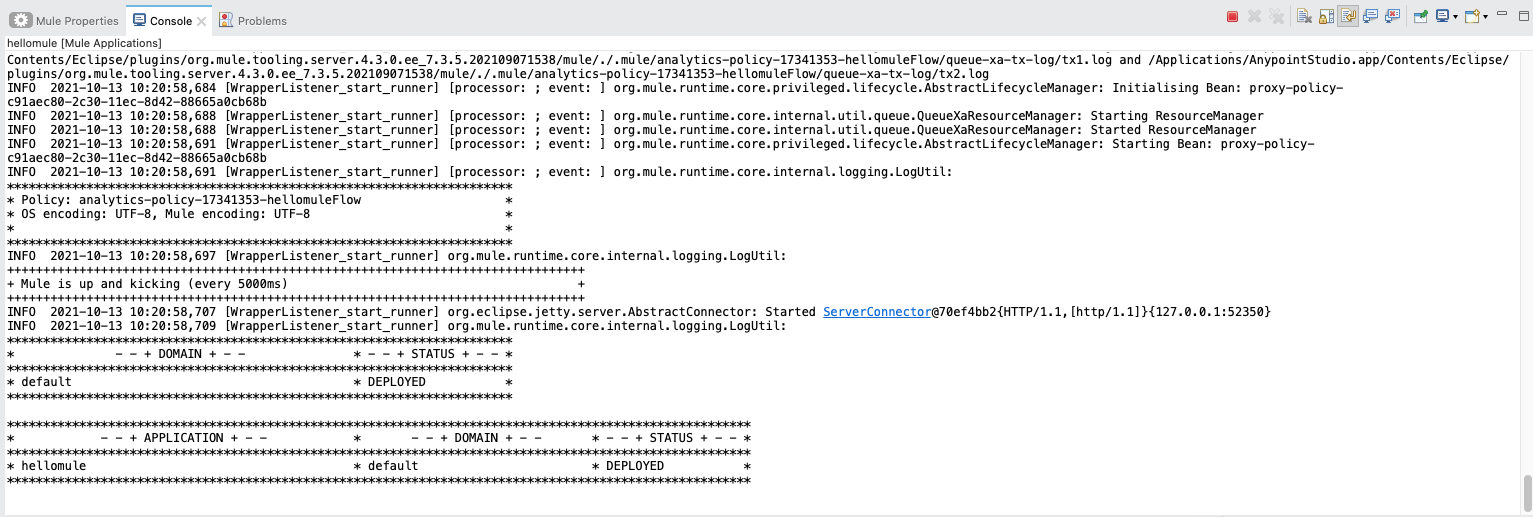
Once that’s set, click on Apply and Close and run your Mule app. Verify that there are no errors in the Console and the Status of the application is DEPLOYED.
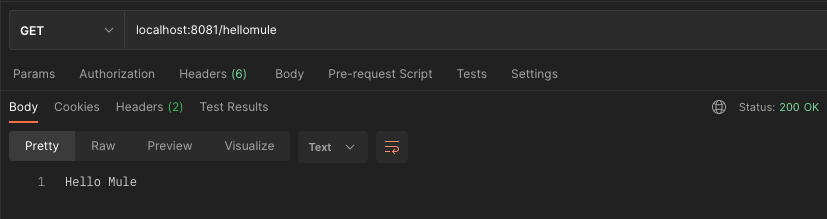
Go to your REST Client and send a request to the local application. You should get back the Hello Mule response and a 200 OK status.
Stop the application.
Deploy to CloudHub with your environment credentials
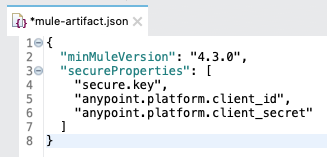
In your Anypoint Studio, open the mule-artifact.json file to add these two properties to the secure properties list. This will hide both properties in our Runtime Manager for security reasons.
1
2
3
4
5
6
7
8
{
  "minMuleVersion": "4.3.0",
  "secureProperties": [
  	"secure.key",
  	"anypoint.platform.client_id",
  	"anypoint.platform.client_secret"
  ]
}
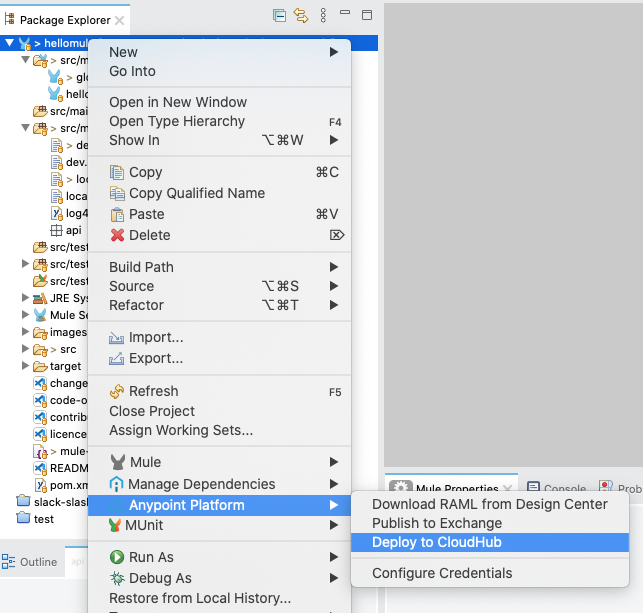
Save this file and right-click on your project. Select Anypoint Platform > Deploy to CloudHub.
Make sure you select the previously deployed application and check the Overwrite Existing Application option. Go to the Properties tab. Enter your Client ID and Client Secret like this:
1
2
anypoint.platform.client_id=<YOUR CLIENT ID>
anypoint.platform.client_secret=<YOUR CLIENT SECRET>
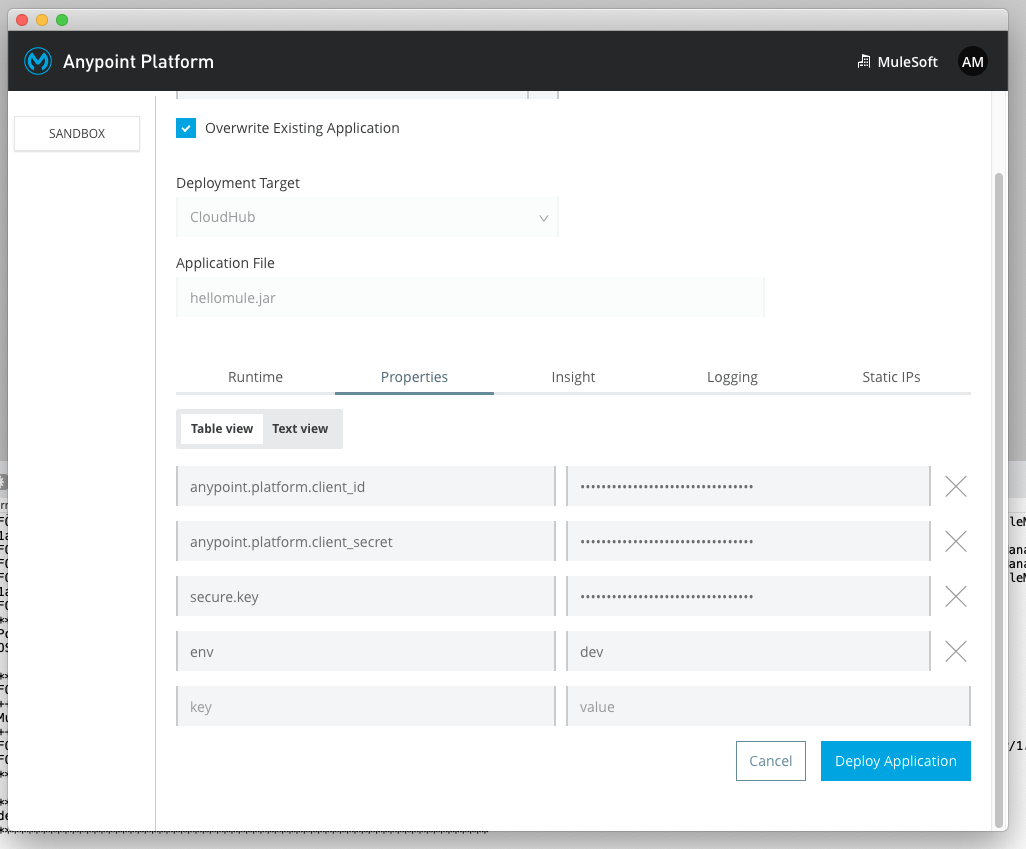
By this point, the anypoint.platform.client_id and anypoint.platform.client_secret properties may or may not appear hidden. Anypoint Platform’s behavior can change over time. After the application is deployed, both properties should be hidden in Runtime Manager.
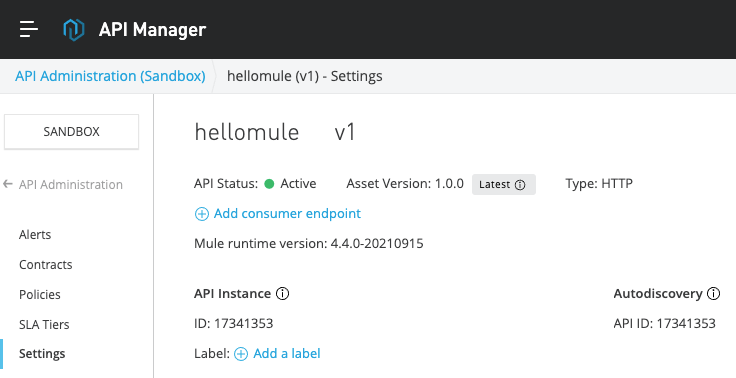
Click Deploy Application. After your application finishes deploying in Runtime Manager, you should see the status of your API set as Active in API Manager. Now you can enforce policies directly from API Manager without needing to redeploy your Mule application.
Next Steps
Do you have any questions about the code? You can compare your Mule project with ours to make sure everything was set up correctly.
Setting up API Autodiscovery in Anypoint Studio is really as simple as following the steps above. It is important to keep using best practices for our code. It makes our life as developers a little bit easier and can save us a lot of time in the long run. In the next tutorial, we’ll show you how to apply the Client ID enforcement policy to your Mule application in API Manager.
Click on the Next button below to continue to the next tutorial.


Try Anypoint Platform for free
Start your 30-day free trial of the #1 platform for integration, APIs, and automation. No credit card required. No software to install.
Questions? Ask an expert.
