Now that we have successfully created our first mule application in our previous tutorial, let’s learn how to manage our API with API Manager.
API Manager allows you to add policies such as rate-limiting, IP blacklisting, authentication, and threat protection. These policies can be added after you publish your integration so that way you can monitor and change settings even if your API is live to consumers. First, we will learn how to add API Autodiscovery to our mule application which registers your application to the API gateway to set permissions and SLA’s. Next, we will learn how to publish our mule application to CloudHub, and then manage our API via API Manager.
Prerequisites
- Anypoint Platform - We’ll need an Anypoint Platform account to design our first API. You can sign up for a free trial account here.
- Anypoint Studio - This is MuleSoft’s IDE! Anypoint Studio enables you to start building APIs and integrations quickly with hundreds of pre-built connectors, templates, and examples. Download Anypoint Studio here.
- REST Client - Download and install any REST Client of your choice. There are plenty of options out there for you to use, you can download MuleSoft’s Advanced REST Client, or you can use the popular REST Client Postman. We’ll be using Postman throughout these tutorials.
Configure API Autodiscovery
When your API specification is published on Exchange, you can begin the process of registering the API, setting up security policies, SLA’s and analytics throughout the lifecycle of your API through API Manager. You need to first configure API Manager by logging into Anypoint Platform (click the button in Step 1), and in the Management Center, select API Manager.
All organizations by default have a Sandbox and Design environment, which can have independent configurations, policies, and proxies. The Sandbox environment will typically be limited in available resources and you may need to adjust your deployment target or worker size depending upon the scale of your application. For now, go to API Manager, and click the blue button that says Manage API and select Manage API from Exchange. Select the Contact API that you created on the first tutorial.
Leave the implementation URI blank and make sure your Asset version is the latest version published. Don’t forget to check the box that declares you are using Mule 4 and above.
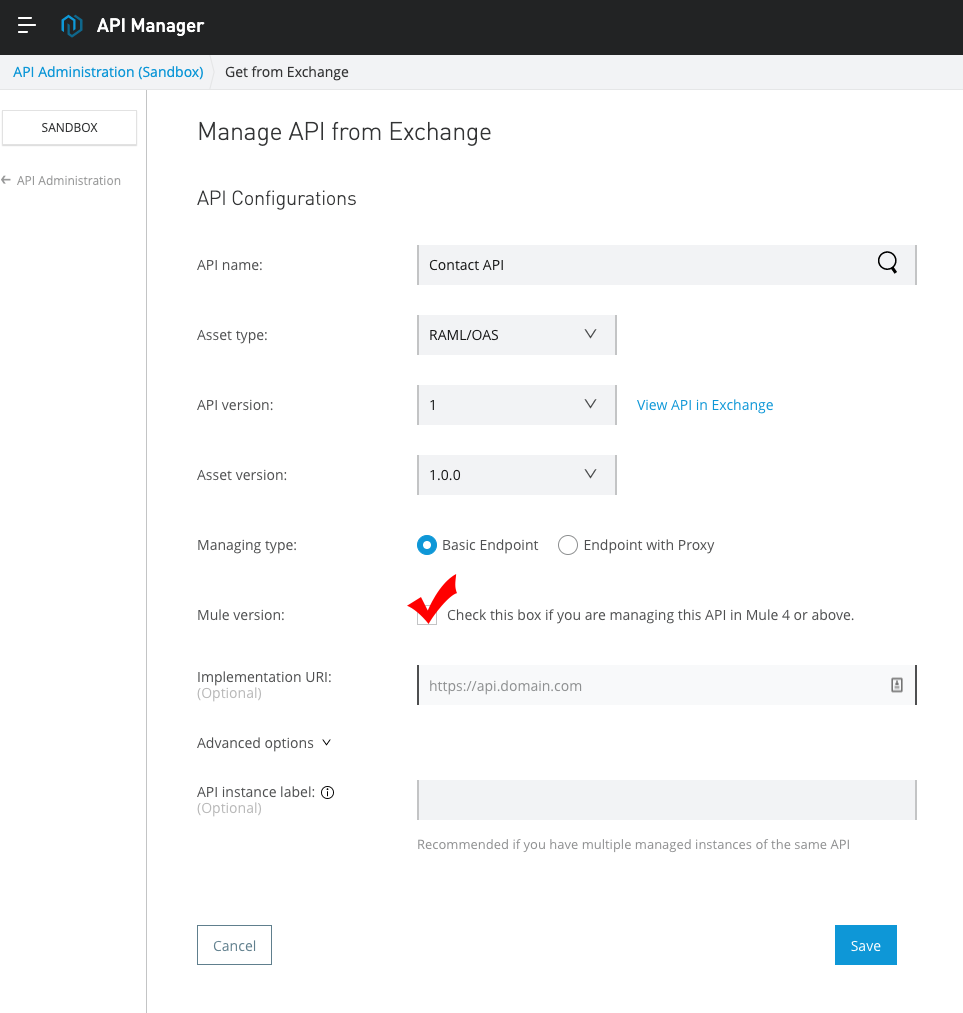
After clicking Save, you will see a new screen that contains an “API Instance” ID. Copy this ID to your clipboard to use it in Anypoint Studio.
In order for your application to register itself to the gateway, we need to add and configure API Autodiscovery in your Anypoint Studio application. To add the API Autodiscovery component:
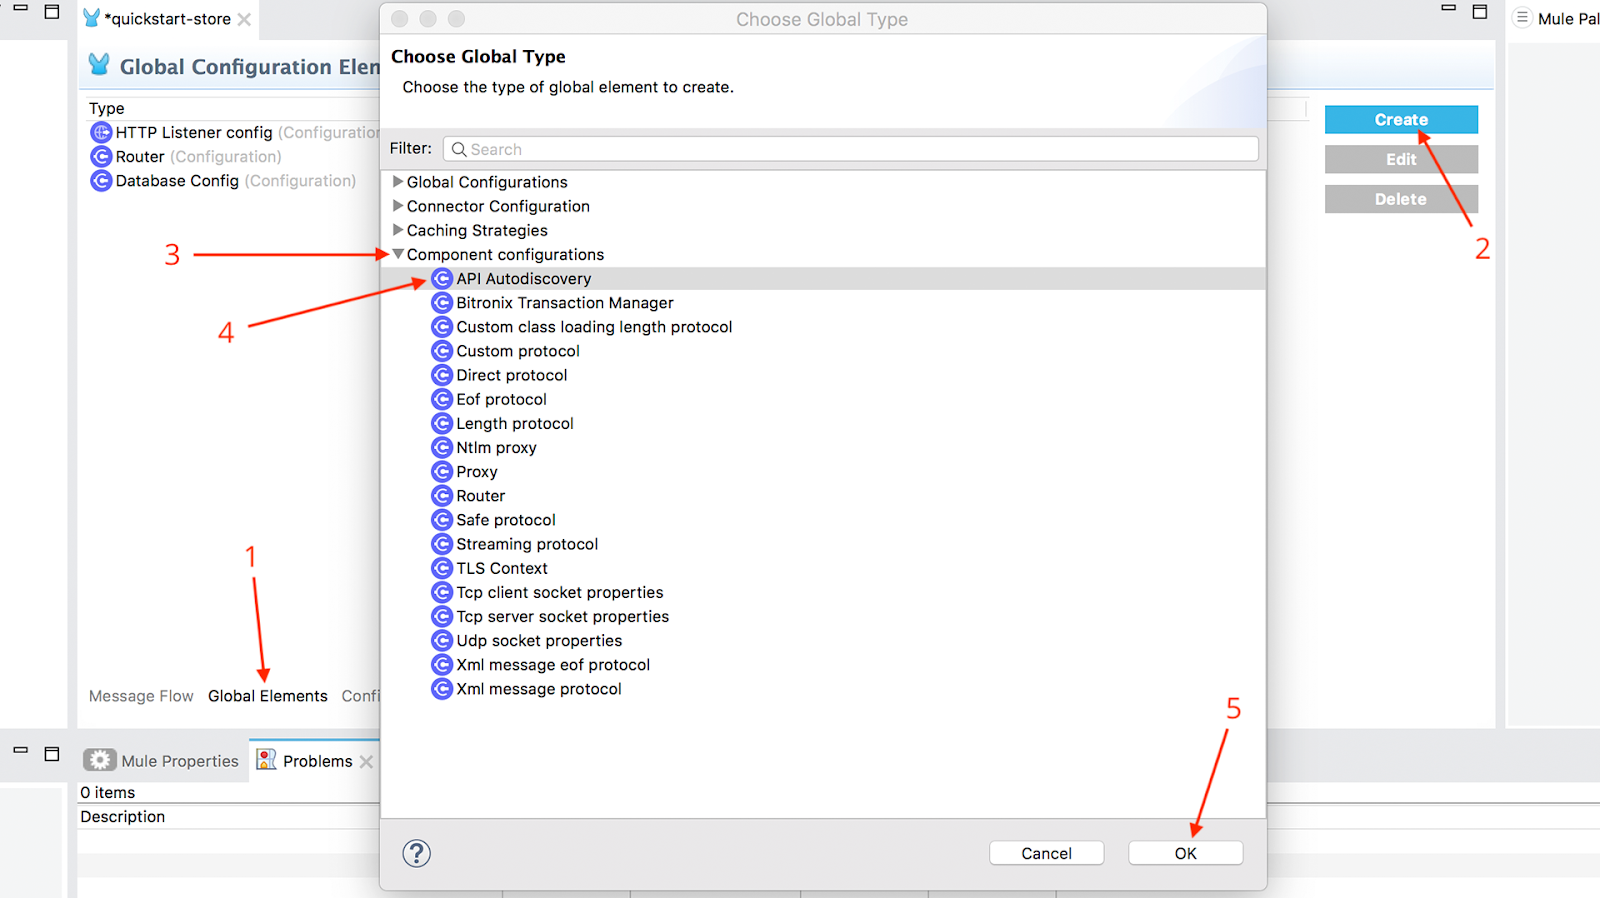
- In Anypoint Studio, click Global Elements to view all the globally accessible elements in your Mule App.
- Click the Create button.
- Expand the Component configurations dropdown.
- Select API Autodiscovery and press OK.
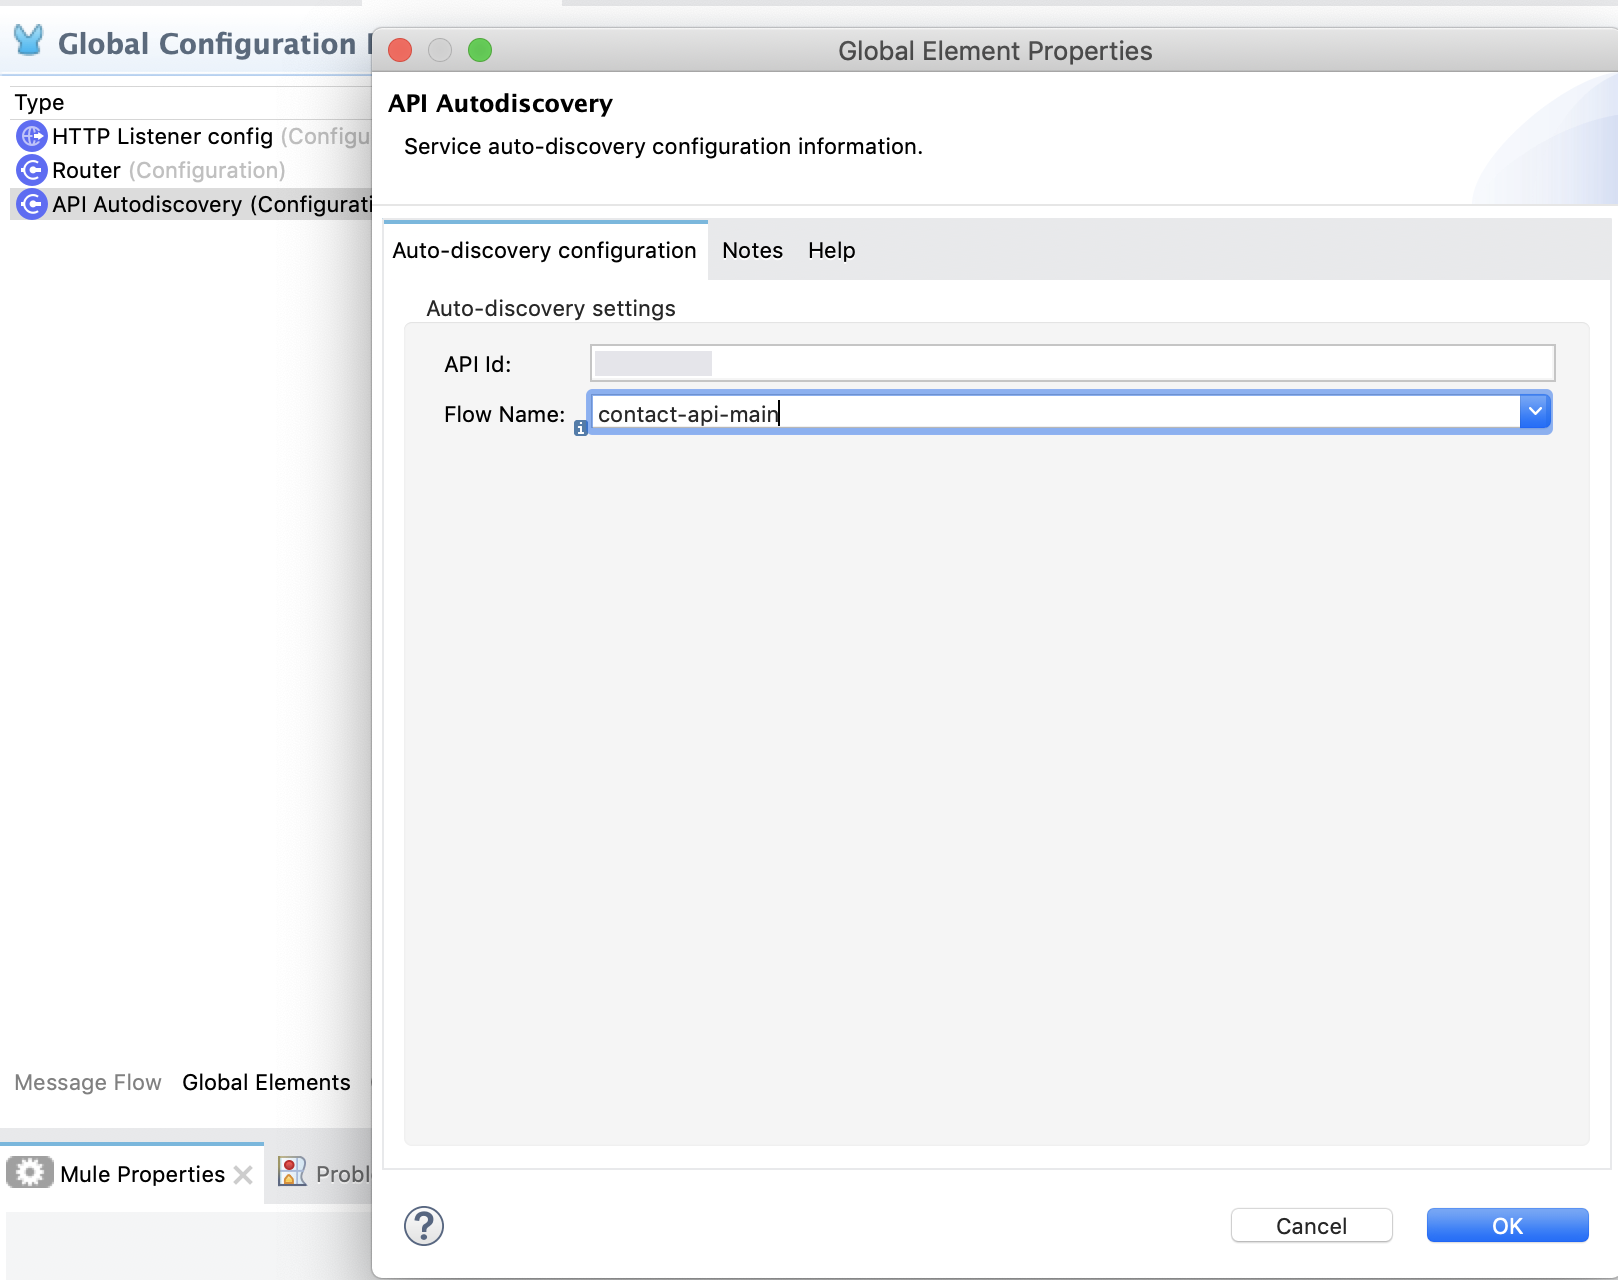
Next, paste your API ID into the API Autodiscovery Global Element Properties window (you can access that window by clicking on API Autodiscovery in the Global Elements tab, then clicking the Edit button). For your Flow Name selection, make sure to choose: contact-api-main (or whatever you named your main flow). Click OK to save your changes.
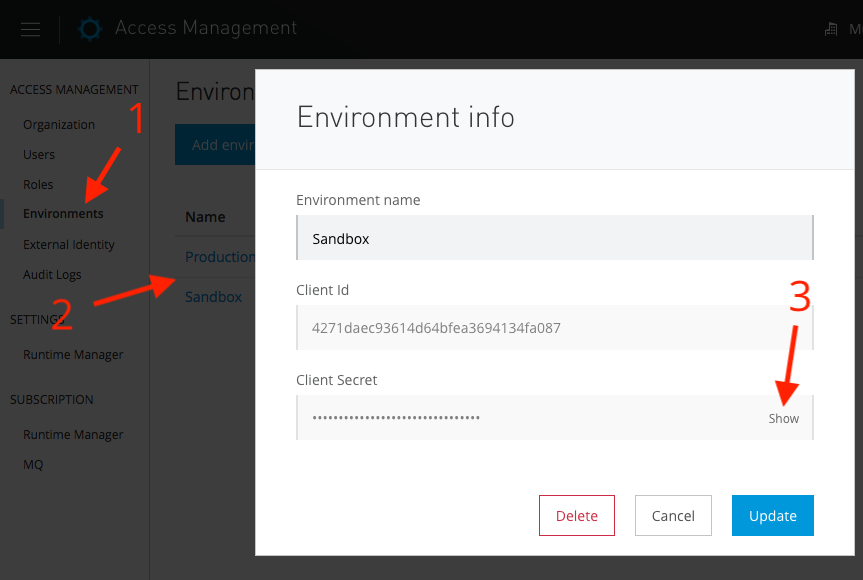
Before publishing your application, you need to obtain your organization’s credentials to control apps that are registered on your gateway. To do this, you will need to provide a client ID and secret that is used in conjunction with the API ID to provision it to the correct organization, environment, and API version. Log back in to Anypoint Platform, and navigate to Access Management -> Environments. Then click on the environment name that matches the environment from API Manager, which will show a new lightbox. Keep this window open for the next setup.
Deploy to CloudHub from Anypoint Studio
Now that you have developed your first Mule application, and setup API Autodiscovery in API Manager, let’s deploy from within Anypoint Studio to CloudHub. CloudHub is the MuleSoft managed platform for deploying your API’s and integrations.
To start, right-click on your project folder called contactapi in the Package Explorer tab, and select Anypoint Platform and click Deploy to CloudHub. Select Sandbox and name your application whatever you wish.

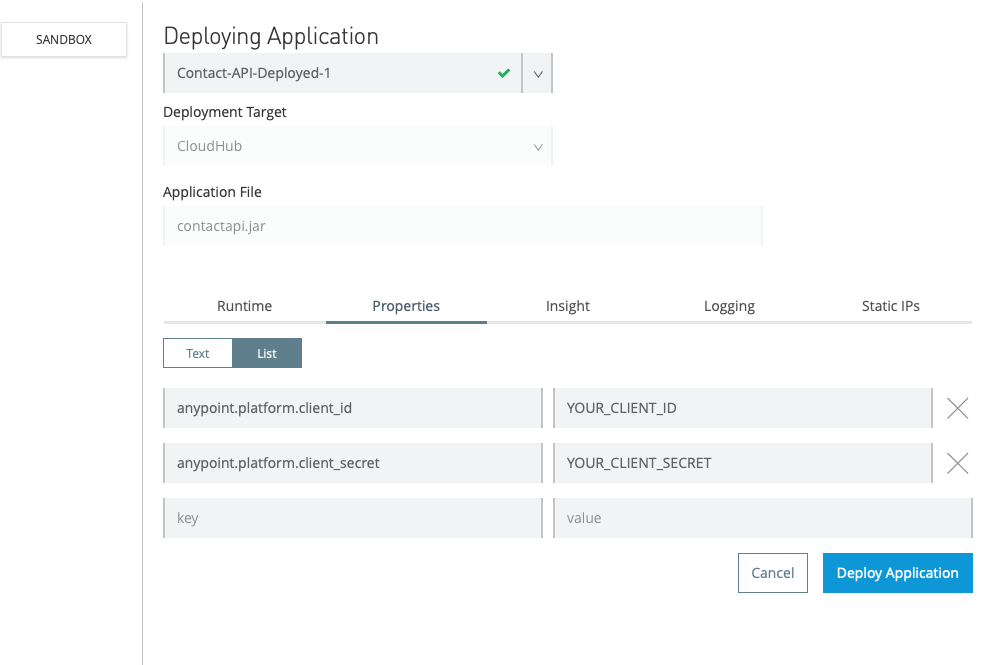
This will open the application deployment window where you can select the environment you’ll be publishing to (same as prior steps), set the runtime version, resource allocation, etc.
The deployment name you want to choose may already be taken. In this case, please type in a different name for deployment that is available. Also, you may reach your worker size limit; however, your account may be provisioned enough if you reduce the worker size to “0.1 vCore”.
From the steps above, the application knows which API to associate itself with via API ID, but it doesn’t have the authentication parameters needed to register. Instead of baking it into the app itself with a properties file, you’ll be placing the client ID and secret from Step 2 in the properties tab of the deployment window in order to allow your app to authenticate itself and update easily should the need arise without having to edit the project (e.g. promoting from sandbox to production). Insert the following properties and replace the fields accordingly from the previous section:
Click Deploy Application and click Open in Browser to grab the URL of your published API and integration from Runtime Manager. This will open the application deployment window where you can select the environment you’ll be publishing to (same as prior steps), set the runtime version, resource allocation, etc.
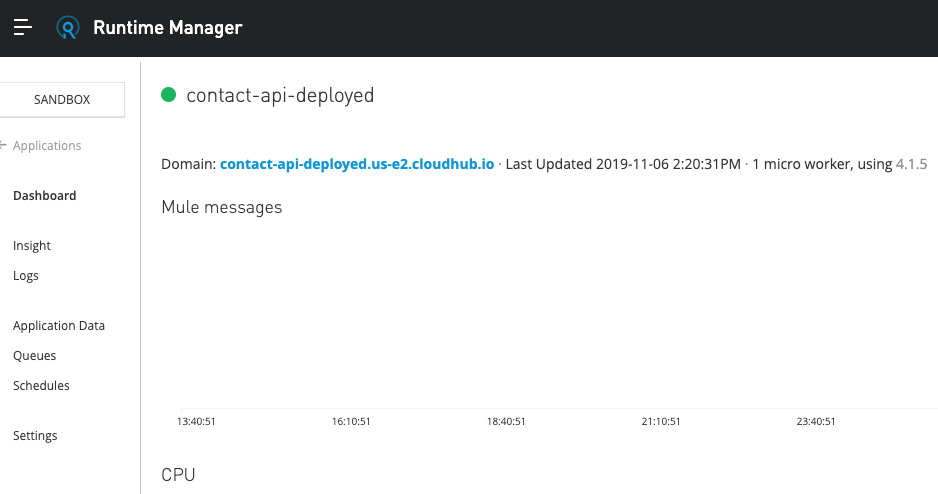
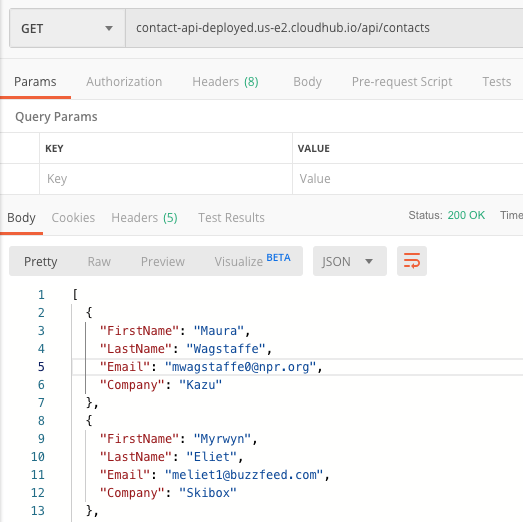
When you open up your deployed application in CloudHub, grab the URL that’s displayed in Runtime Manager, and insert that URL back into Postman and try sending the same payload as before. You should notice that the API will return you with the desired values.
Set policies on deployed apps in API Manager
You can now go back to API Manager and see that the “Status” column of your API is now marked as Active with a green dot next to it. This means the app has successfully registered with the gateway and you can manage it. To set a rate limit policy on the api.
- Click v1.0. - This will take you to the settings for your API.
- Click Policies → Apply New Policies → Rate limiting → Configure Policy.
- Configure the Rate limit to the following:
| # of Reqs | 1 |
| Time Period | 1 |
| Time Unit | Minute |
Go back to Postman and try sending the request again. You will notice that you will get a 429 Too Many Requests error once rate limiting has been setup! After you test out this feature, feel free to remove this API policy since you will need to use this API in the next tutorial.
Next steps
You did it! Your app is now deployed and is able to be analyzed and managed! Your app has registered itself with the gateway and can set policies and even set up SLA tiers. In our next tutorial, you will learn how to integrate your API with Salesforce!
Click on the Next button below to continue to the next tutorial.


Try Anypoint Platform for free
Start your 30-day free trial of the #1 platform for integration, APIs, and automation. No credit card required. No software to install.
Questions? Ask an expert.
