In the previous tutorial, we learned how to develop, test, and deploy our first Mule Application. In this tutorial, we will review some of the best practices that we can apply to our future Mule projects.
Prerequisites
- Anypoint Platform - We’ll need an Anypoint Platform account to host our application on CloudHub. You can sign up for a free trial account here.
- Anypoint Studio - This is MuleSoft’s IDE! Anypoint Studio enables you to start building APIs and integrations quickly with hundreds of pre-built connectors, templates, and examples. Download Anypoint Studio here.
- REST Client - Download and install any REST Client of your choice. There are plenty of options out there for you to use, you can download MuleSoft’s Advanced REST Client, or you can use the popular REST Client Postman. We’ll be using Postman throughout these tutorials.
- Base code - There are two options for gathering the base code we will use for this tutorial: 1) Start from the first tutorial of this series to generate the base code on your own. 2) Download the base code here:
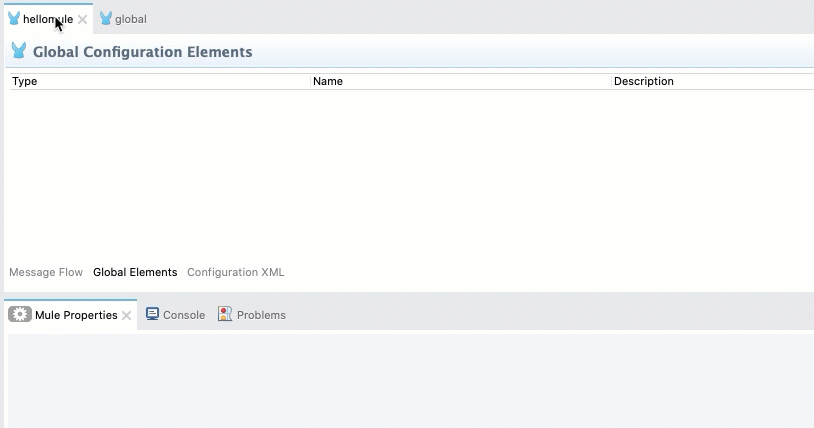
Create a global.xml file to keep the global elements
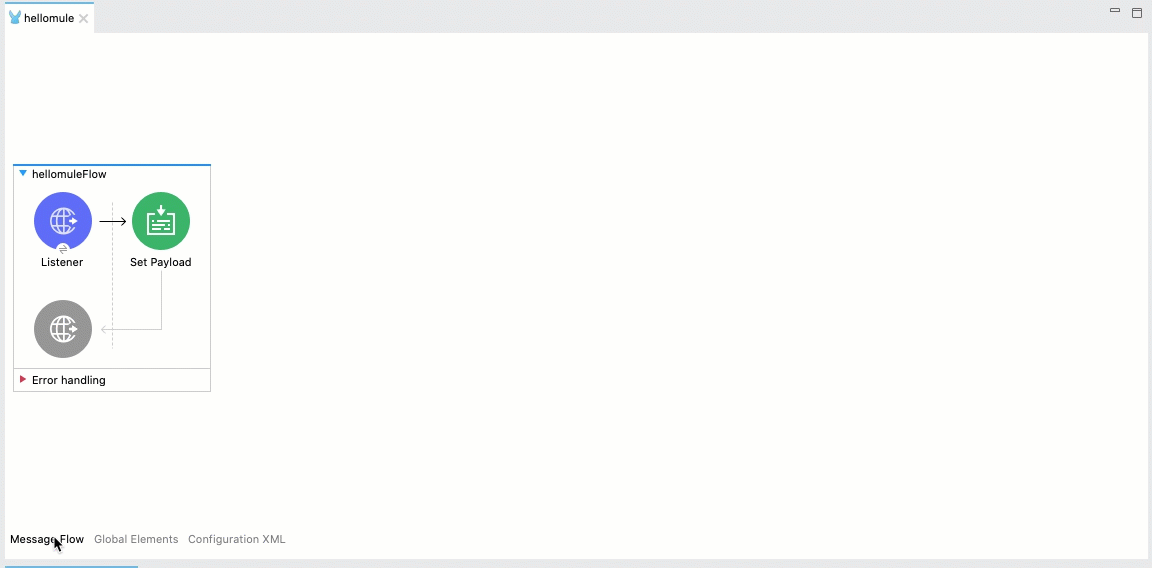
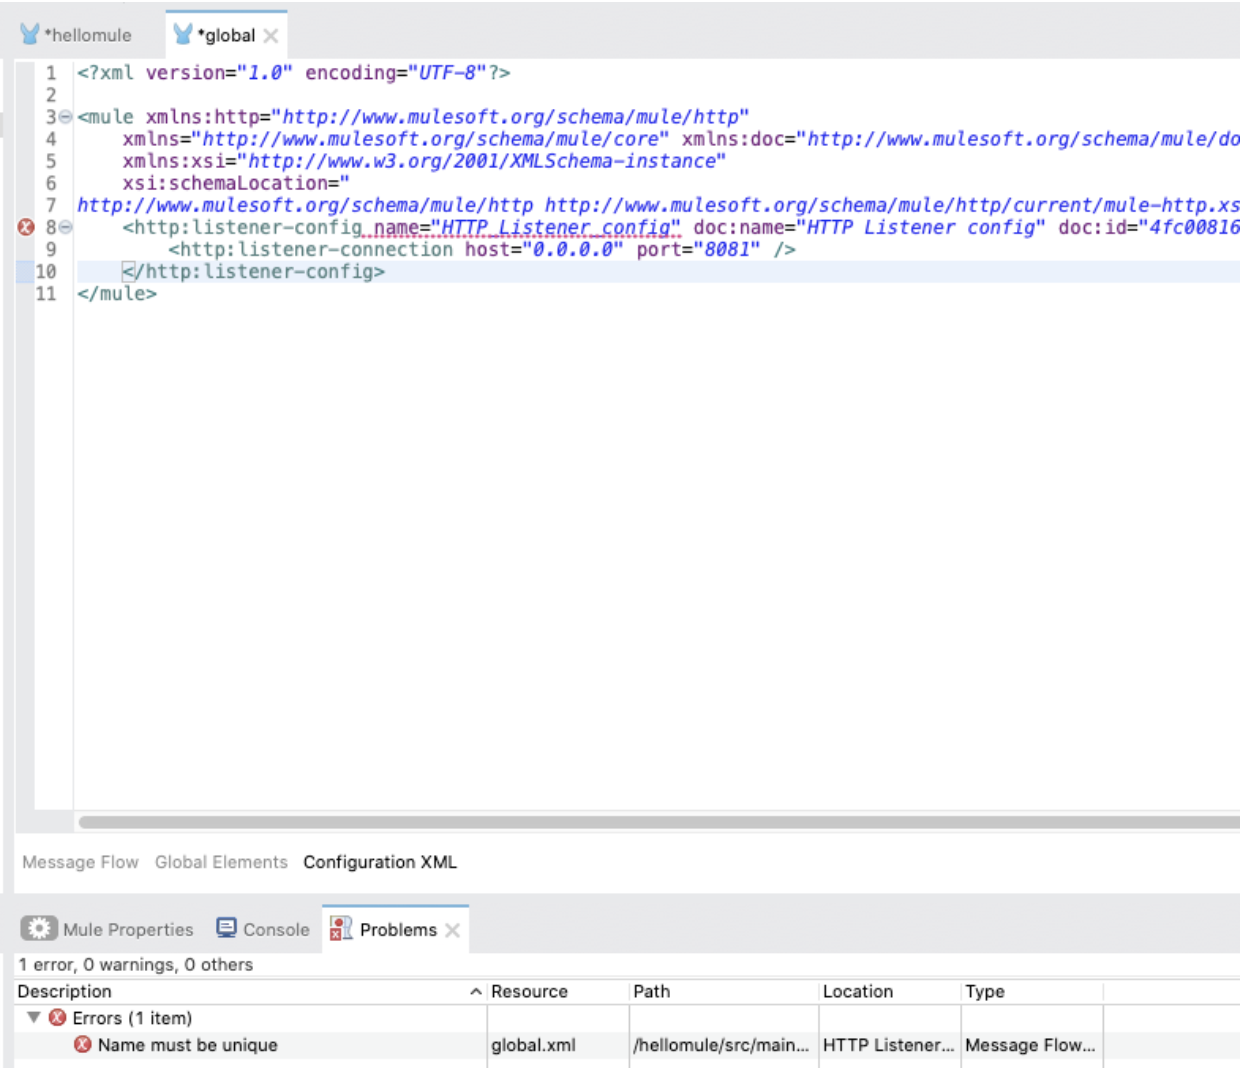
In our last tutorial, we had created a Mule flow with an HTTP Listener component. When we clicked on the Green Plus (Add) button to start configuring this connector, we actually created a global element. You can switch between the Message Flow, Global Elements, and Configuration XML views by using the three tabs between the Canvas and the Properties Editor/Console.
It is a best practice to create a new global.xml file to keep all our global elements stored there. This is useful when we have more XML files and we don’t want to be looking for our global elements in each file.
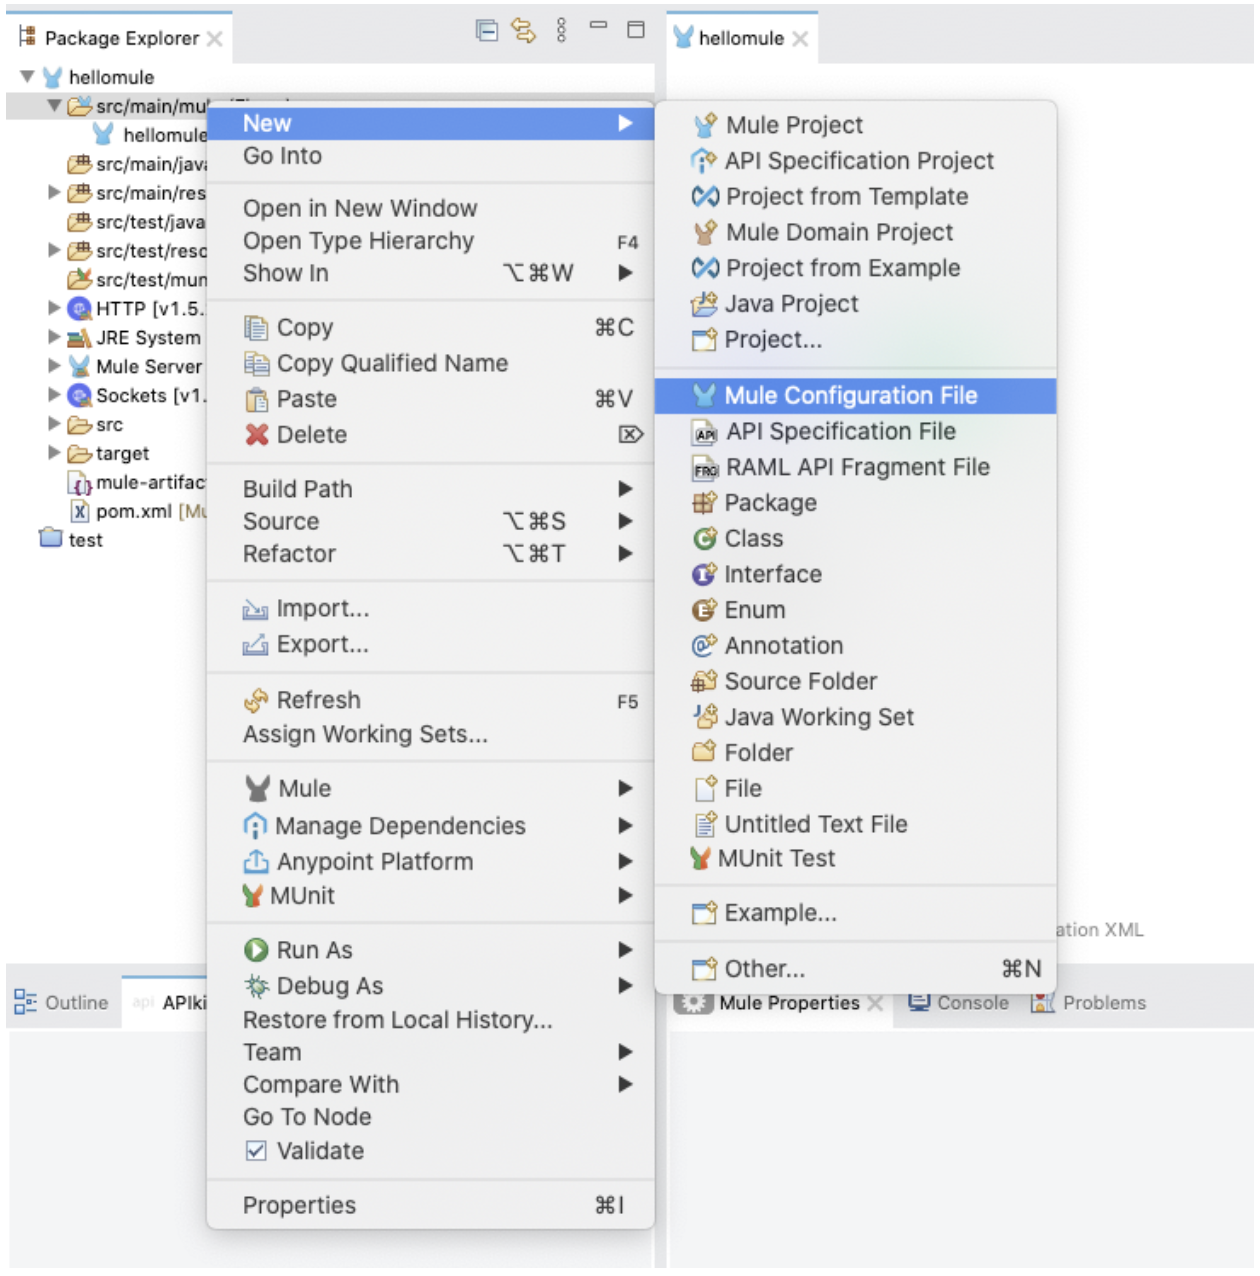
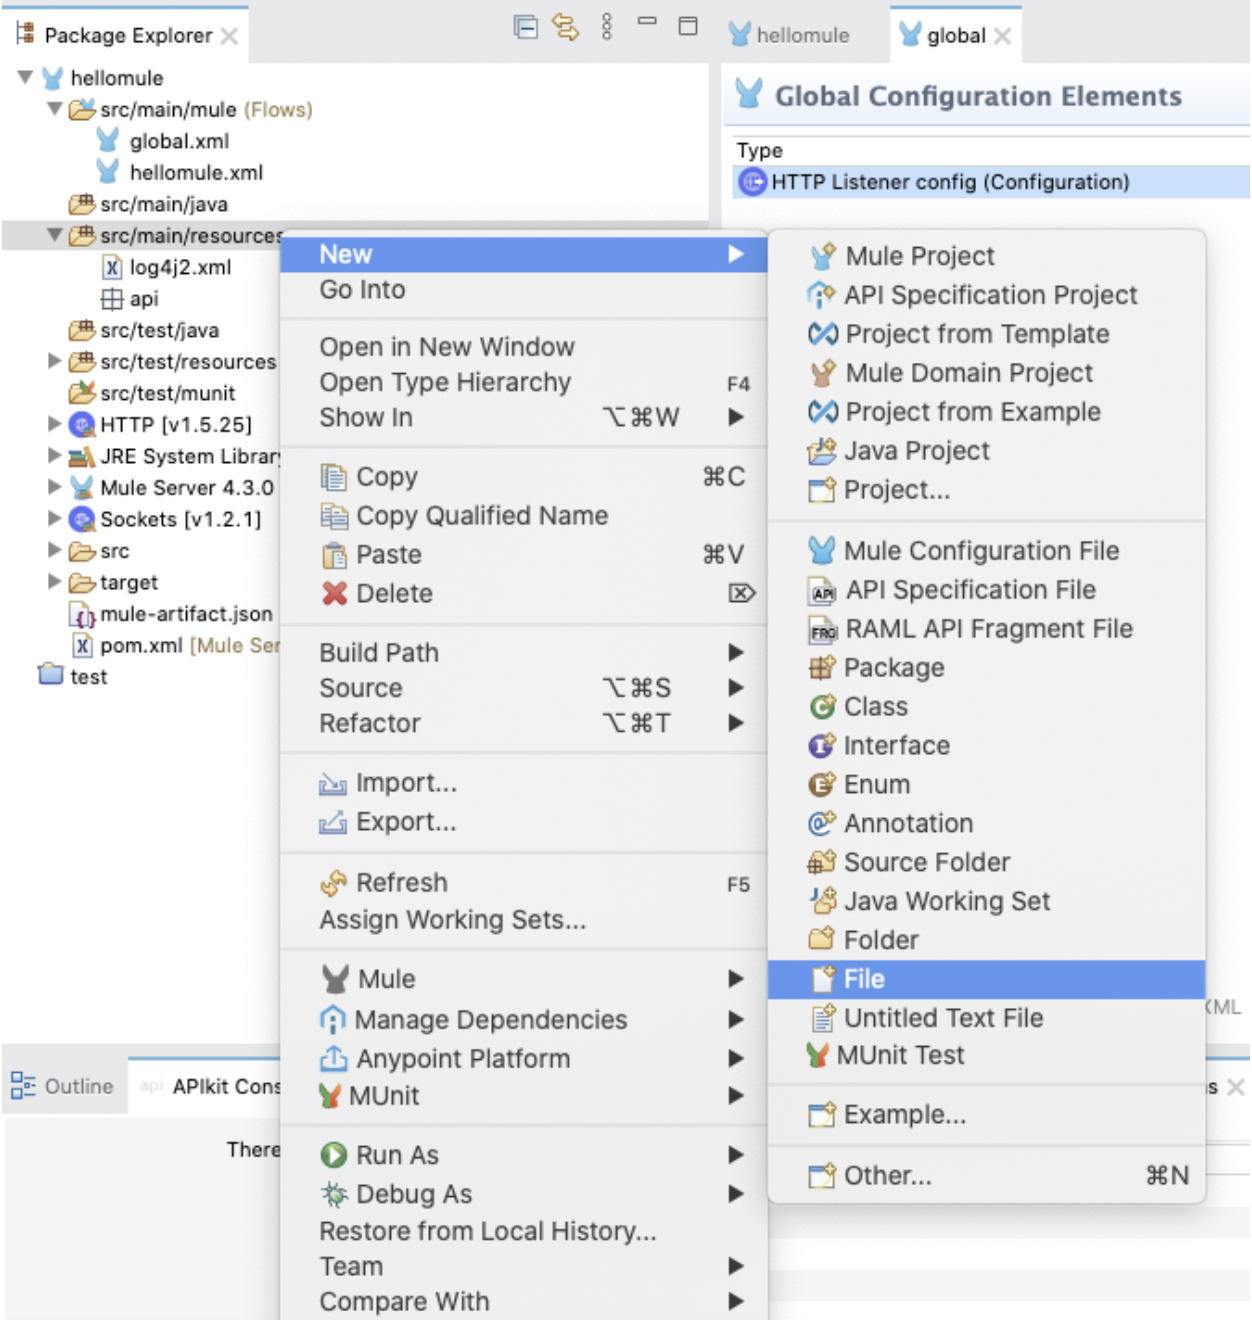
Right-click on the src/main/mule folder. Select New > Mule Configuration File.
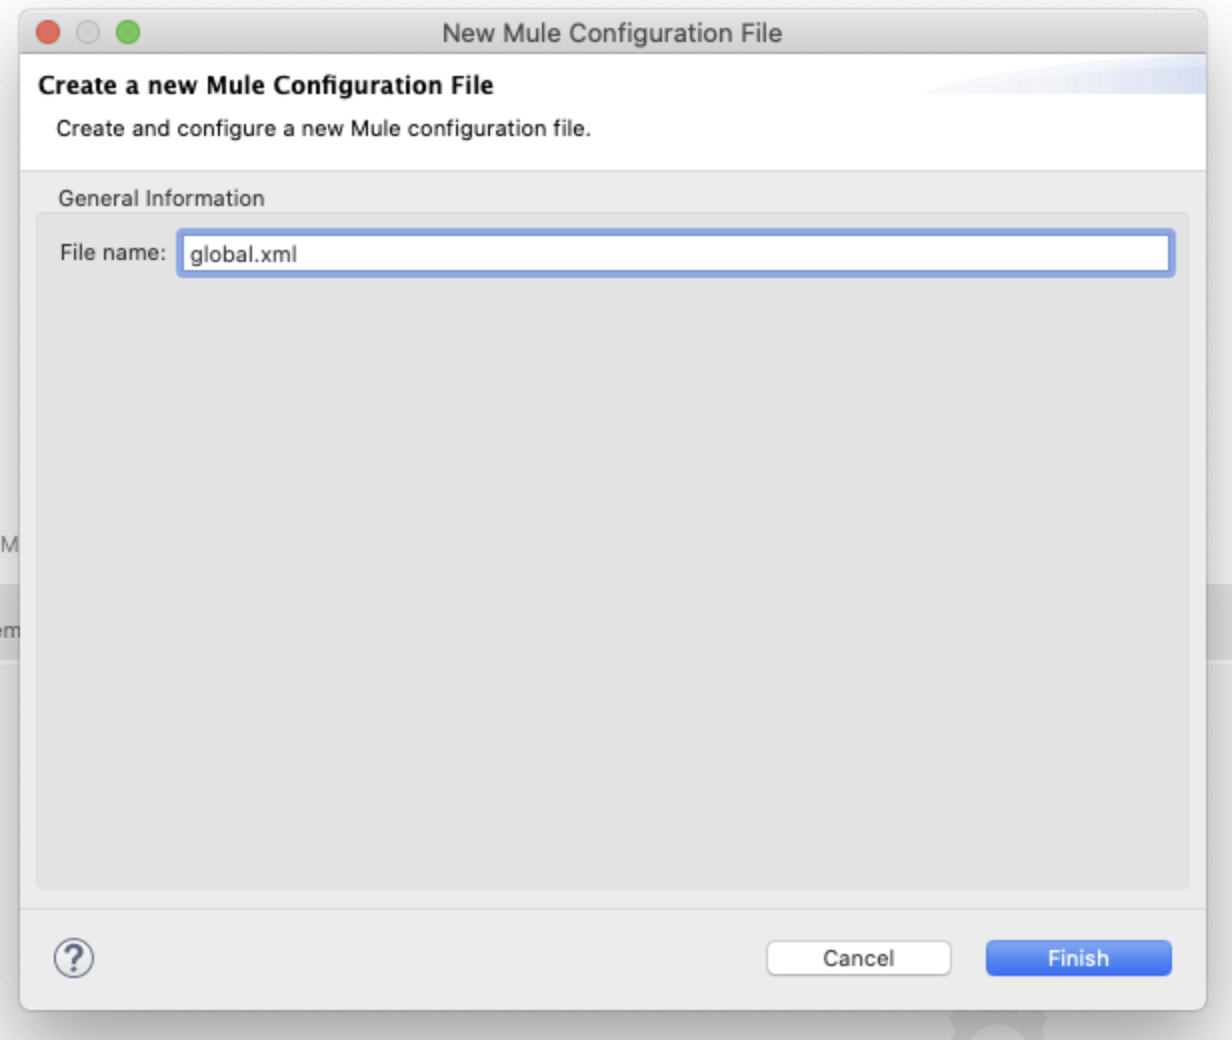
Add the name global.xml and click Finish.
Go back to the hellomule.xml file and switch to the Configuration XML view. Locate the http:listener-config code and cut everything between the tags.

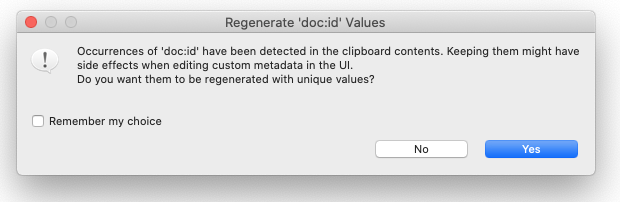
Go to the global.xml file and switch to the Configuration XML view. Paste this code inside the mule tags. If you get an alert regarding the ‘doc:id’ values, you can select Yes to regenerate the IDs of each component. Unless you purposely want to paste the exact same components, it is recommended to regenerate the IDs when copy/pasting code. Don’t select the checkbox in case you need to copy and paste the exact same IDs in the future.
Notice how you may be getting an error at this point. This is because the hellomule.xml file has not been saved and Studio thinks you now have two global elements with the same name.
You can save each individual file separately, or you can click on the Save All button at the top left of the screen.

The error disappears after saving both files.
If you switch to the Global Elements tab for both files, you will now notice that the HTTP_Listener_config is no longer present in the hellomule.xml file and it was moved to the global.xml file.
Externalize the hardcoded values into properties
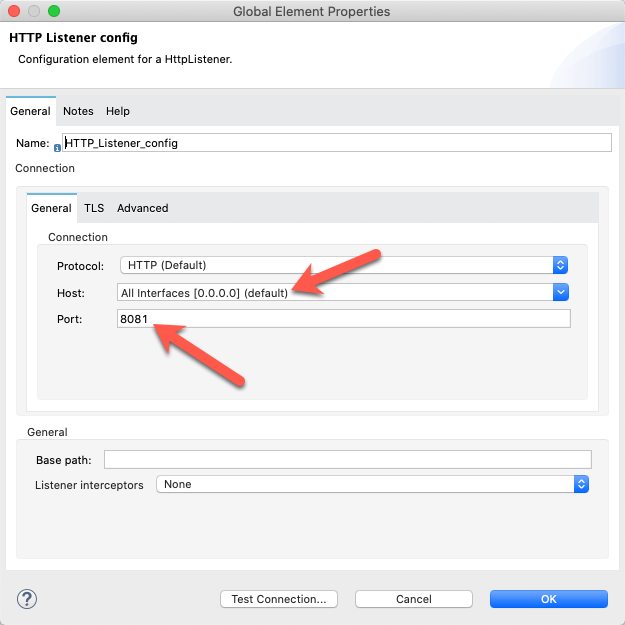
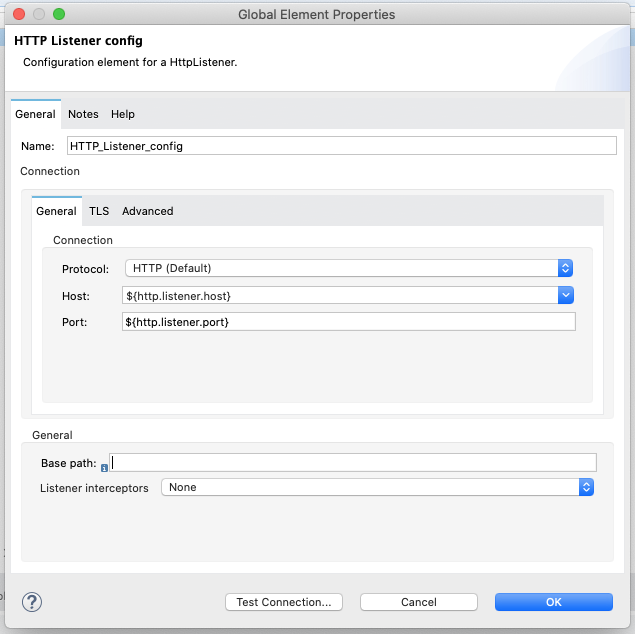
In the global.xml file, switch to the Global Elements view. Select the HTTP_Listener_config element and click on the Edit button to the right or double-click it. Remember the default values for the Host and the Port? These are hardcoded values. This means that whenever we want to change them, we have to find the correct element and edit it. Maybe it’s not hard to do right now because we only have one global element, but this becomes an issue in bigger projects.
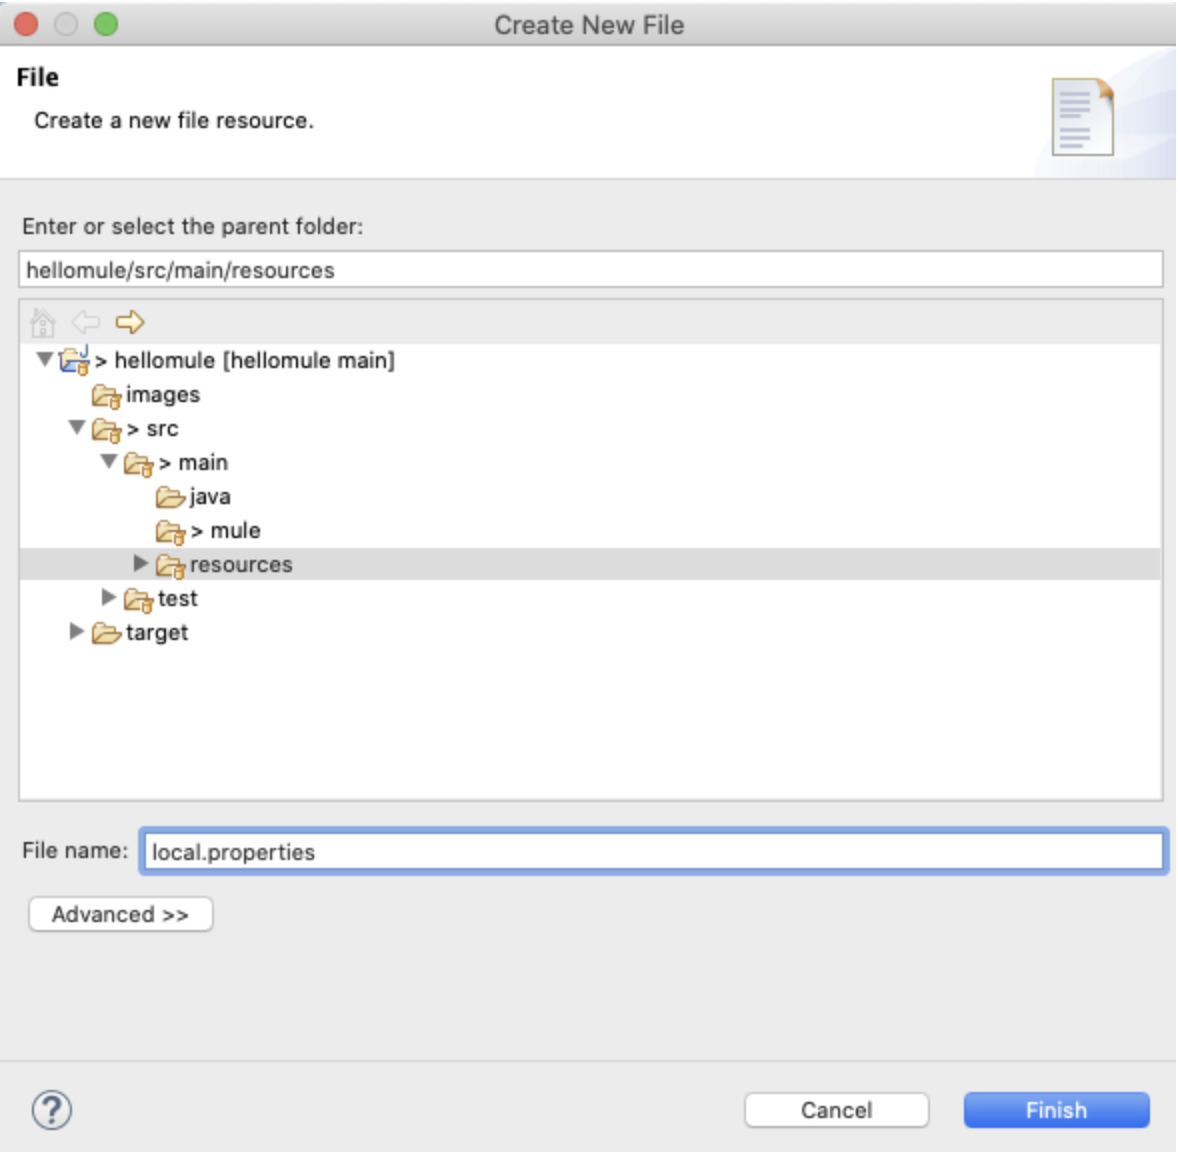
To avoid having hardcoded values in our code, it is a best practice to externalize them into properties files. Right-click on the src/main/resources folder and select New > File.
There are two types of supported properties files:
.properties.yaml
There is no best practice to use one or the other, it depends on your preference. The main difference is that .properties files are easier to copy/paste, but the .yaml properties are cleaner to look at. For the purpose of this tutorial, we will be using .properties. You can read more about them in the MuleSoft docs.
Create a local.properties file under src/main/resources.
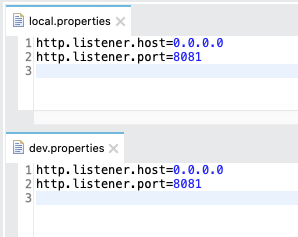
Inside this new file, copy and paste the following properties and save the file:
1
2
http.listener.host=0.0.0.0
http.listener.port=8081
Repeat the same steps for a dev.properties file. This helps us separate the properties per environment. When we run our Mule app on our local computer, we’ll be using the local.properties file. When we deploy our application to CloudHub, we’ll be using the dev.properties file. In this case, both properties have the same values. But it’s a good practice to separate your properties files by environment.
Go back to the global.xml file and switch to the Global Elements view. Select the HTTP_Listener_config element and click on Edit. In order to refer to a property from any connector configuration, you need to use the following syntax:
${your.property.name}Replace each hardcoded value with the corresponding property, using the previous syntax. You should end up with something like this:
Click OK and save all files.
Set up the Configuration Properties global element
Adding the properties file is not enough to let the Mule Application know where to look for them. If you try to run the app without this configuration, it will throw an error stating that it wasn’t able to find your properties.
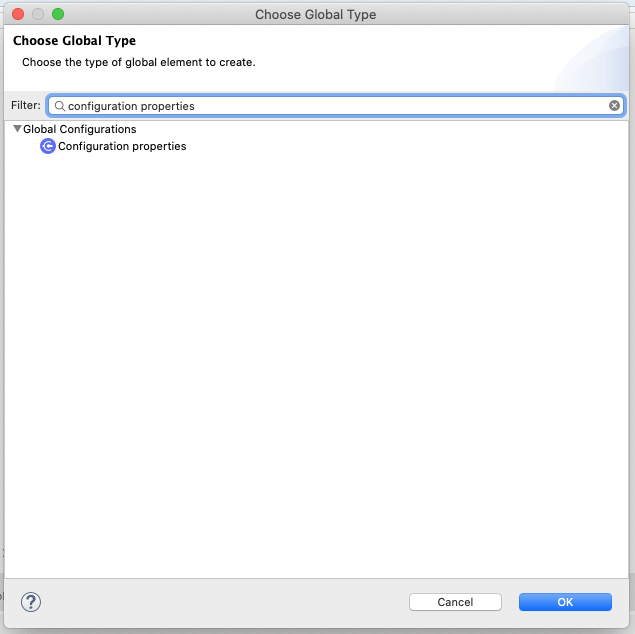
In your global.xml file, switch to the Global Elements view. Click on Create to add a new global element. Search for Configuration properties. Select the element and click OK.
Because we’re not using static properties files, we need to be able to switch between files depending on the environment. Remember that the ${} syntax is used to reference properties. Let’s add the following properties file:
${env}.properties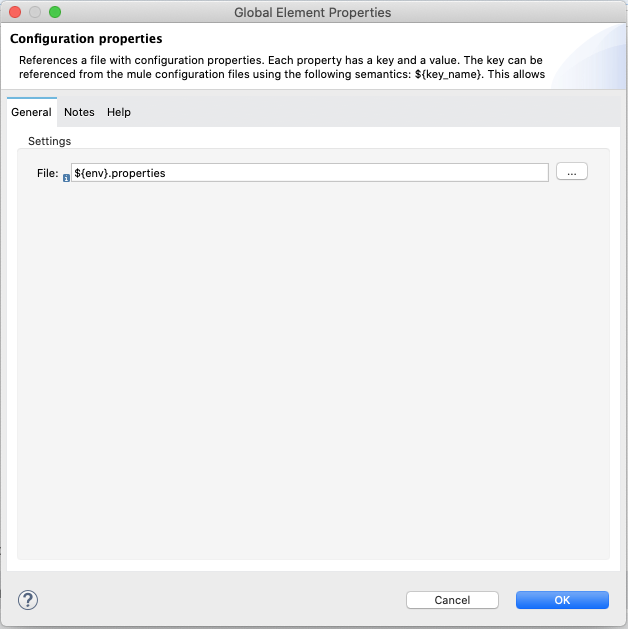
You should now have two global elements in the global.xml file. We still need to add the env property that we just referenced in the previous step. There are two ways to do that: 1) adding it to the environment variables at runtime, or 2) creating a global property in the global configuration elements. The first way is preferred when you don’t want to save the property in the source code. We’ll see how to do this in the next tutorial for secure properties. Since this is not a secure property, we’ll add it to the global configuration elements.
Click Create and select Global Property. The name should be env and the value local.
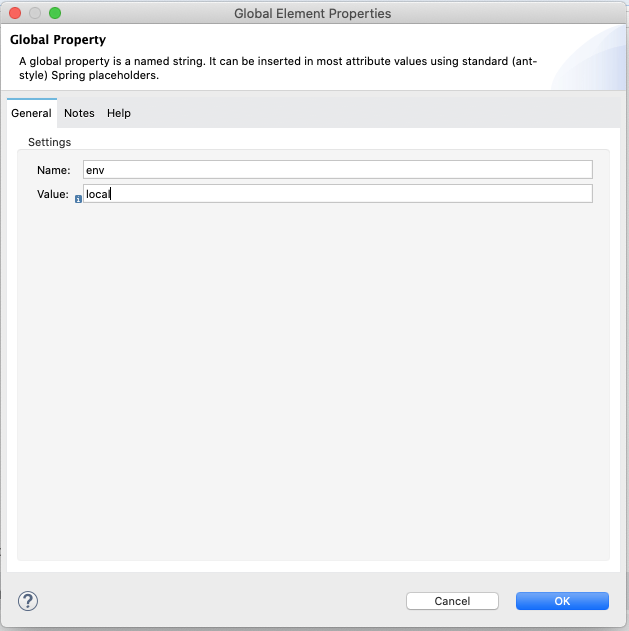
Click OK and save all files.
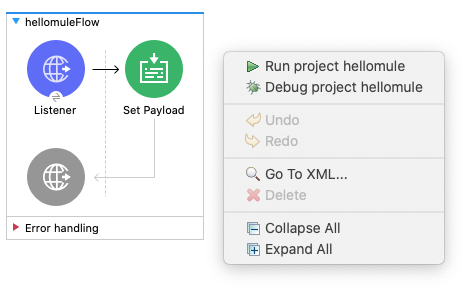
Verify the Mule project is still working as expected
Make sure you saved all the files. Go to any of the XML files and switch to the Message Flow view. Right-click inside the canvas and select Run project hellomule.
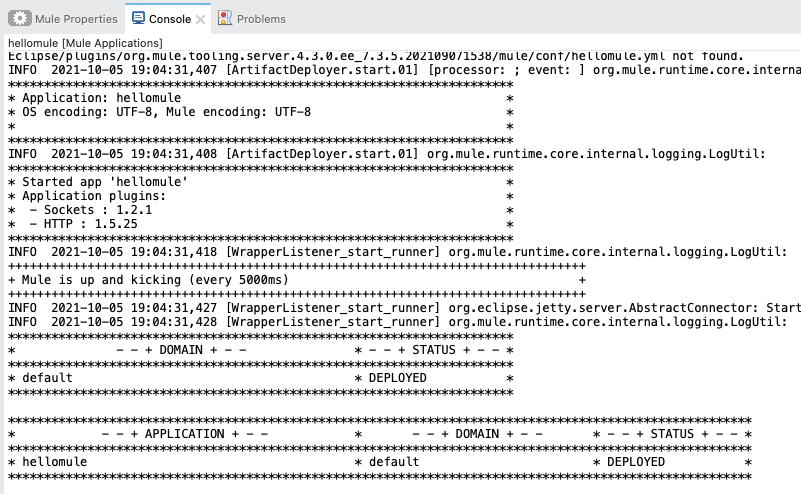
Verify that there are no errors in the Console and the Status of the application is DEPLOYED.
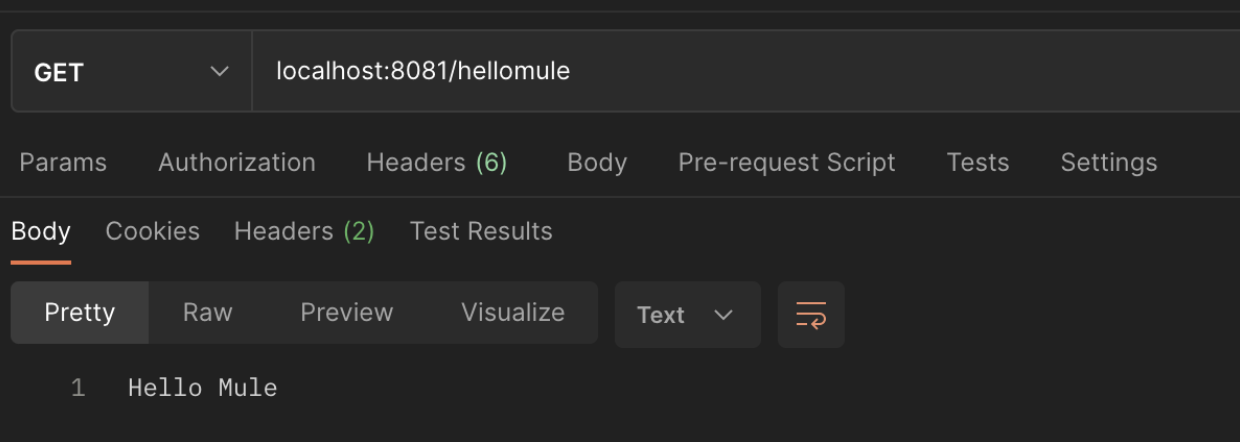
Go to your REST Client and send a request to the local application.
localhost:8081/hellomuleYou should get back the Hello Mule response and a 200 OK status.
To stop the project from running locally, you can right-click again on the canvas and click Stop project hellomule.
Next Steps
Do you have any questions about the code? You can compare your Mule project with ours to make sure everything was set up correctly.
There are more best practices that we didn’t cover in this tutorial, but these are the basic ones you should always have on your Mule projects. In the next tutorial, we’ll show you how to secure your properties before deployment and how to add the env property in CloudHub to reference the dev.properties file.
Click on the Next button below to continue to the next tutorial.


Try Anypoint Platform for free
Start your 30-day free trial of the #1 platform for integration, APIs, and automation. No credit card required. No software to install.
Questions? Ask an expert.
