Introduction
Git is a free and open-source distributed version control system that is designed to protect your data between versions, and enable developers to share changes to their code cross-organizationally. Git and Anypoint Studio combined is powerful when you are working on a team where you will need to track changes made to integrations developed in Anypoint Studio. In this tutorial, learn how to set up the EGit Plugin which allows you to commit, clone, pull and push to repositories directly from inside the Anypoint Studio IDE.
The first step is to Sign up for Anypoint Platform for free. Click the button below to create a free account.
Already have an account? Sign in.
Initial Commit to the Git Repository
Anypoint Studio 7.5 + version has git plugin packaged with Studio installation which means that you no longer need to install the Egit plugin. Using Egit plugin you can:
- Synchronize your API specification with Design Center
- Check-in your code to git repositories
- You can clone an existing Git repository
- Create Git repositories and more
Initial Commit to Local and remote repository: As a part of a team of developers, you may be using an SCM (Source Code Management) tool such as git to keep track of changes in an application, you will need to create a repository in a shared location on Git to check-in your Mule application code from Studio so other developers can collaborate.
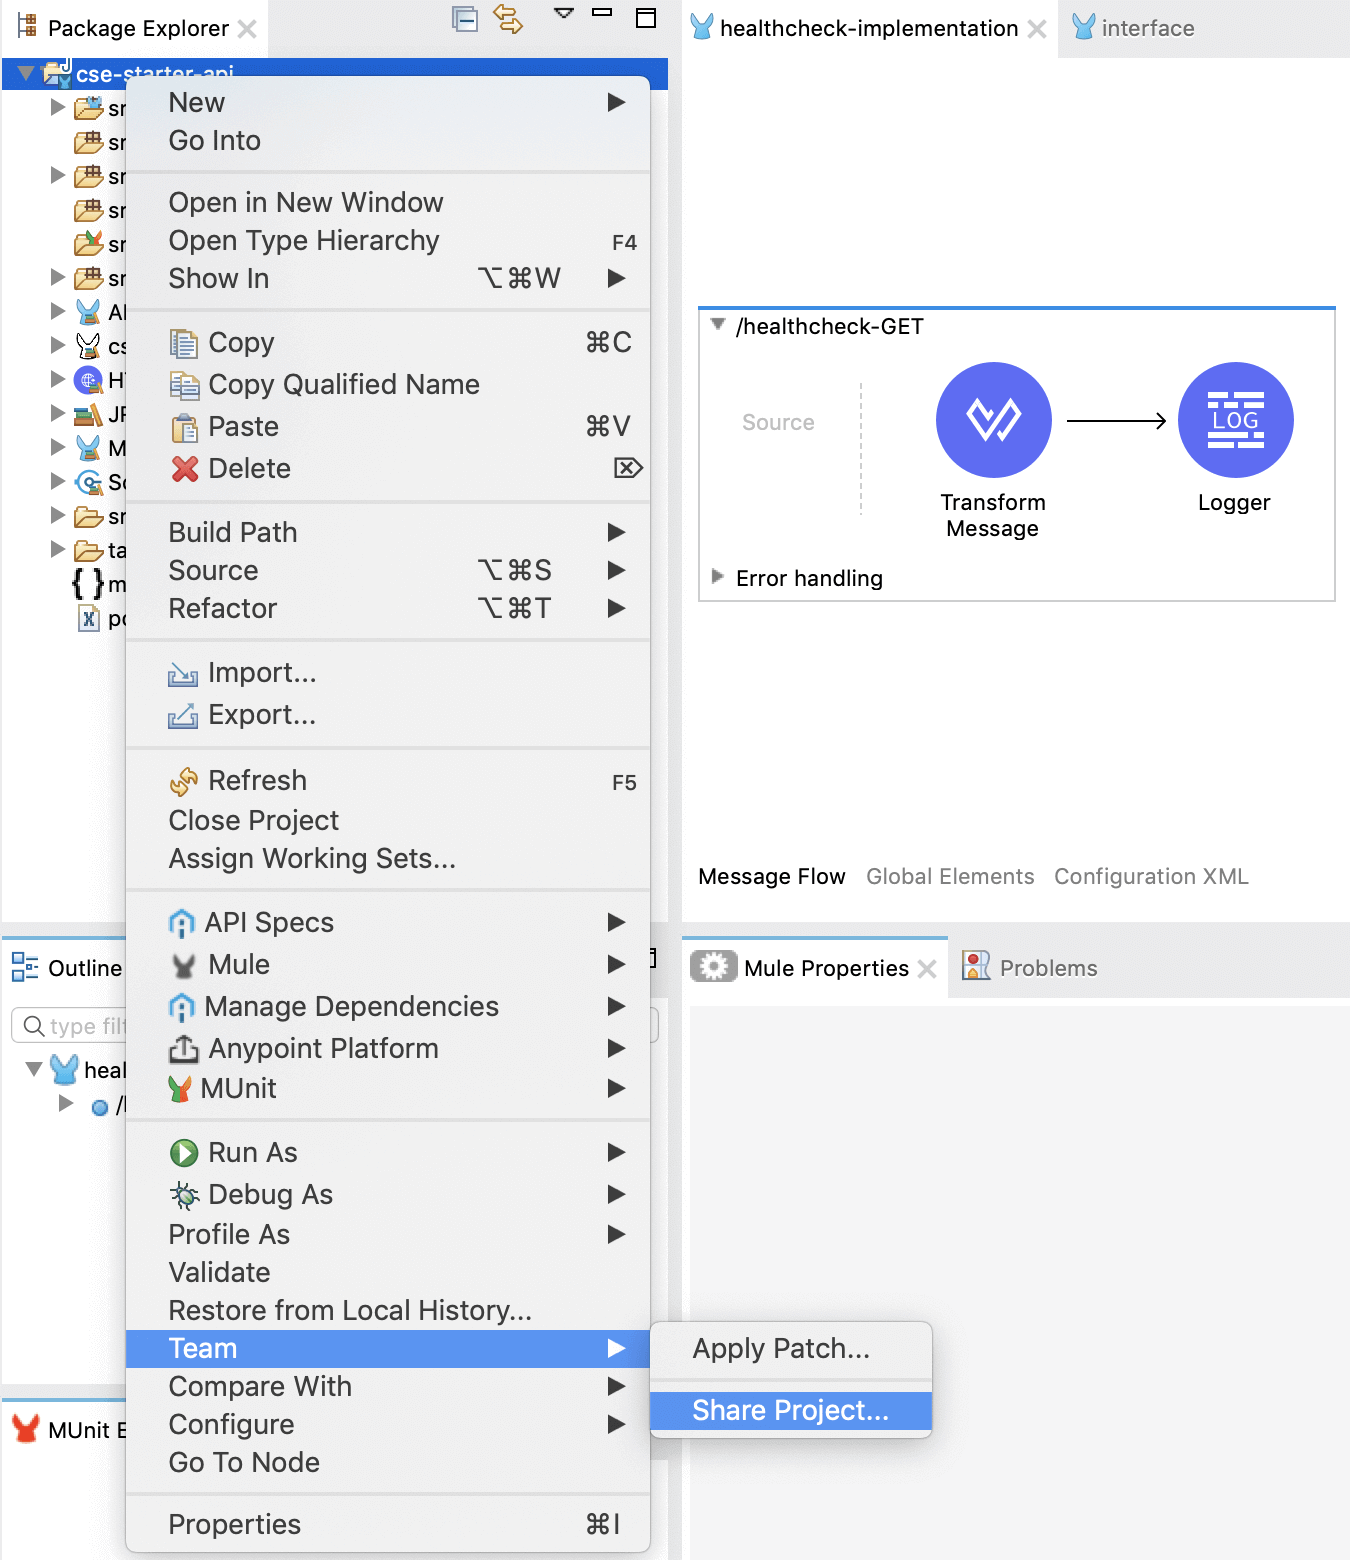
To create a local repository, In the Package Explorer, right-click the name of your project → select Team → select Share Project
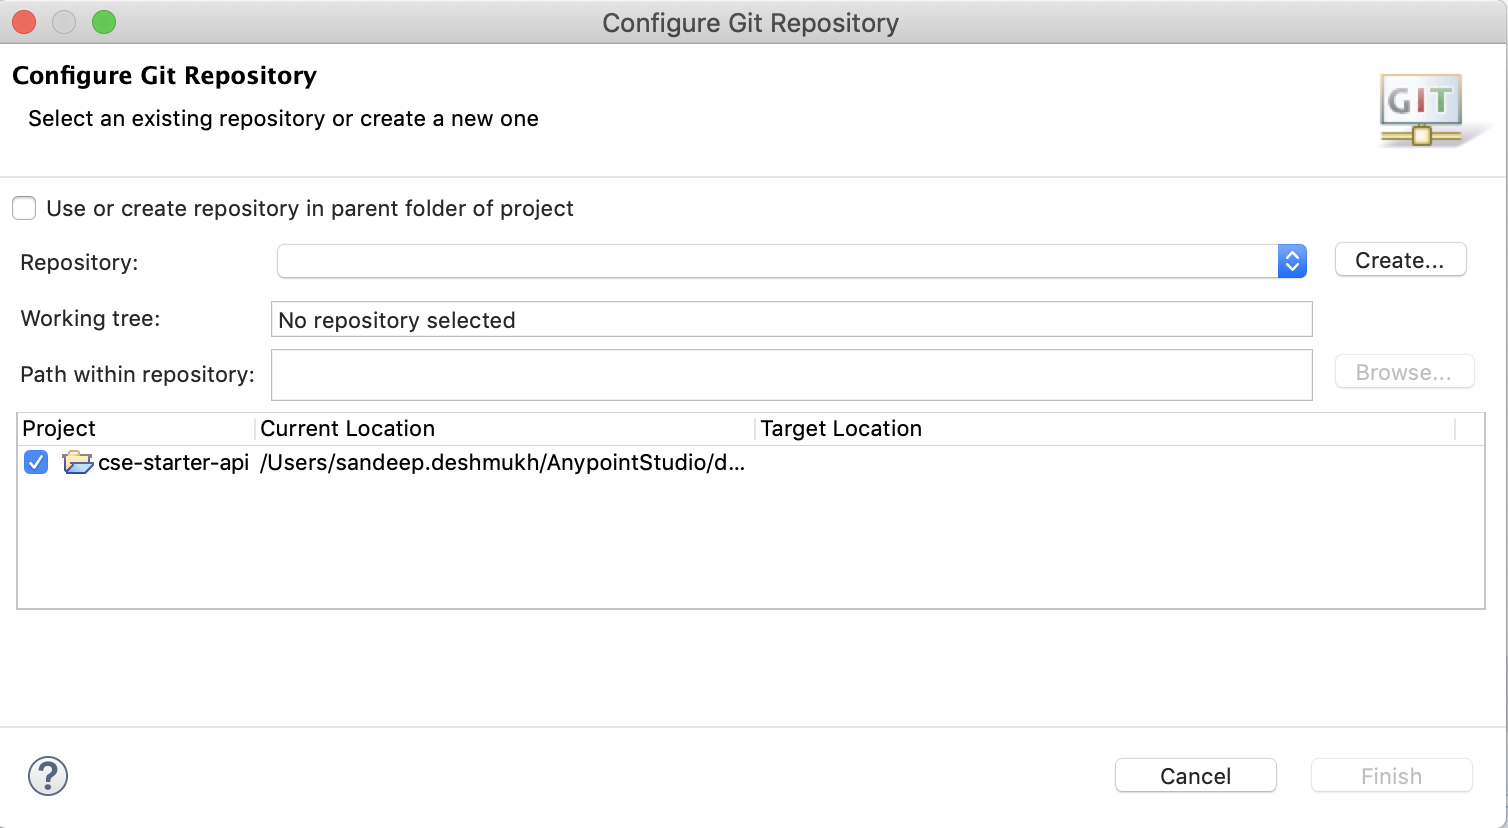
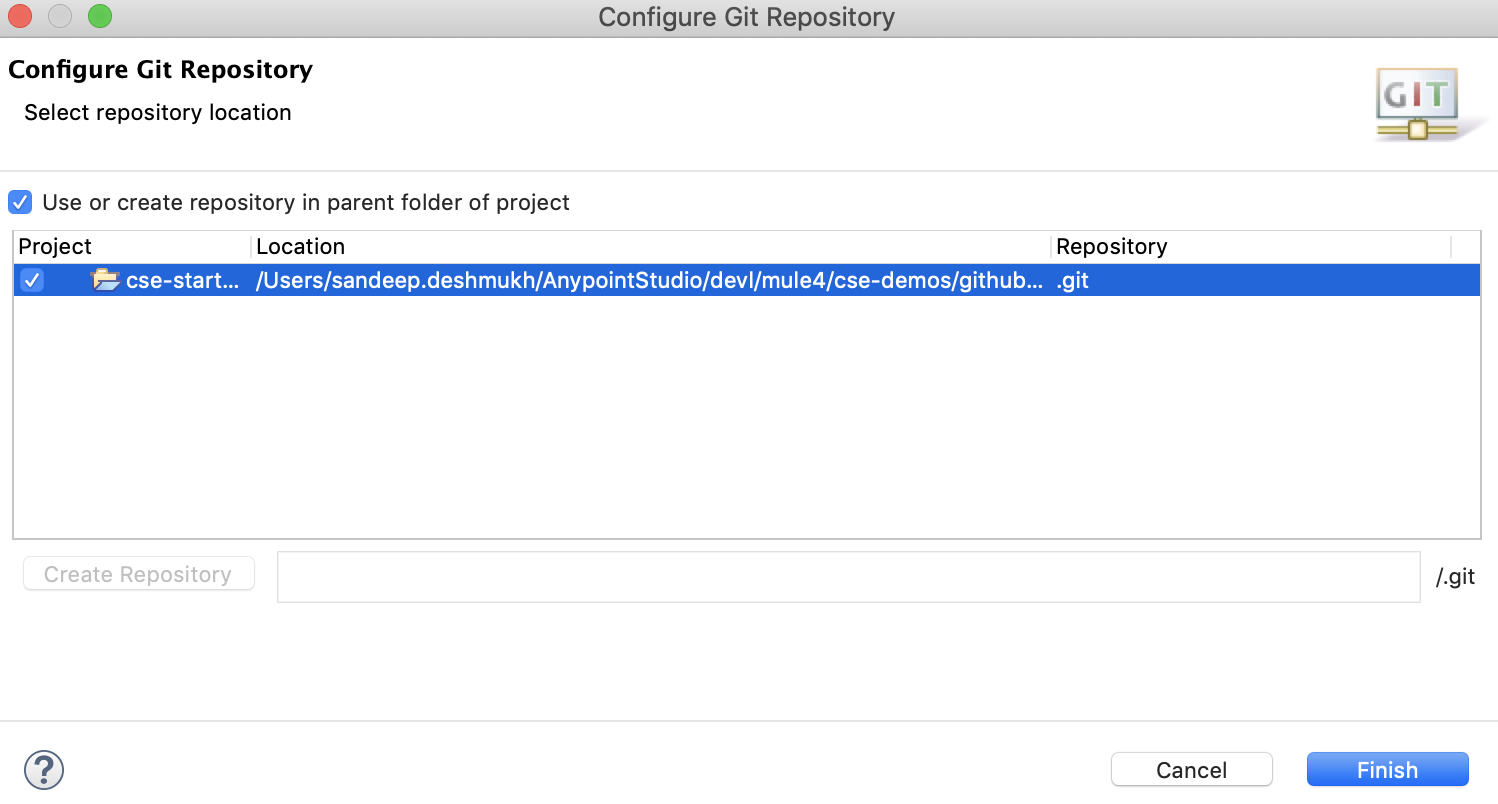
In the Configure Git repository window, Select the checkbox for Use or Create a repository in the parent folder of the project. (Note: Using this method you will make sure that the .git folder is created in your project root and not your parent folder.)
Click on the Create Repository button and then finish
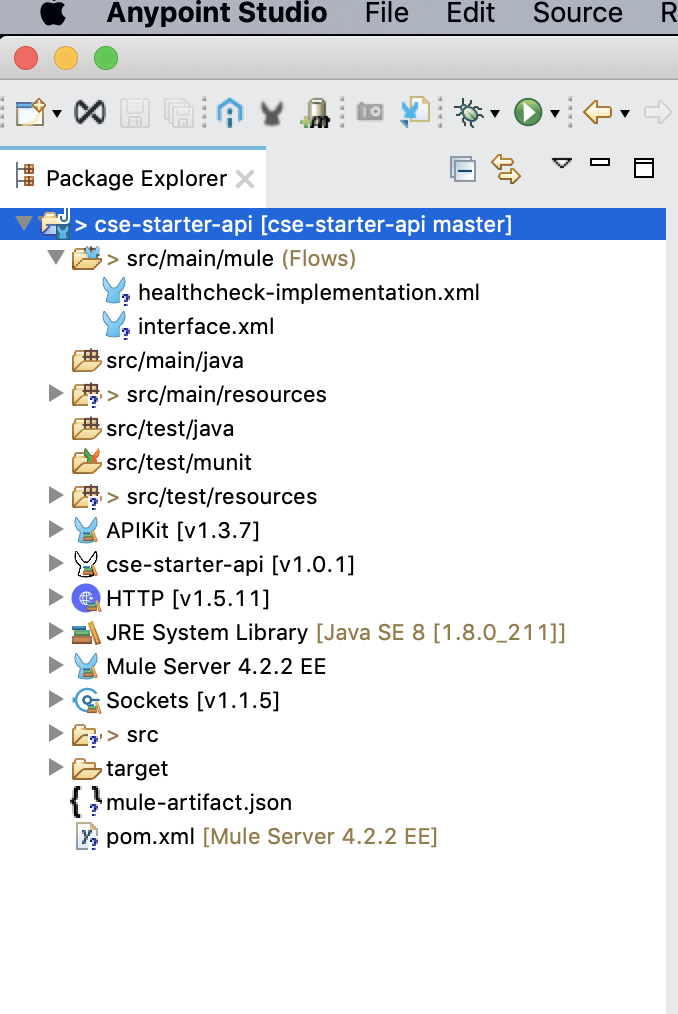
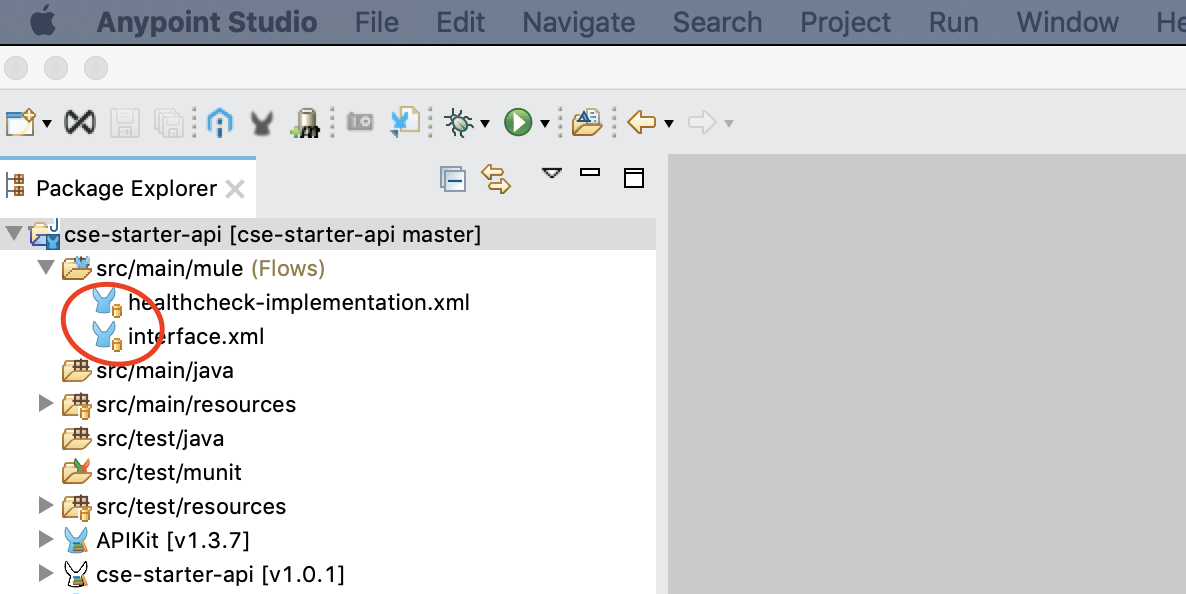
In the Anypoint Studio package explorer, you can see the arrow mark and questions mark symbols for your studio files. This icon indicates that you have created a Git repository for your project on your local drive, but you have not yet registered it and are not yet tracking changes to the project.
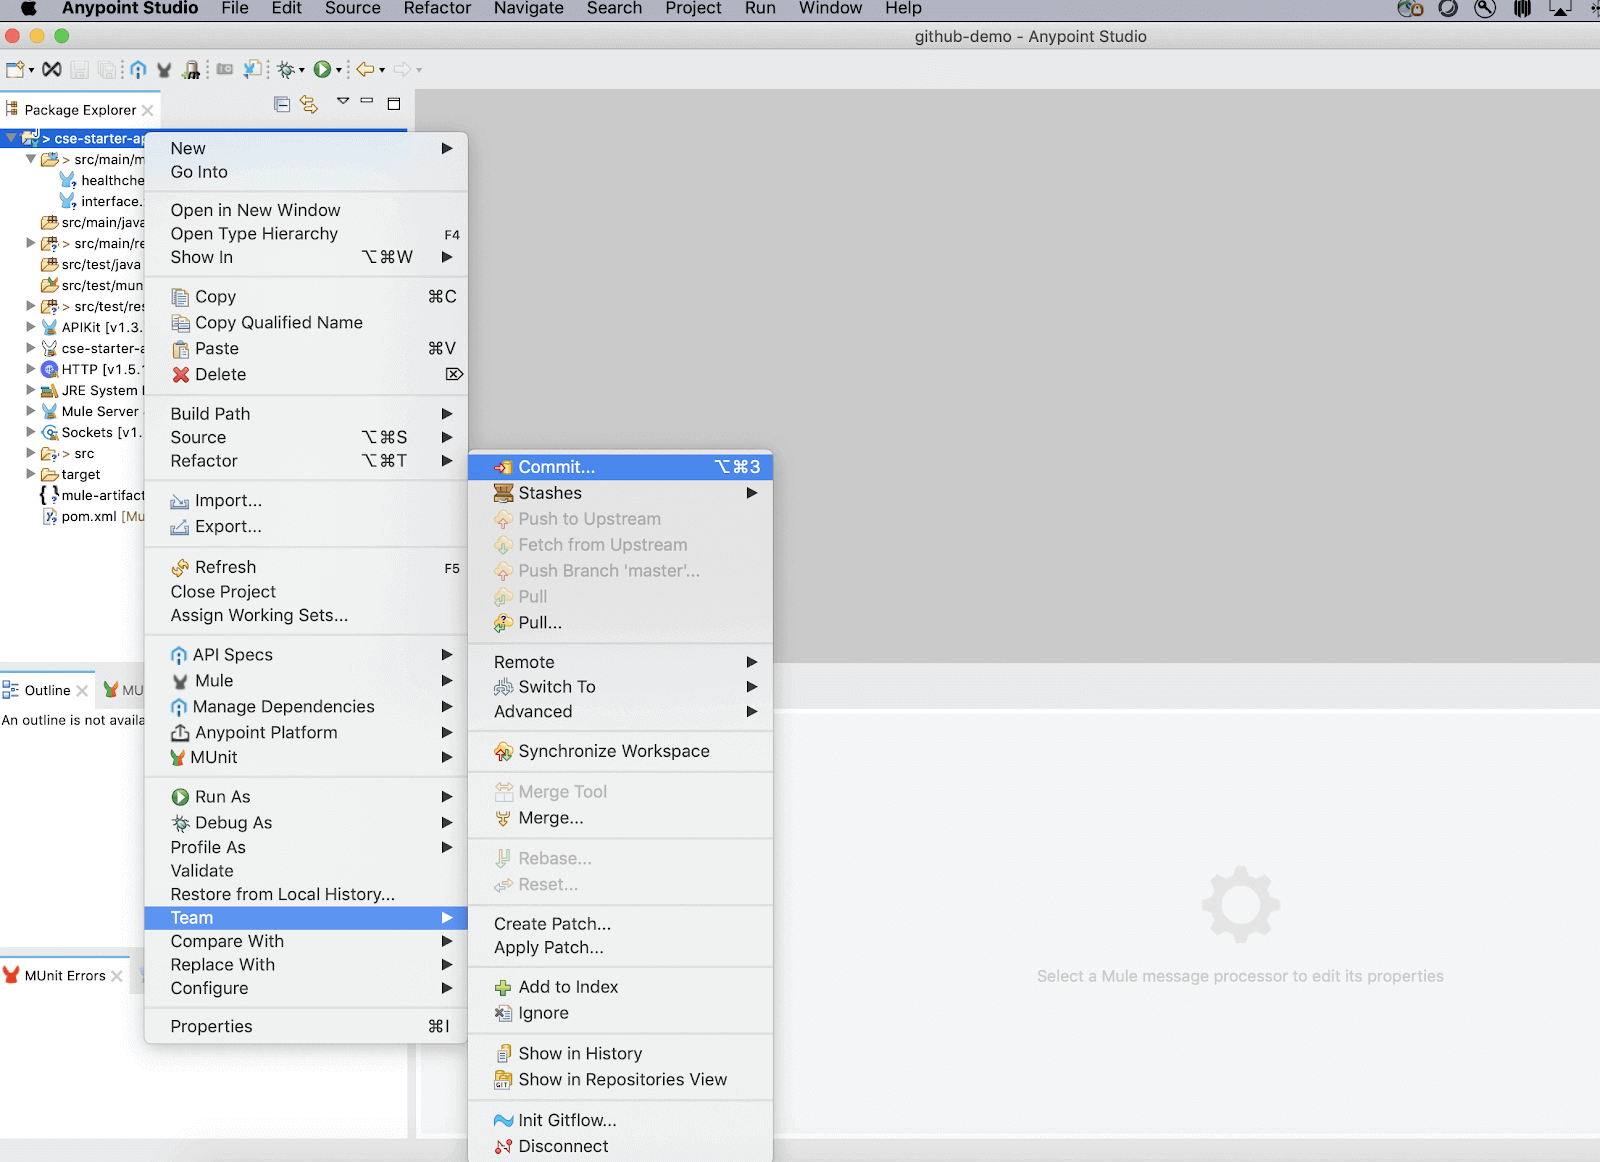
Now you need to register the local repository and track changes. To do this go to your package explorer, right-click to the name of your project → select Team → select Commit
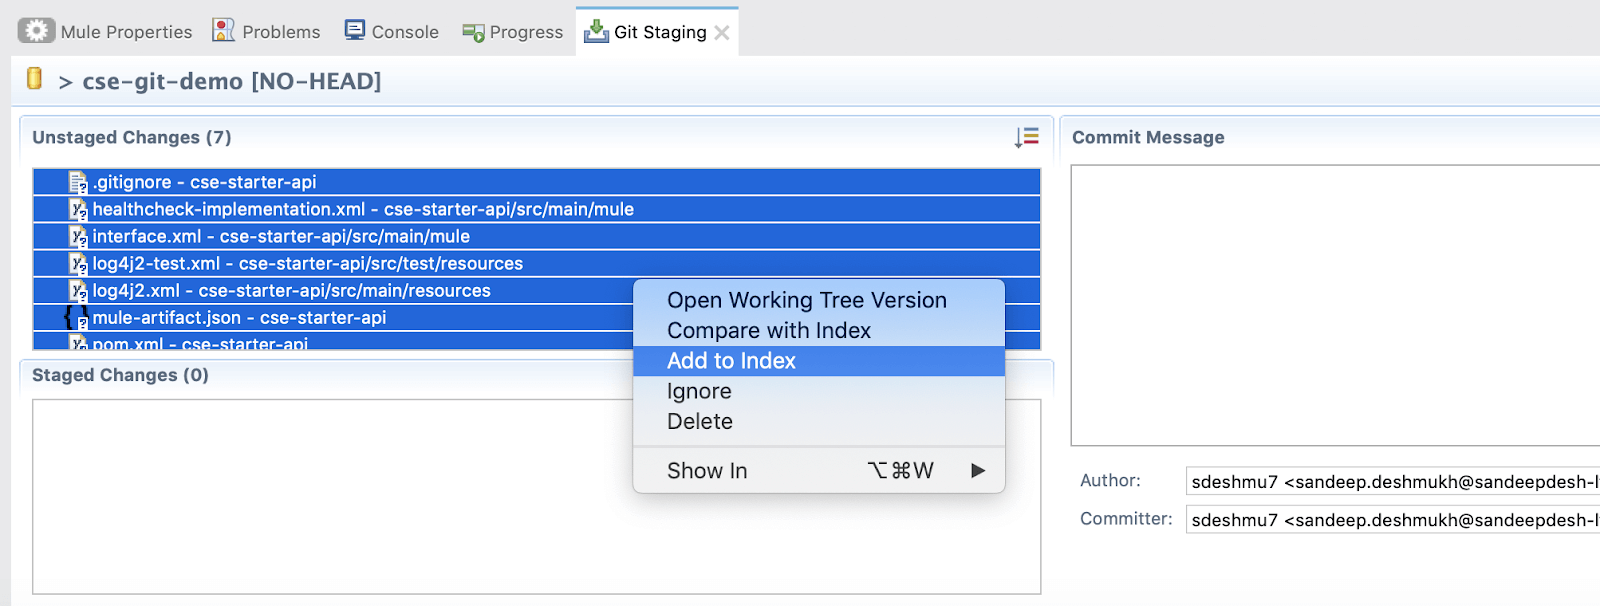
Once you have clicked on the Commit button. You will see the Git Staging tab opened up. Select all the files that you want to check-in in Git then right-click on the selected files and click on Add to index.
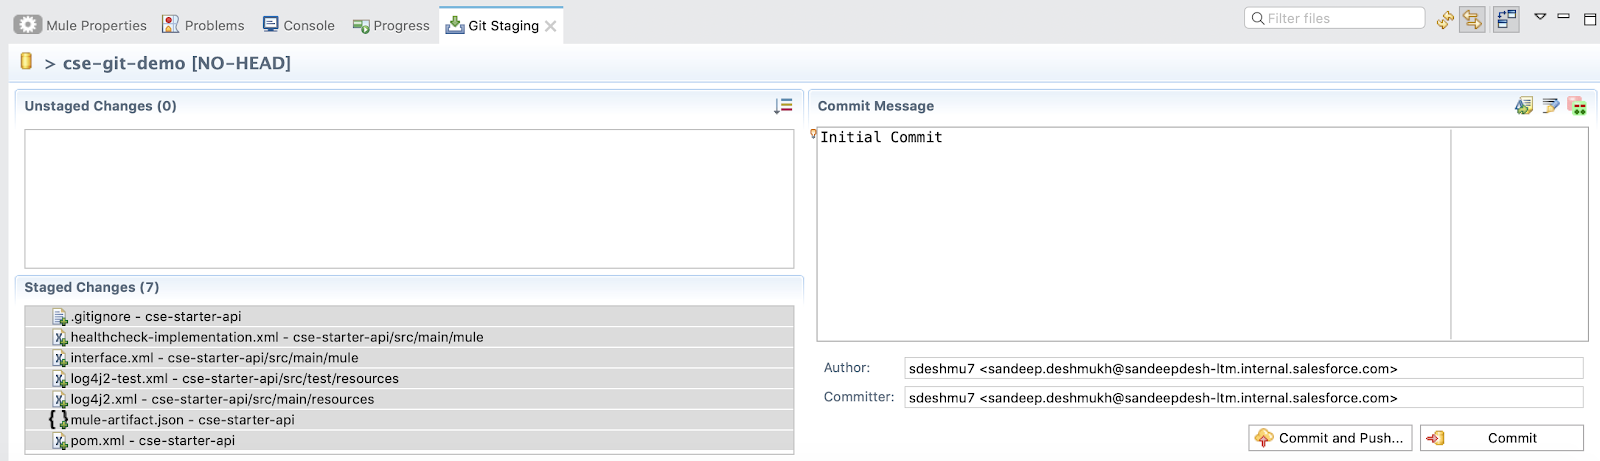
Add a commit message to the text box and click on the ‘Commit’ button. Your changes will be stored in the local git repository.
In the package explorer, there is a yellow barrel icon which indicates that the changes have been committed to your local git repo. Also, there is no more arrow icon next to the project name.
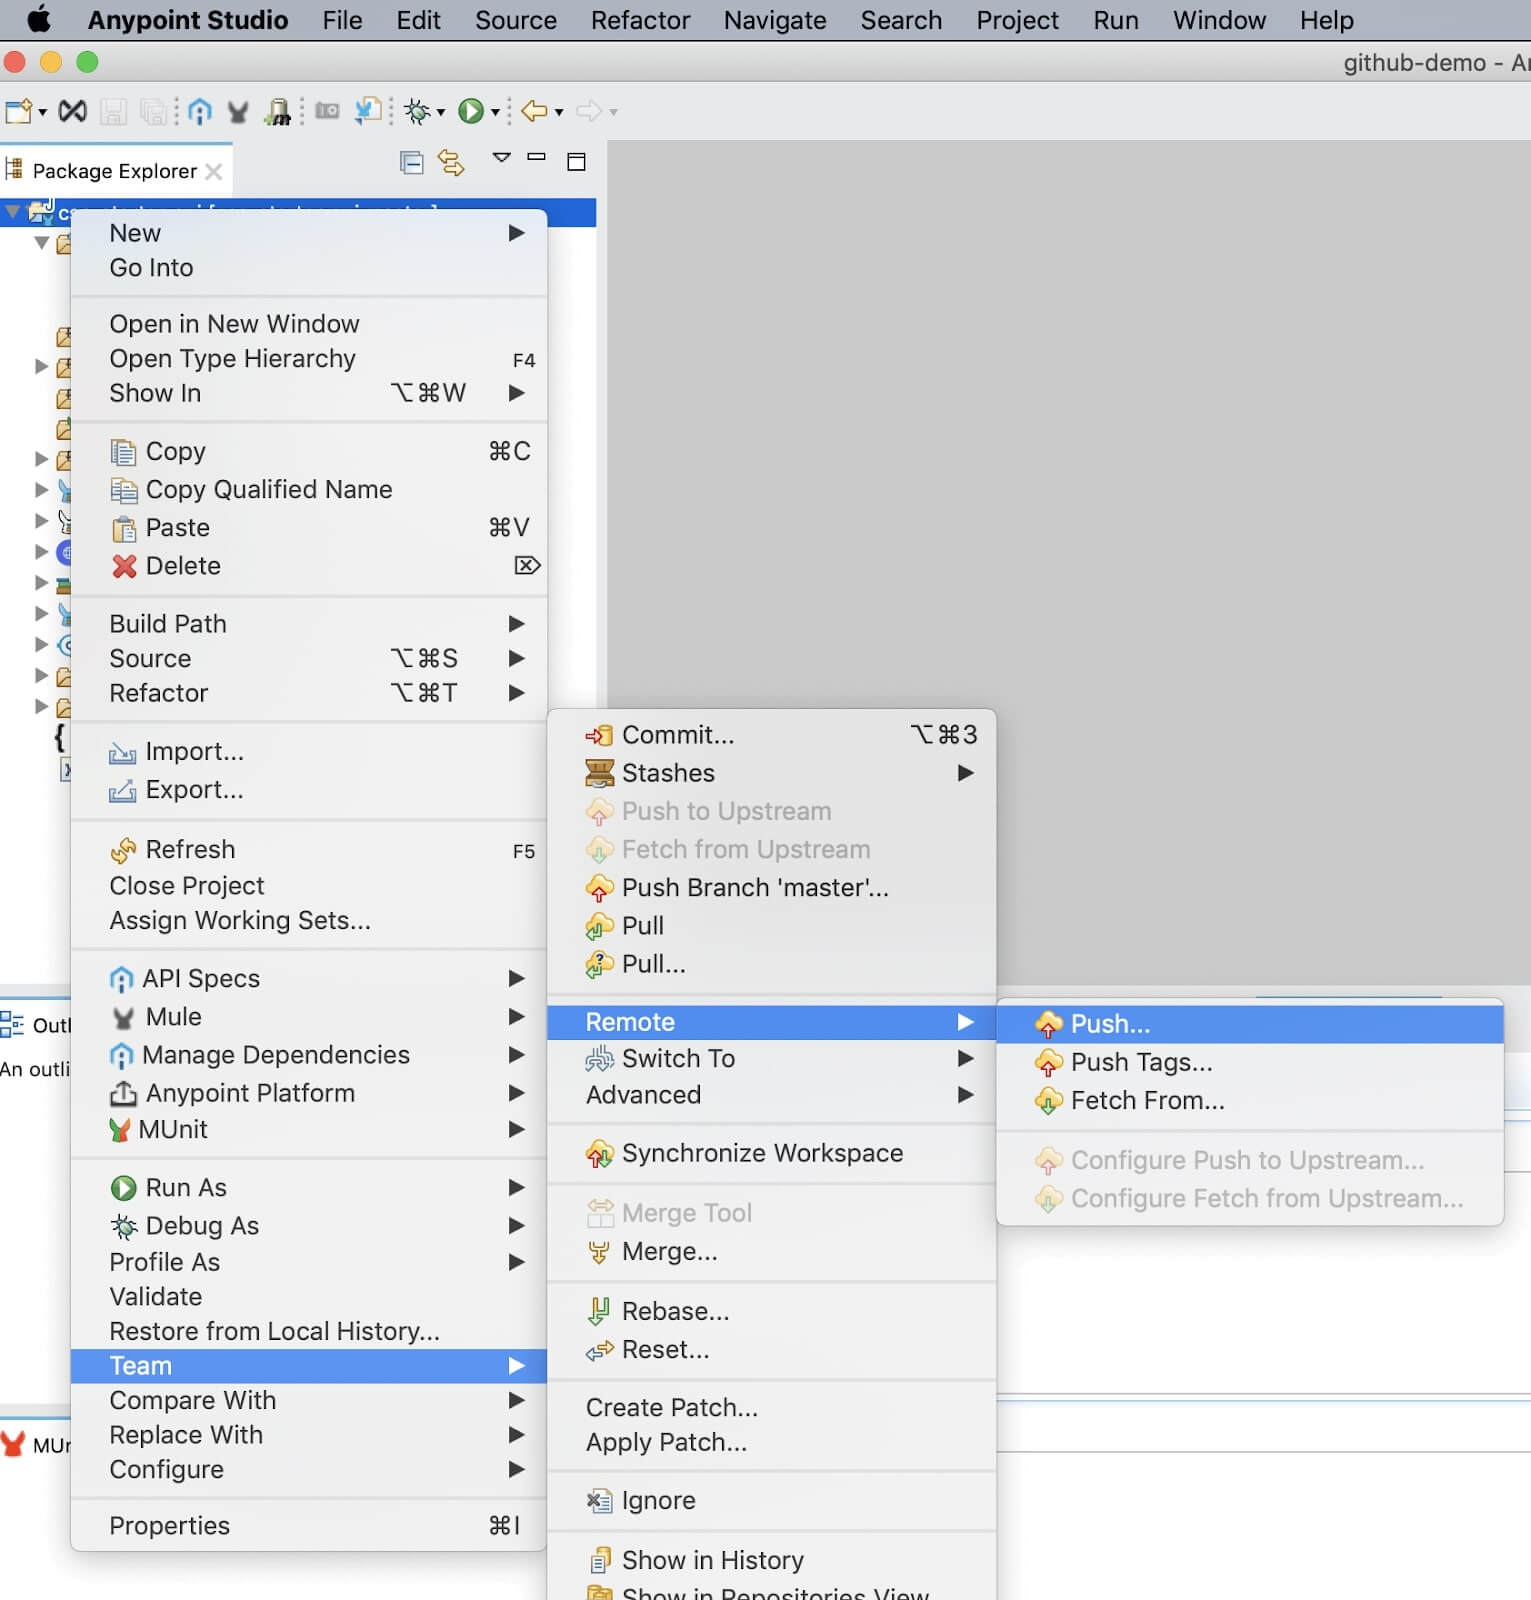
Next, commit to your remote git repository. In the Package Explorer, right-click the name of your project navigate to Team → select Remote → Push
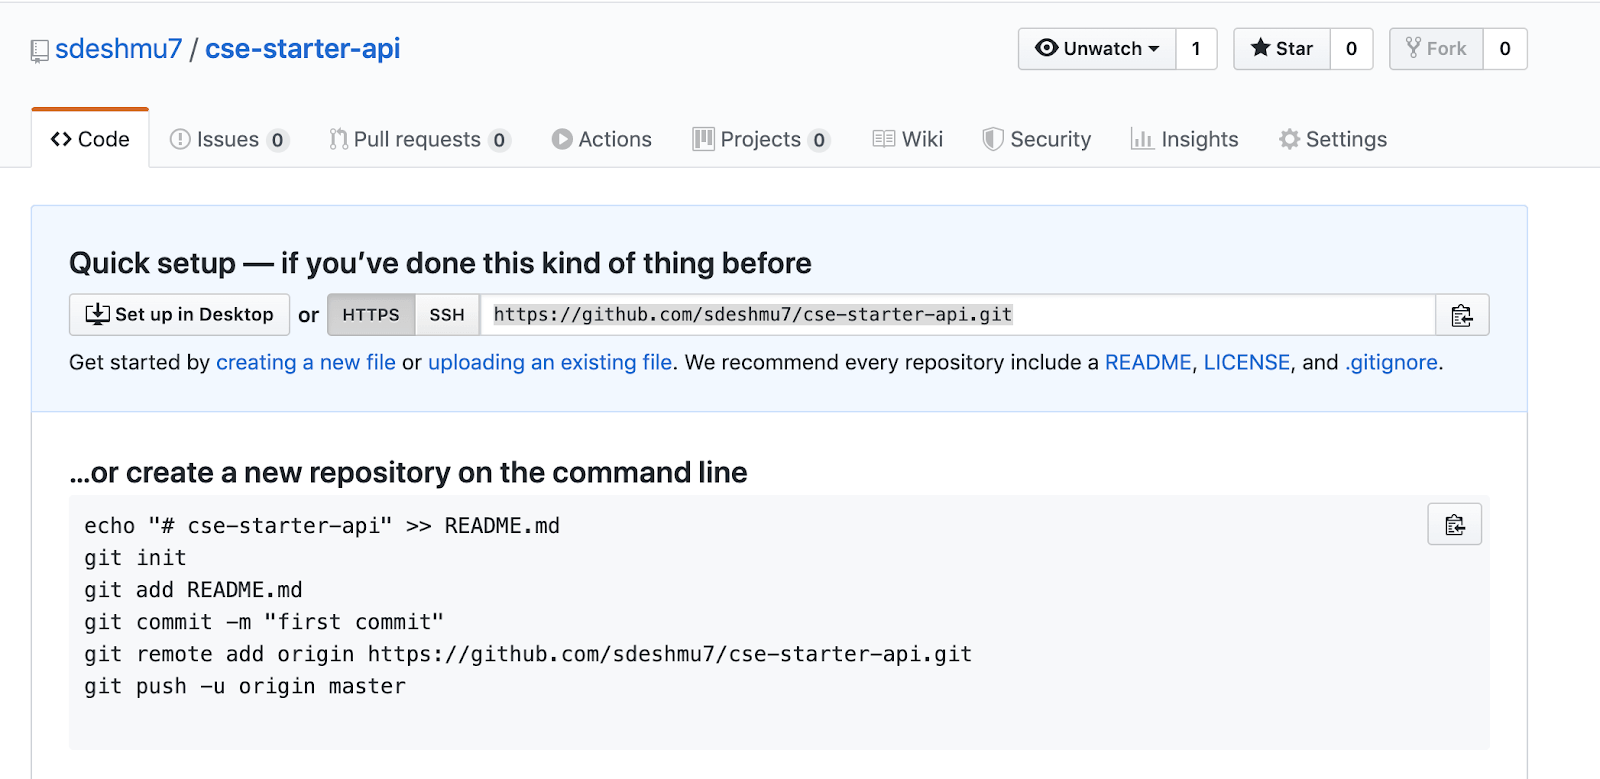
Login to Github.com or an appropriate system like Gitlab, AzureDevOps etc. where you have the Repo created and copy the remote repository HTTPS URL to clone in your clipboard.
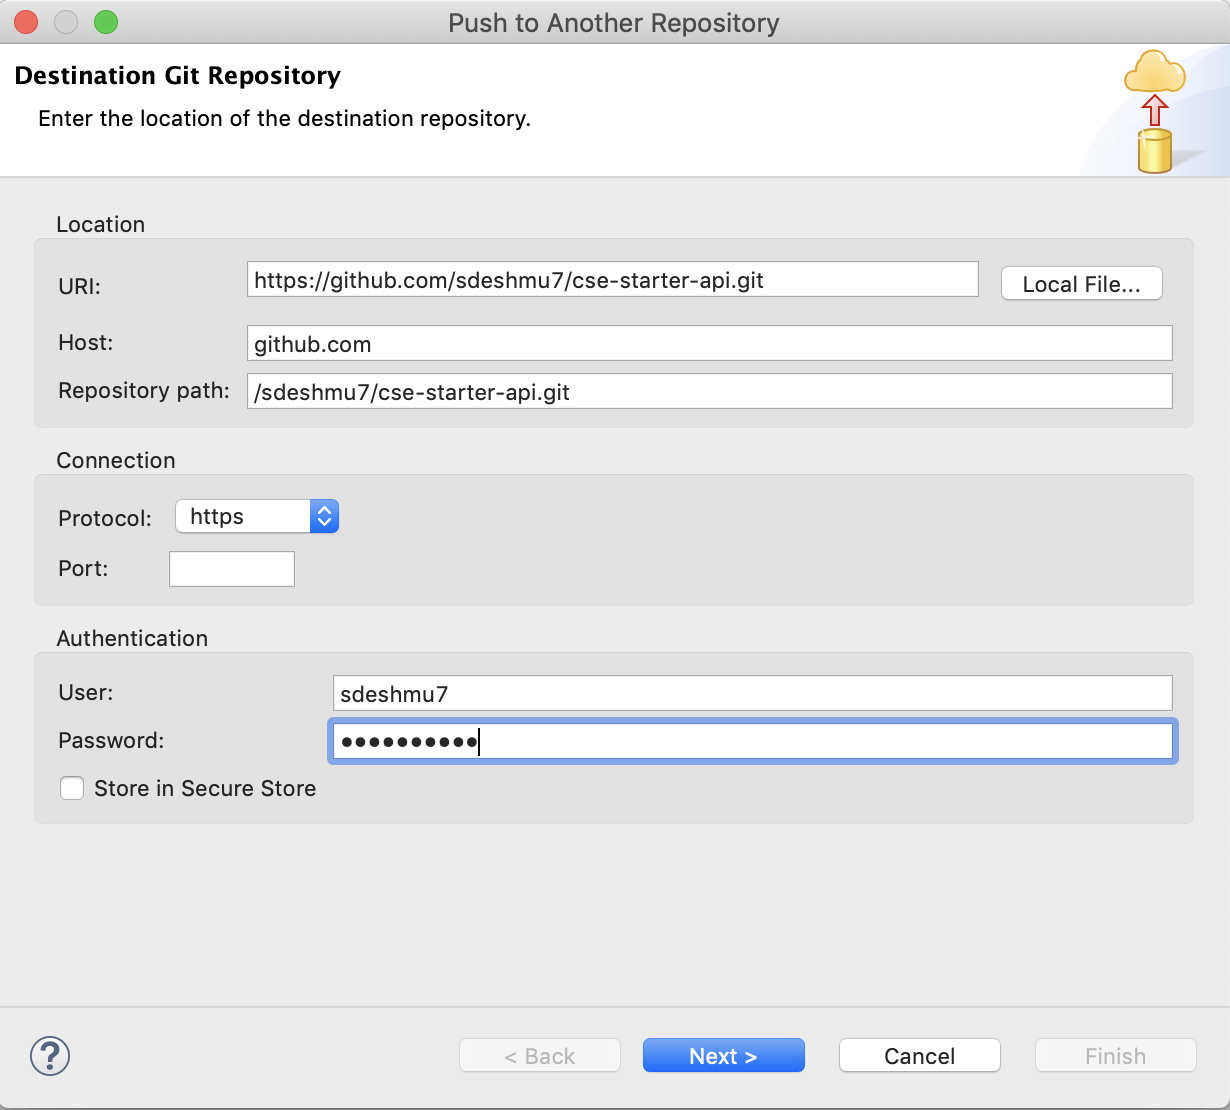
Paste the URL of the empty repository created in Remote Git. If you do not have token authentification enabled for your Org in GitHub. Use Basic authentication and enter the username and password for your USER ID.
If you have two-factor authentication enabled for your Org then you are required to use the token-based authentication. (According to this blog post you will have to use tokens for authentication even for a Git repository on GitHub.com after H2 of 2021).
First, go to https://github.com and log in, now you can see your profile image in the top right corner. Select the Settings menu under your profile image at the top right of the screen.
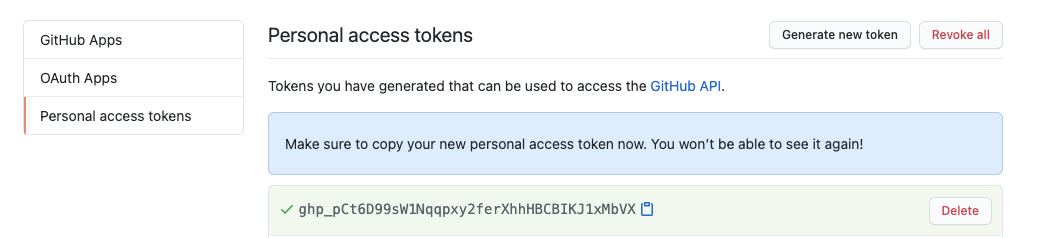
Go to the Developer Settings button at the left under Account Settings. Choose Personal Access Tokens then hit Generate new token button to create one. Now give the token a description. Define the access scope for the token and then copy the generated token. You can then paste the token into the password field.
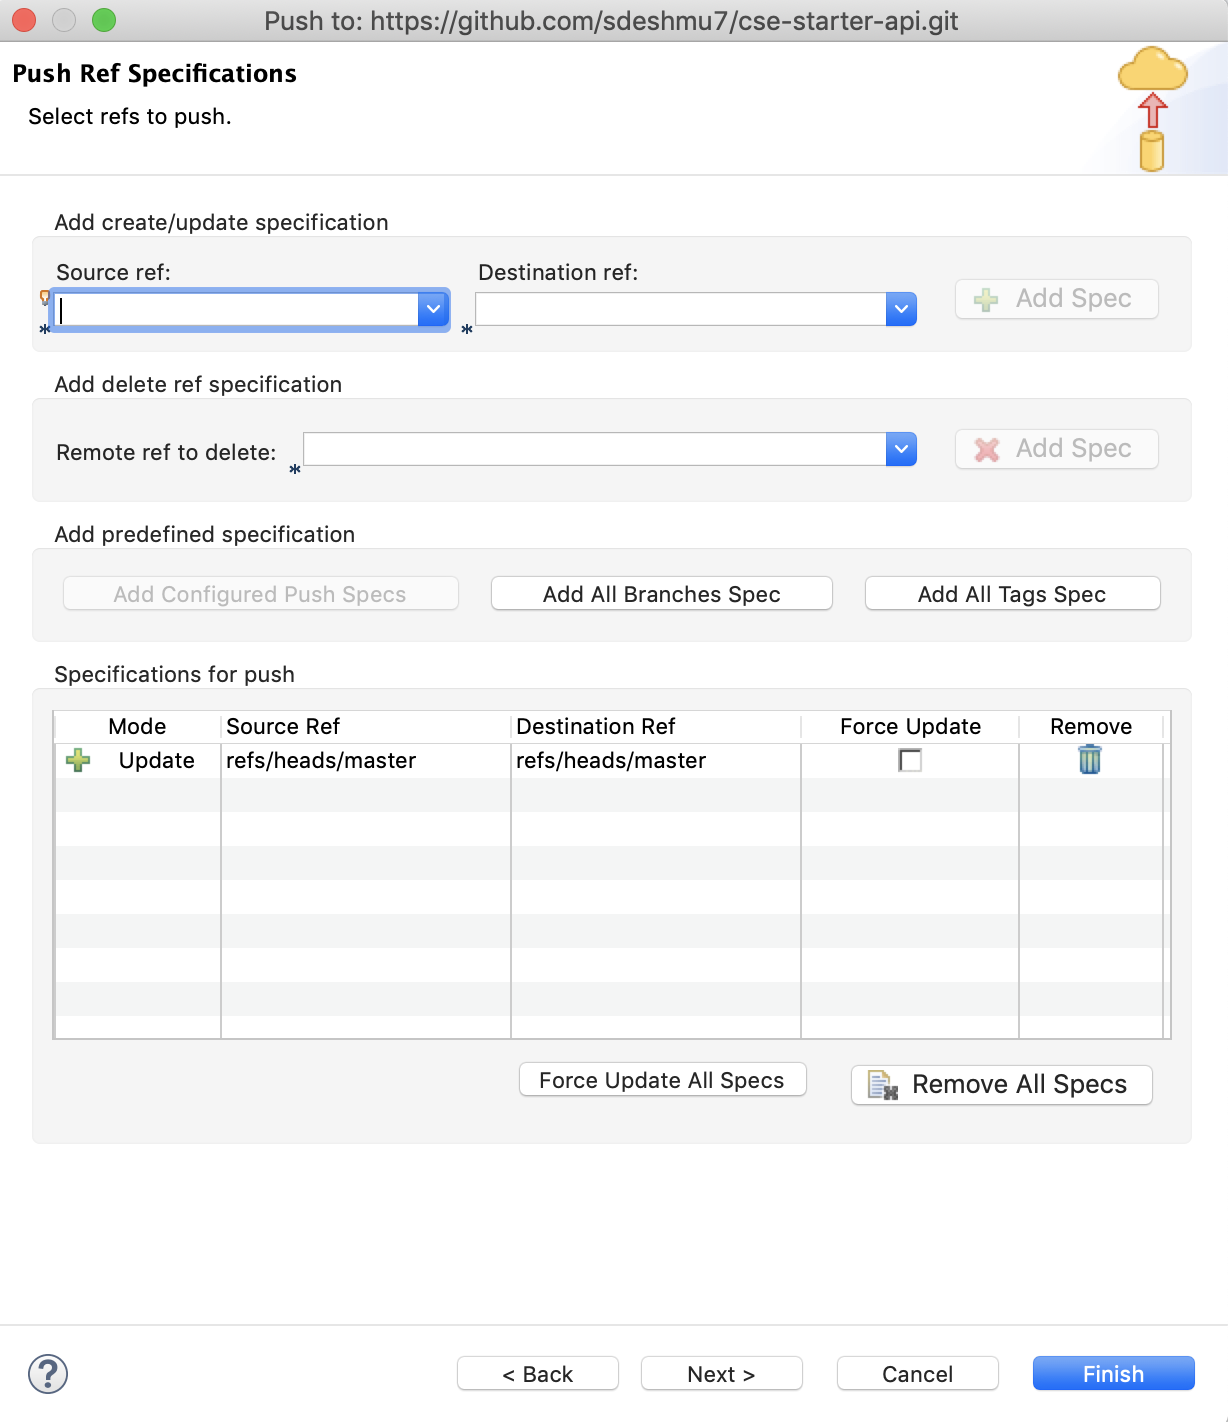
Select the Specification for Push from the Source ref and Destination ref and then Click on Add Spec, then Click on Finish.
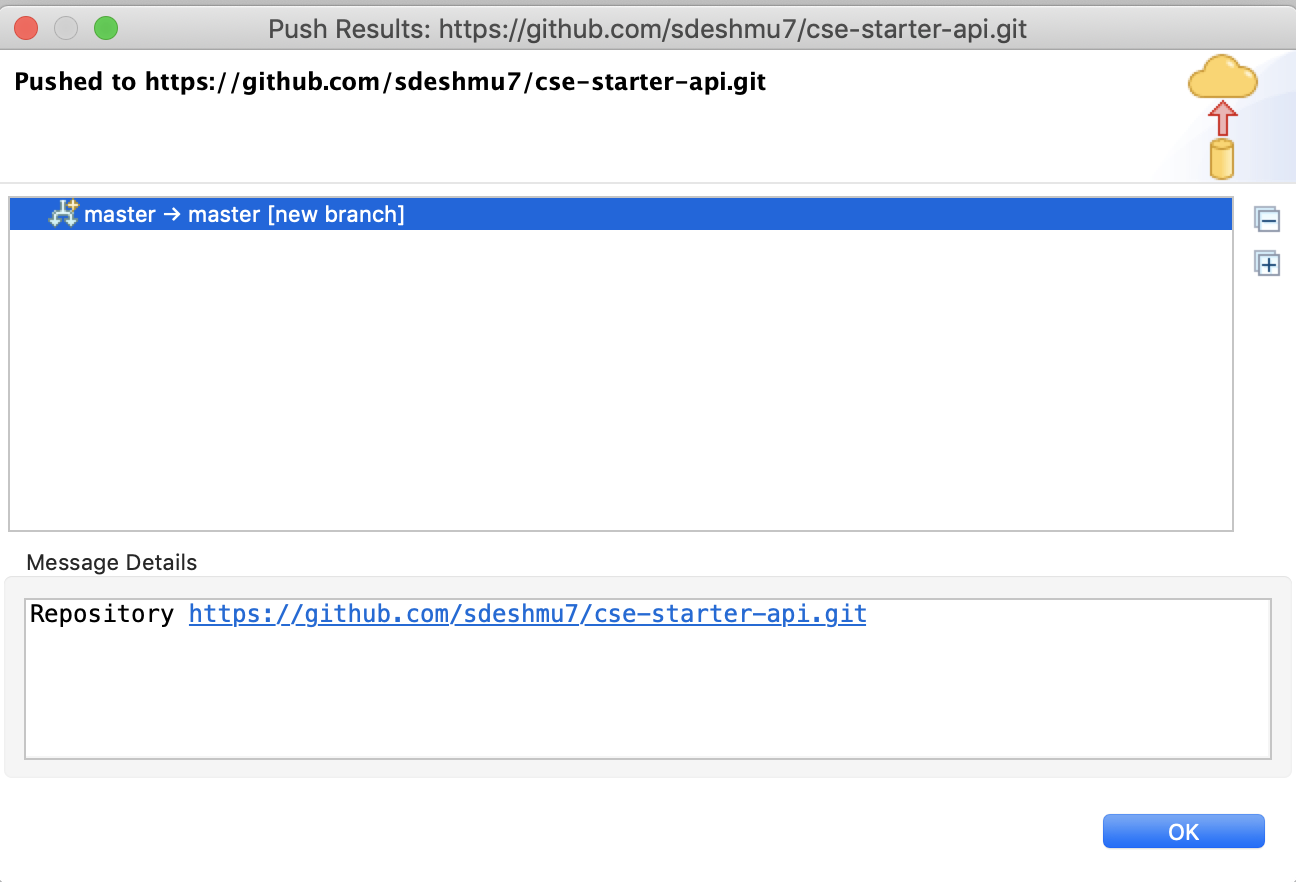
After the changes are committed to the remote repository you will see a window which will indicate that the changes are pushed successfully which is similar to the window below. Click on ‘OK’.
You have Successfully committed your changes to the remote repository in Git using the EGit plugin.
Cloning a remote repository in Anypoint Studio
When working in a team of developers it is very important to agree on a common workflow. Take into consideration factors such as the project you’re working on, deployment workflows and lastly teams personal preferences.
Cloning a project from a remote repository: After the initial commit, team members will start collaborating and adding code to the branch in development. To commit their changes to the remote repository they will first need to import a remote repository in their studio workspace. To import a repository from remote you will need to follow the steps below:
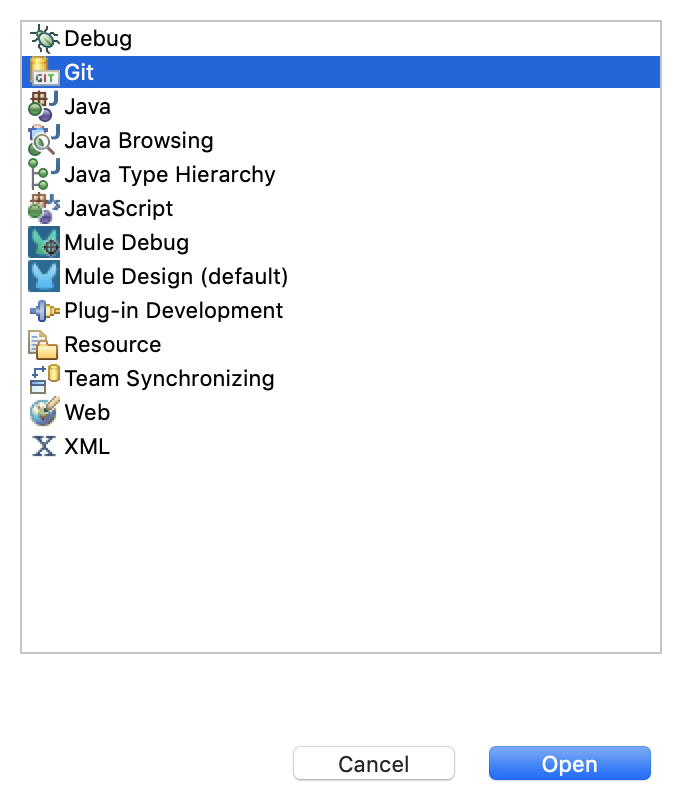
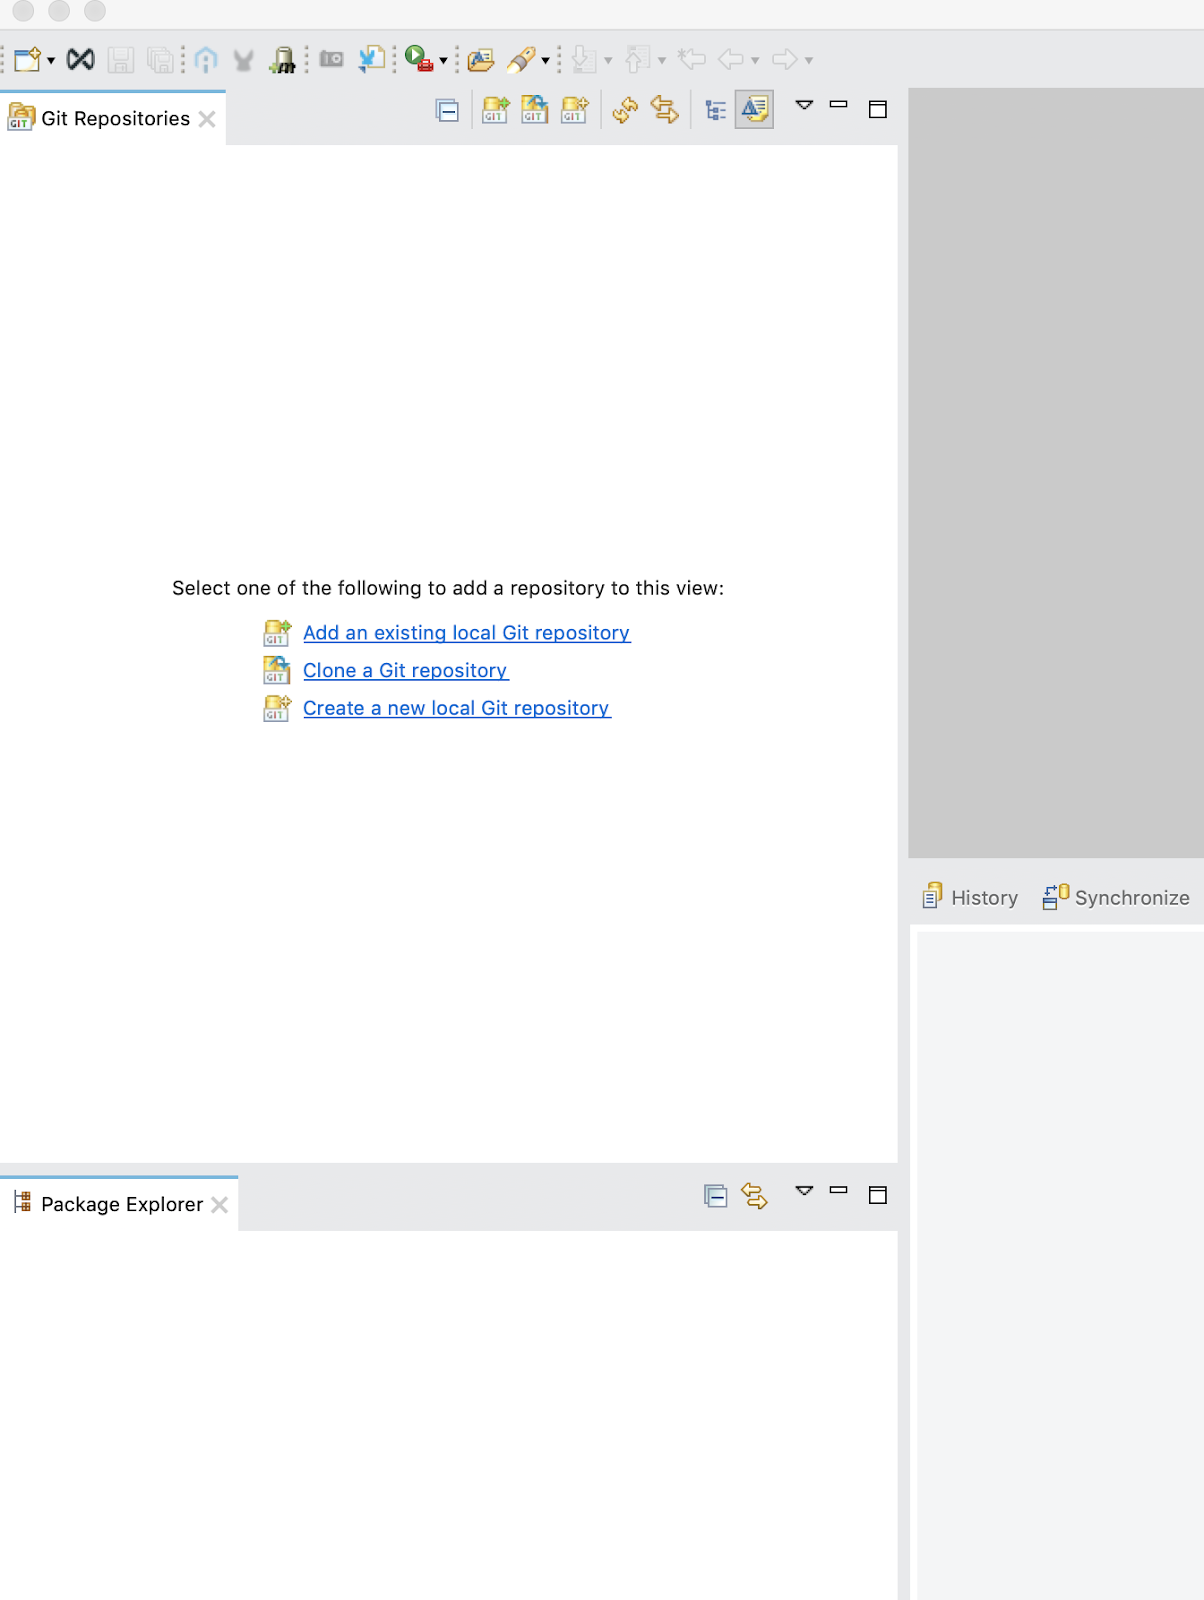
To clone a remote repository, Go to Menu bar → Window → Perspective → Open Perspective → Other → Select Git
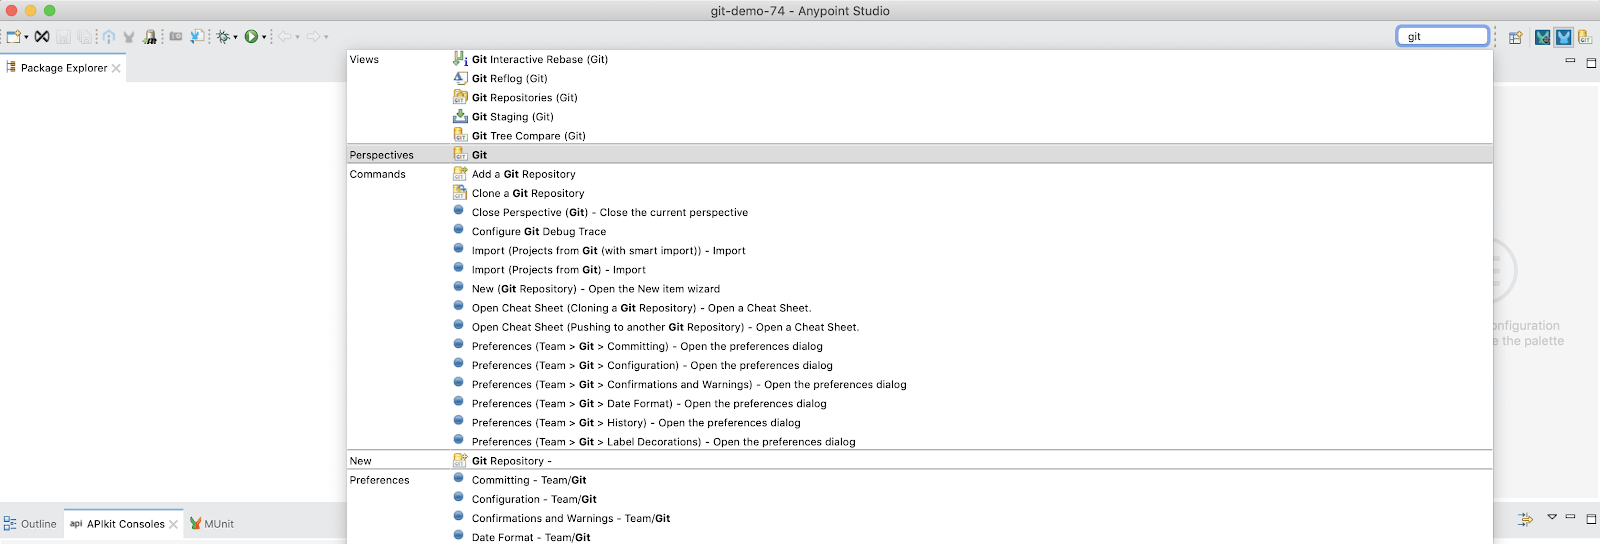
Or you can type the keyword ‘Git’ in the Quick Access text box on the toolbar. Select the option with ‘Perspective Git’
In Git Perspective, Click on the Clone a Git repository option. **Please note that if the workspace is already having projects, then you would need to use this method to clone the GIT Repo : File » Import » Search Git » Clone URI.
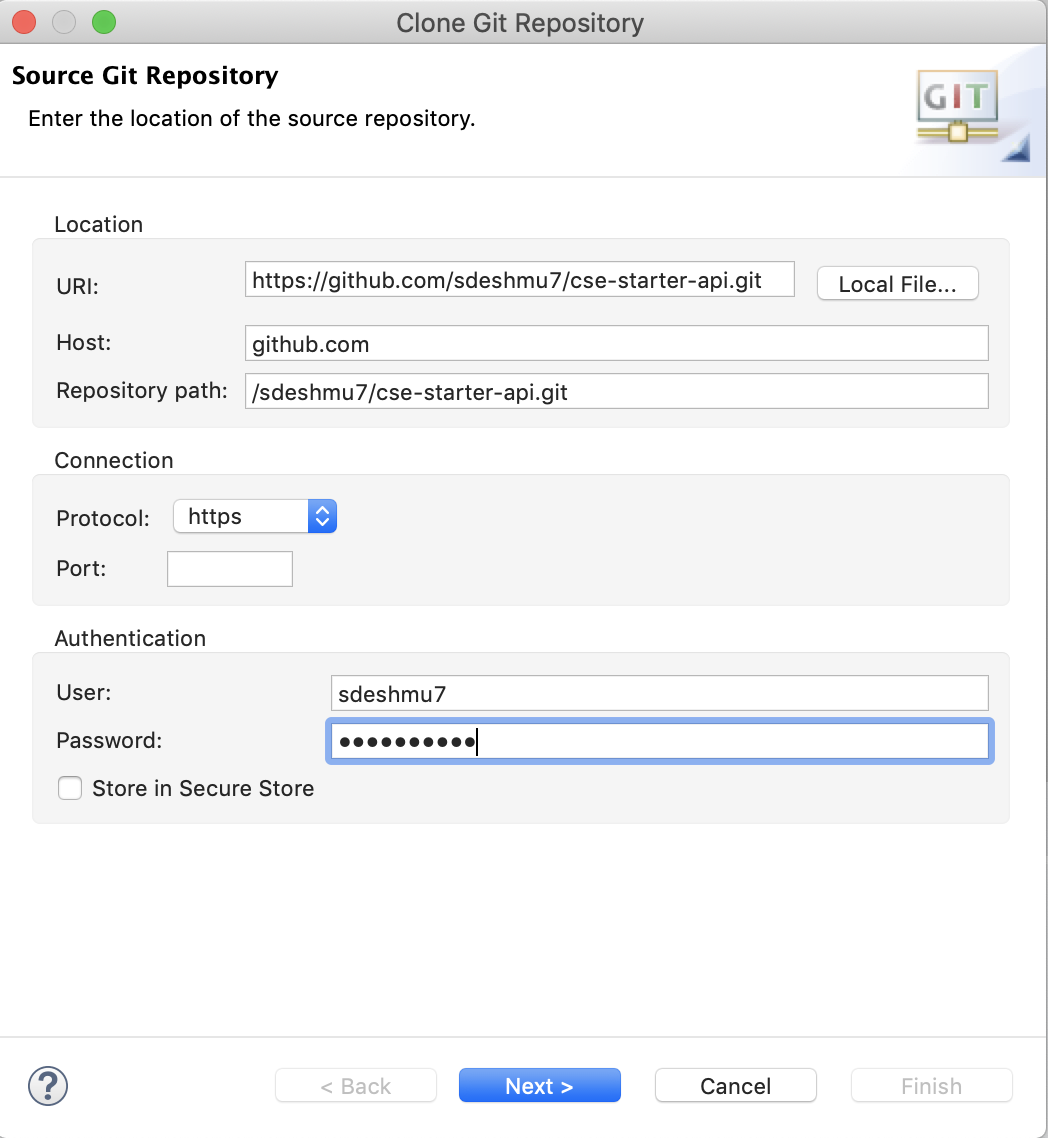
In the Clone Git Repository window, Enter the location of the remote repository i.e. your HTTPS URL.
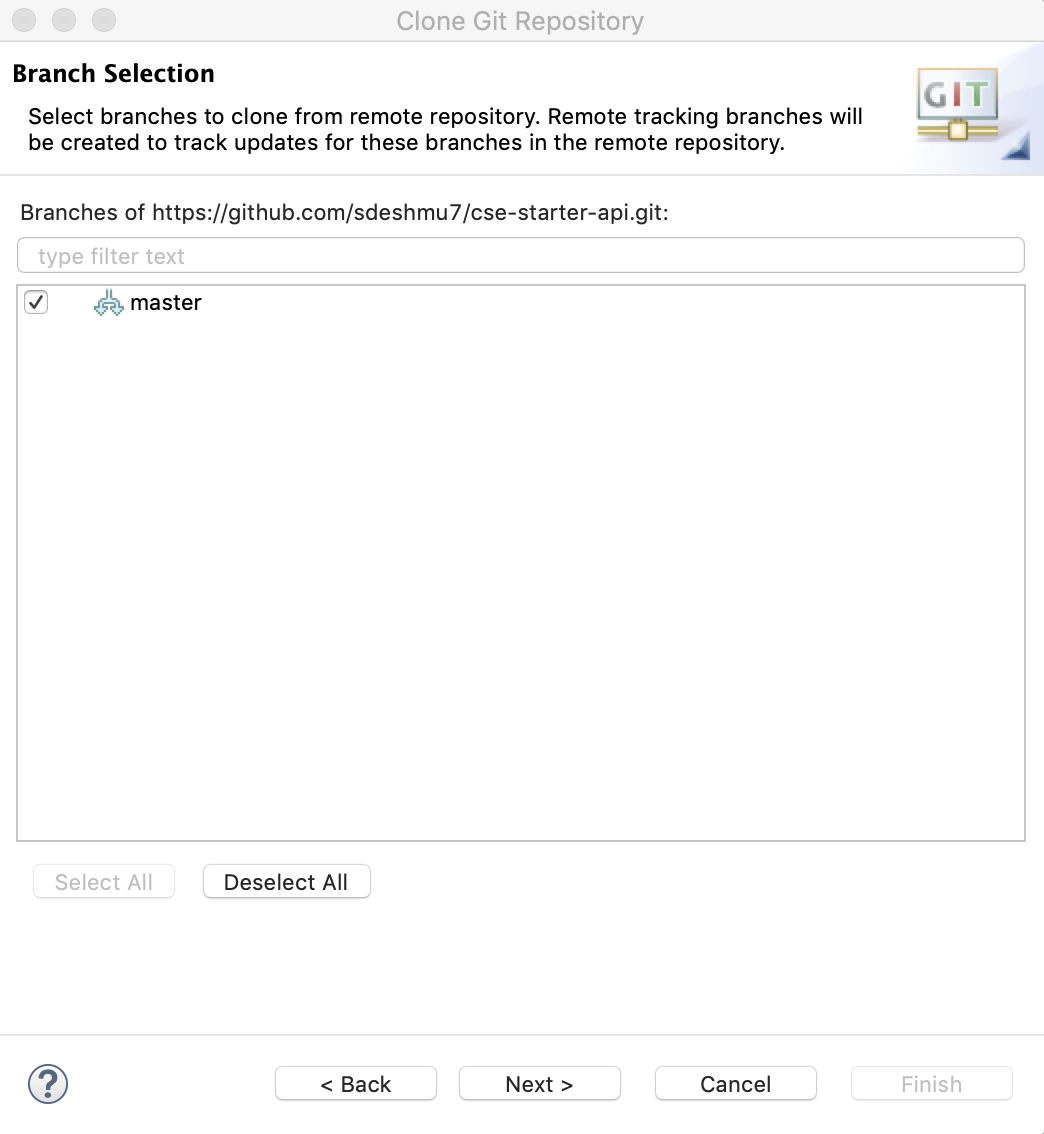
Click on Next and select the branch you want to work on. Check out the Master branch.
Select the directory you want to store the repository. This will be the same location where you will make changes to the project in your local. You can choose the location of your workspace as well. Then click Finish.
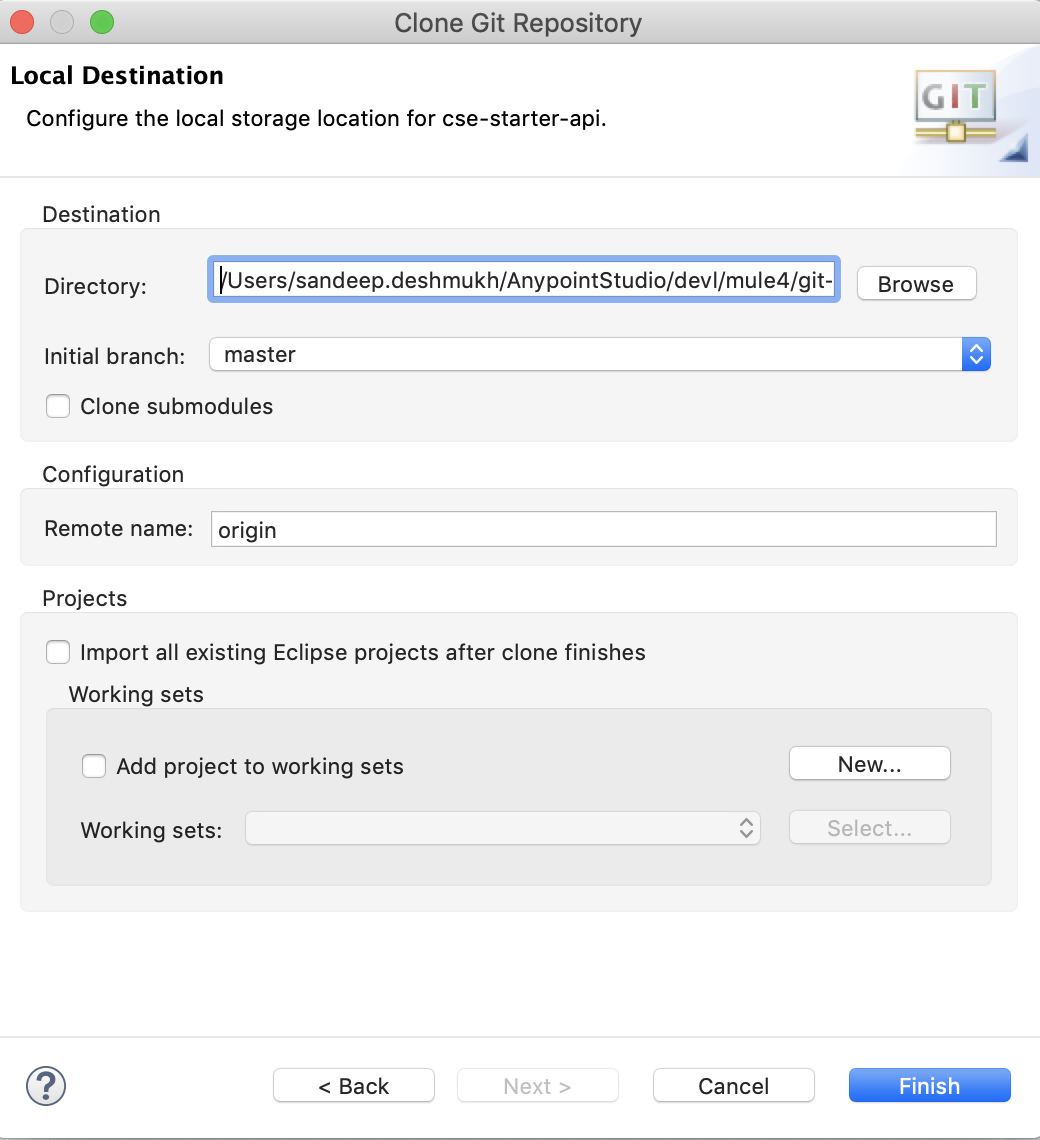
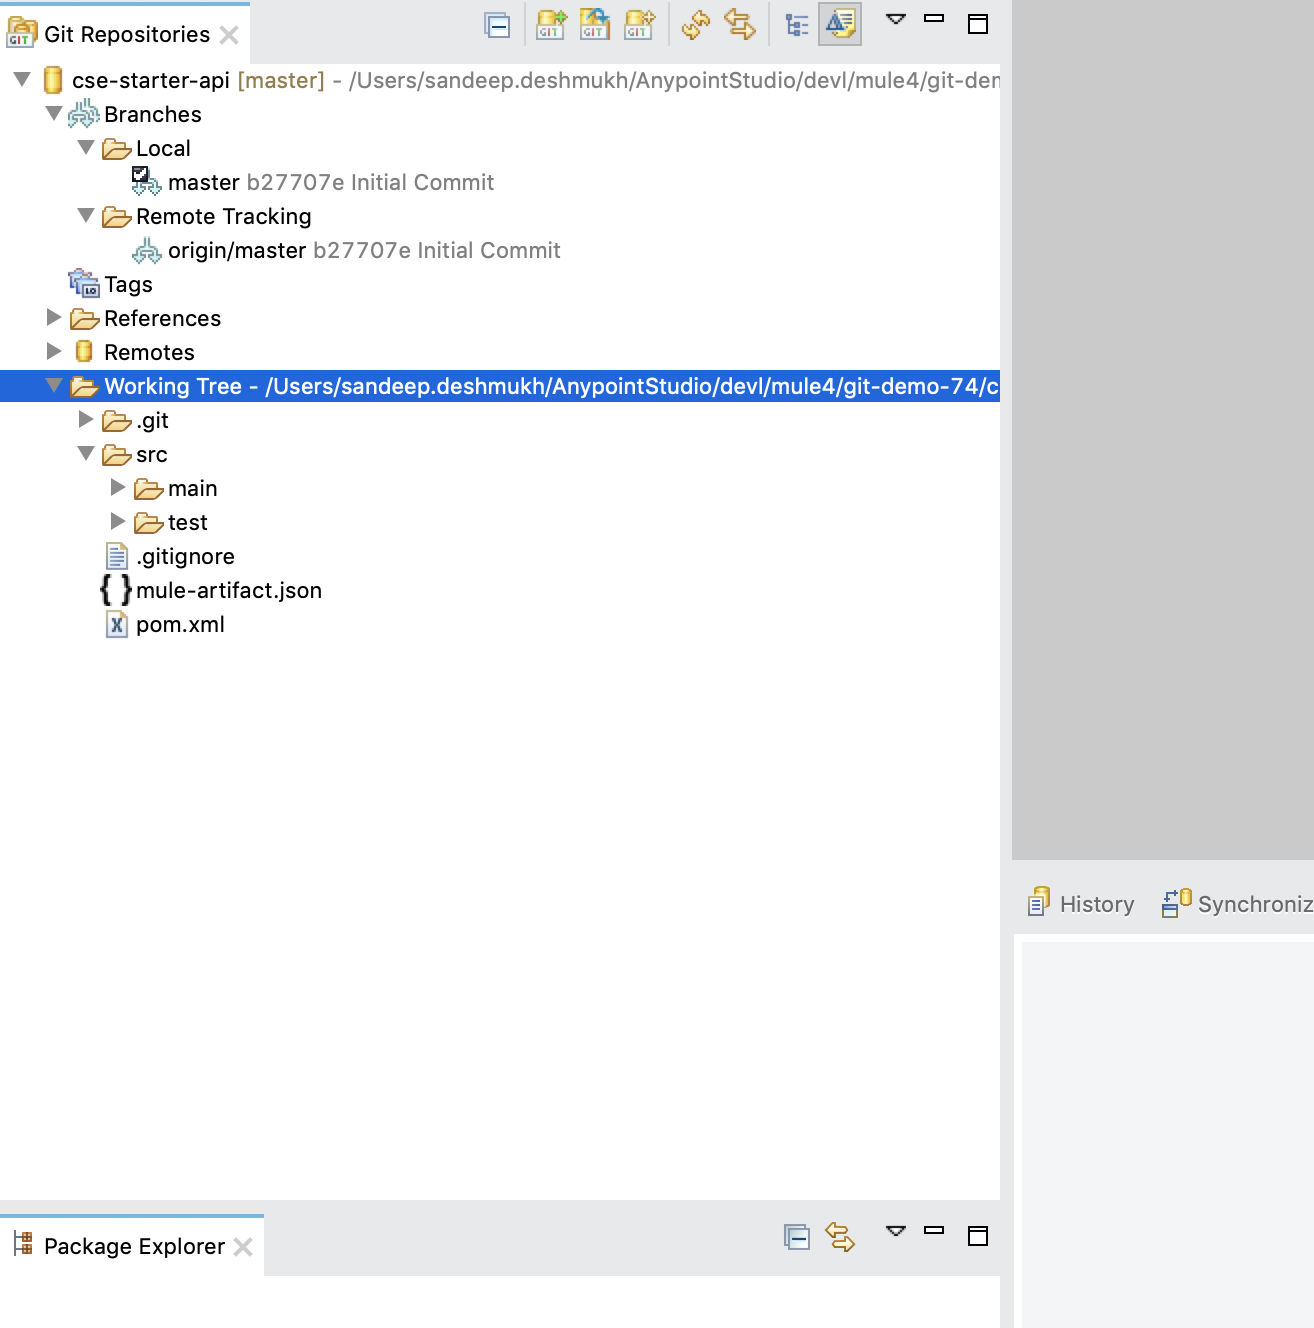
After you click on Finish, you will see a Git Project created at your chosen location.
Next, switch to the Mule Design Perspective. Now you will need to import the project in your Package explorer so you can view project files and make new changes. In your workspace, Click on the option to Import Projects from package explorer.

In the Import window, expand the Anypoint Studio and click on Anypoint Studio Project from File System.
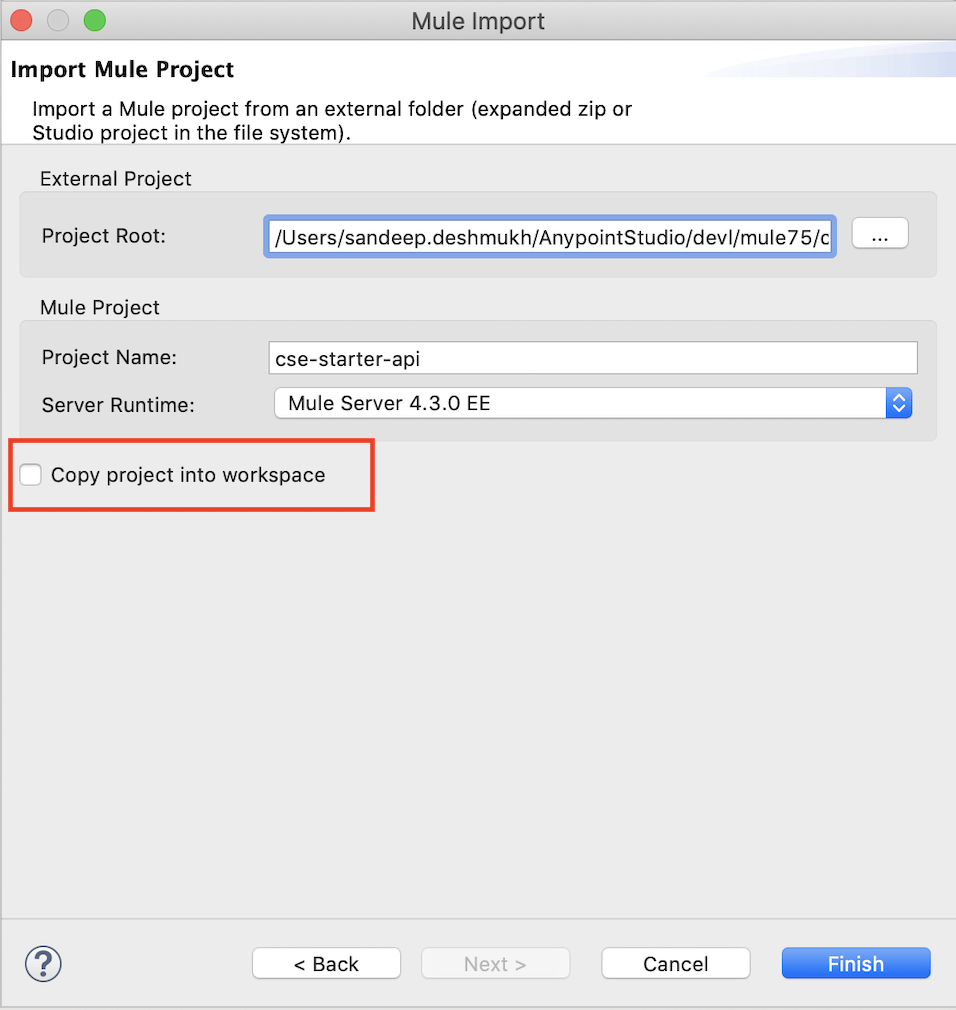
In the Mule Import window, browse to the location of the git repository you just cloned. Make sure that you uncheck the checkbox that says Copy the Project into workspace or you get an error that the project already exists.

Follow one of the standard Git workflows to Add/Edit/Delete files in your project.
Pull and Push to remote repository in Anypoint Studio
As you collaborate with the team of developers to add/Edit files in your Mule Implementation. You will need to make sure that you update(Pull) your local repository of any changes that may have been done at the remote branch. This will ensure that you are not overwriting the changes of other developers and avoid Conflict errors in your Anypoint Studio.
Pull changes in Anypoint Studio: As a best practice, developers are expected to commit unit-tested code changes to the remote repository at the end of day. The following day, all the developers are expected to PULL the changes to their local repository so no file changes are overwritten by other developers.
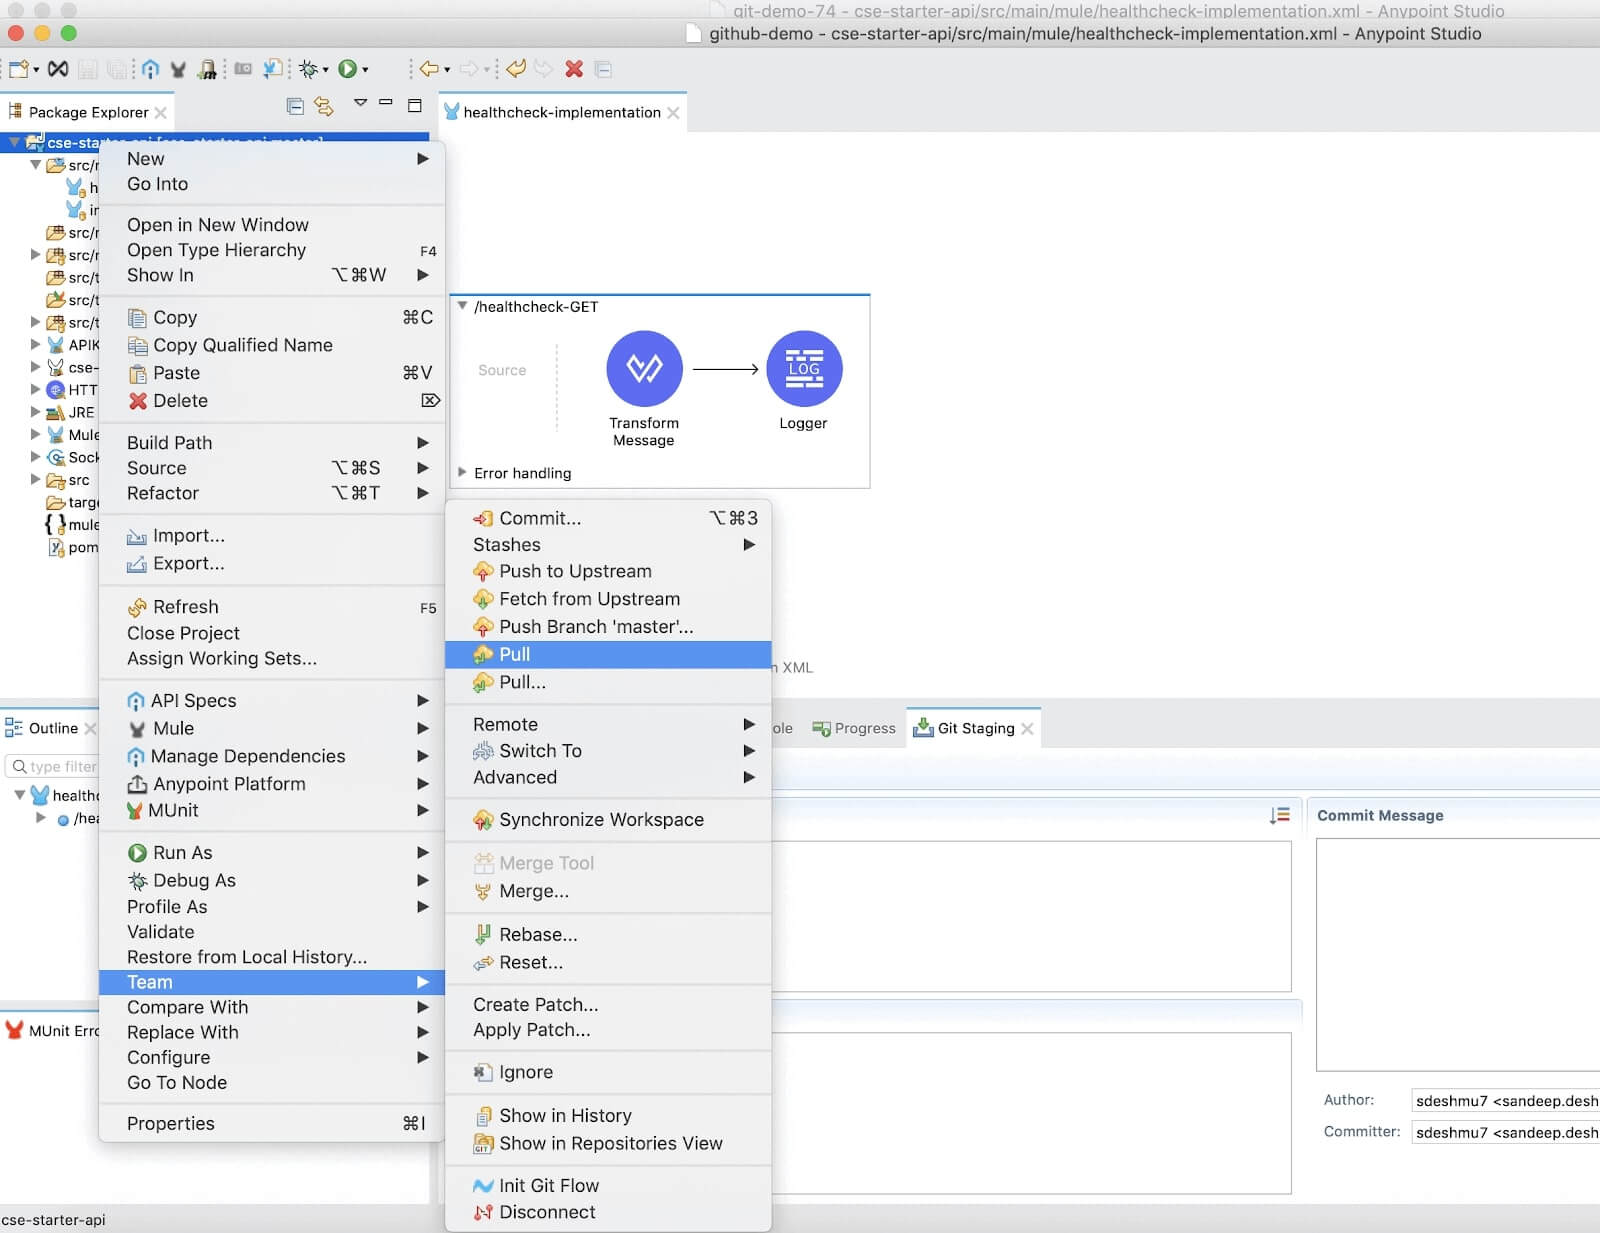
To pull changes from a remote repository, either open your package explorer → Right Click on the project → Team → Click Pull. Once you click on pull, you will see the new changes that are ready to be added to the repository
OR you can open Git Perspective, Select the Project repository → Pull. You will see the new changes that are ready to Merge in your repository

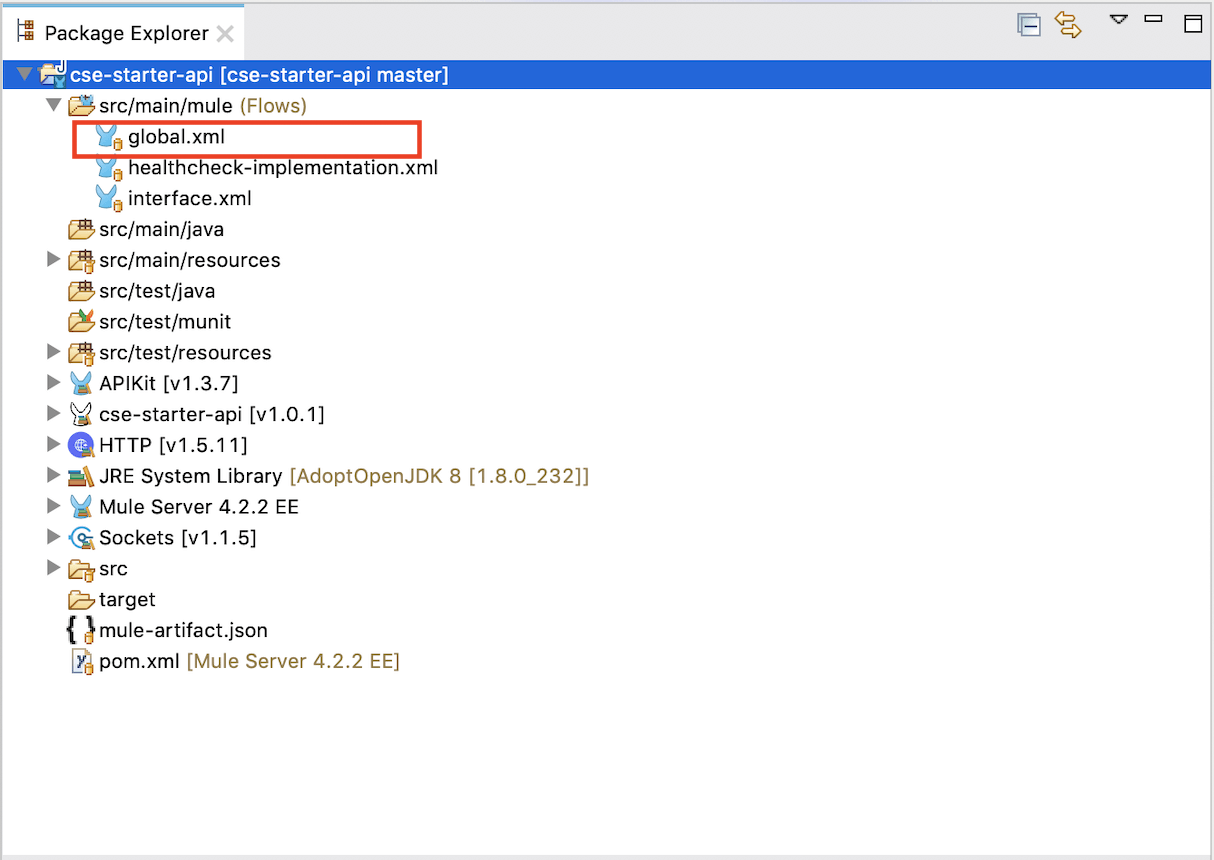
After pull operation, you can check package explorer the new files that are added to the local workspace in your studio
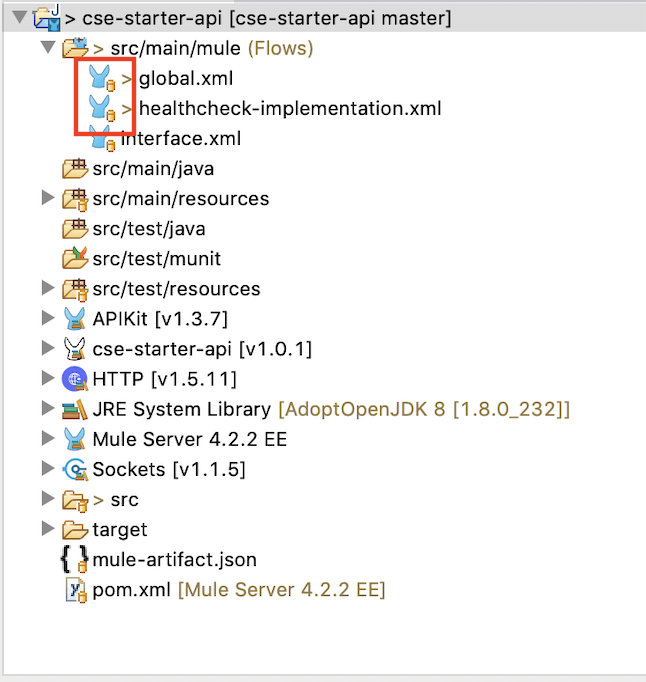
Now, once you have the new changes you can start making your changes to a file in the project. After modifying the files you will see an ‘>’ symbol for the files that are not in sync with the local git version.
Once the changes are completed you can push the changes to the branch. If you are pushing the changes please follow the same instructions for push as mentioned earlier in this document.
If you want to compare the new changes you are committing to the remote repository you can check this with the option Synchronize with Workspace.
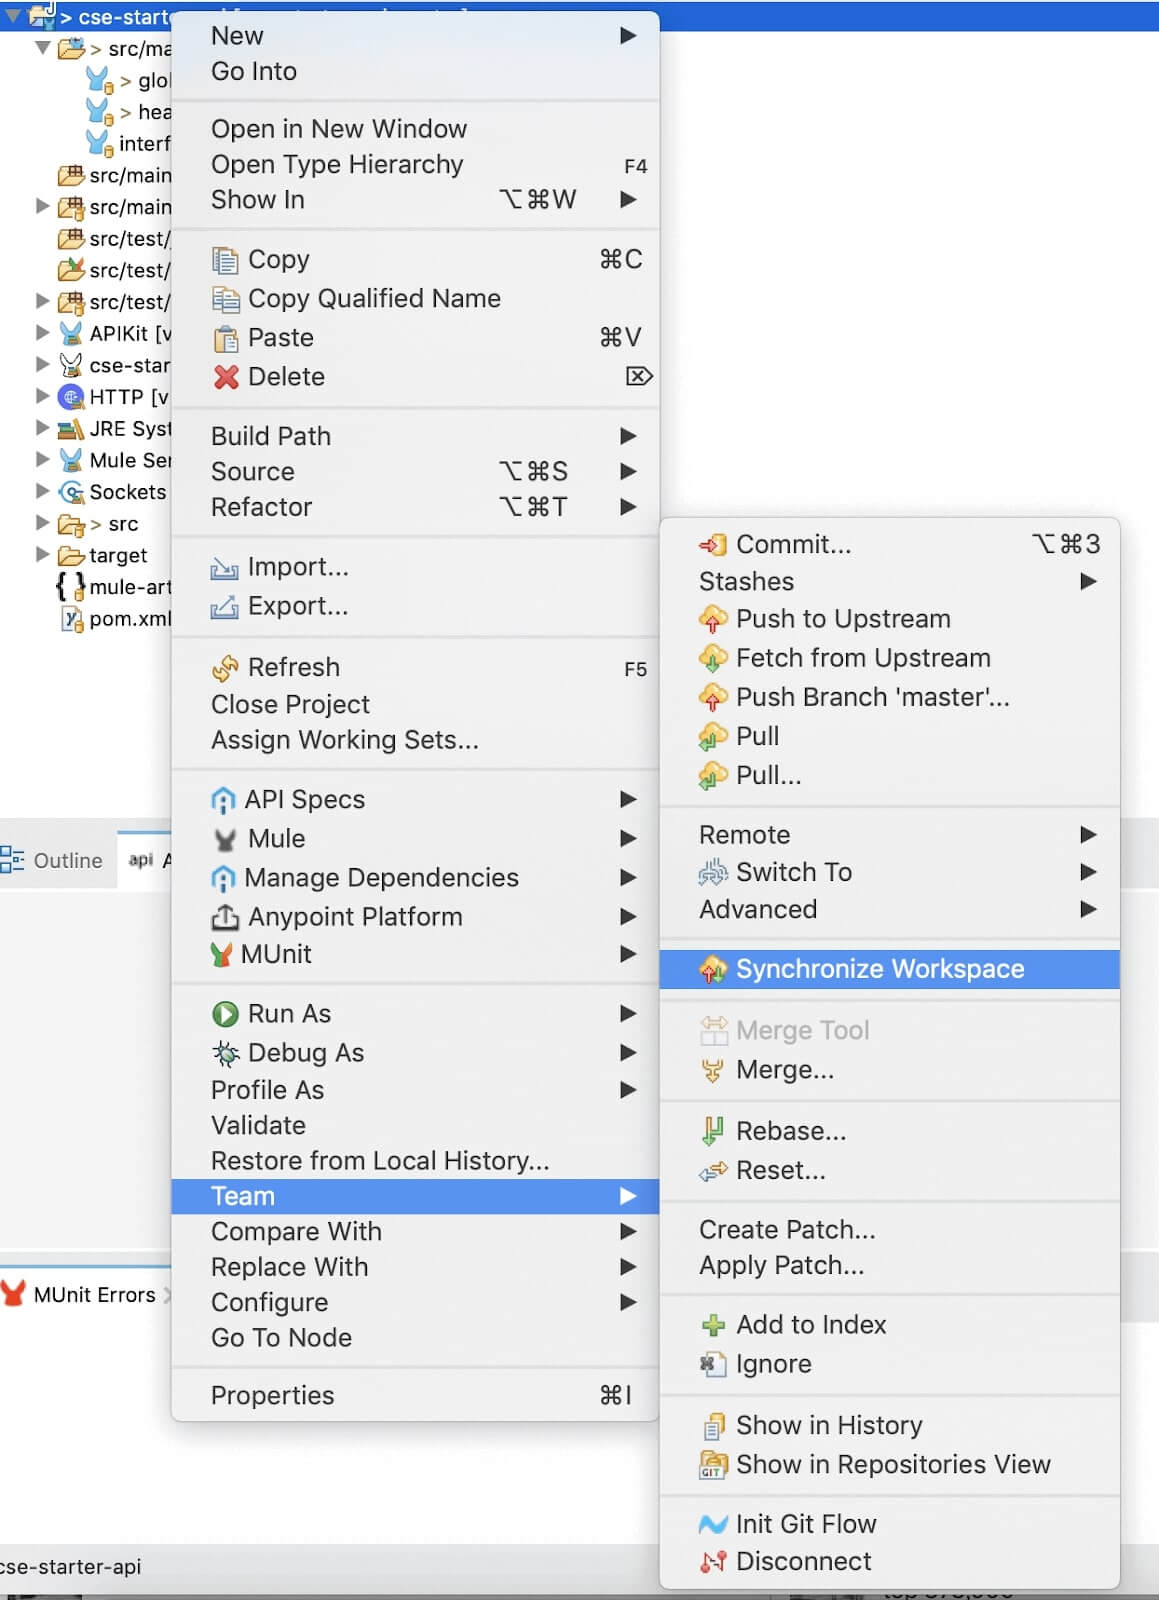
After you click Synchronize workspace you will find a new perspective that will open up and it will show you the difference between the local and remote versions of the files that have differences.

Conclusion
Congratulations on completing the EGit and Anypoint Studio tutorial. This tutorial was focused on setting up Egit plugin with Anypoint Studio. Next time you refer to a git repo, make sure that you use EGit plugin to import the project in your Anypoint Studio. If you have any feedback on this article, please rate this tutorial below. To view our other quickstart guides and tutorials, visit the developer tutorial home page. Your feedback is much appreciated, thank you.


Try Anypoint Platform for free
Start your 30-day free trial of the #1 platform for integration, APIs, and automation. No credit card required. No software to install.
Questions? Ask an expert.
