Overview
Welcome to the Anypoint Service Mesh Azure Red Hat OpenShift tutorial. In this tutorial, we will walk you through the process of installing Anypoint Service Mesh on Azure Red Hat OpenShift. You will deploy a demo application and secure using Anypoint Service Mesh. To log issues, click here to go to the Github repository issue submission form. In order to successfully install Anypoint Service Mesh on Azure Red Hat OpenShift, you will need to create an Enterprise Azure Cloud Platform account and also have an Anypoint Platform Account. Click the button below to sign up for an Anypoint Platform account or log into your existing account.
Already have an account? Sign in.
Step 1: Create an Azure Resource Group
From any browser, go to the URL to access Azure Portal. Open Terminal window. If you don’t already have the Azure CLI installed following the Install Azure CLI to first install Azure CLI. Then run the command:
az group create --name aro-rg-westus --location westus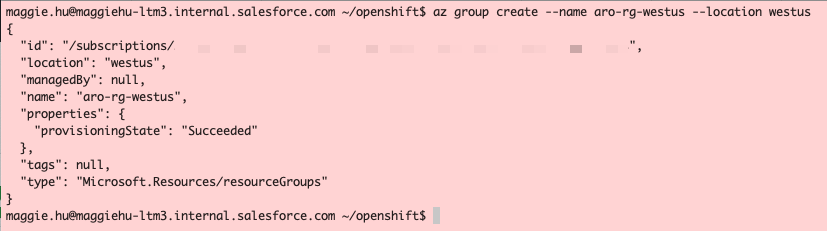
Step 2: Create an Azure Virtual Network
Run the following command:
az network vnet create --resource-group aro-rg-westus --name aro-vnet --address-prefixes 10.0.0.0/22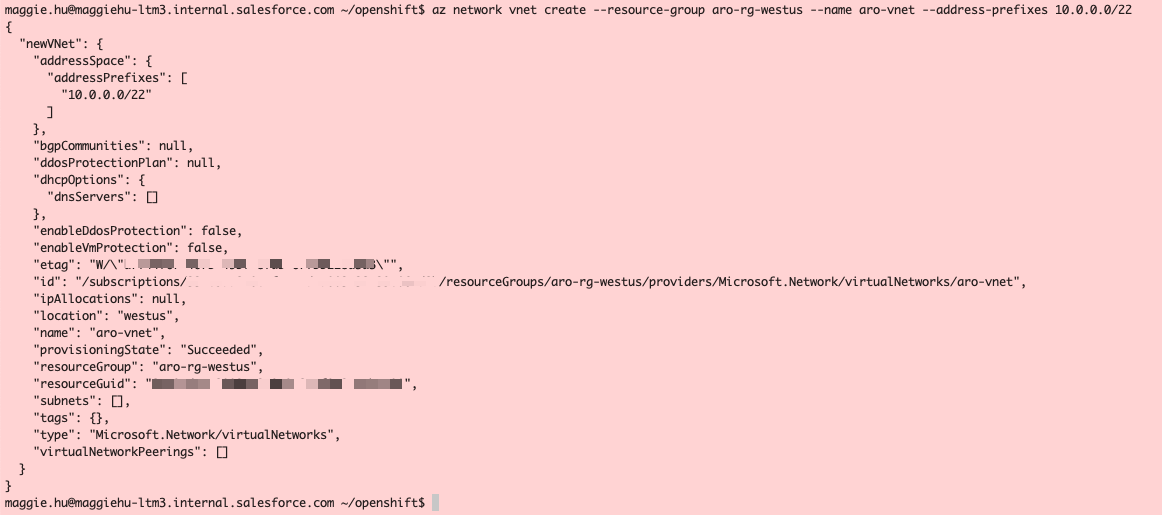
Step 3: Add an empty Azure Subnet for Master Nodes
Run the following command:
az network vnet subnet create \
--resource-group aro-rg-westus \
--vnet-name aro-vnet \
--name master-subnet \
--address-prefixes 10.0.0.0/23 \
--service-endpoints Microsoft.ContainerRegistry 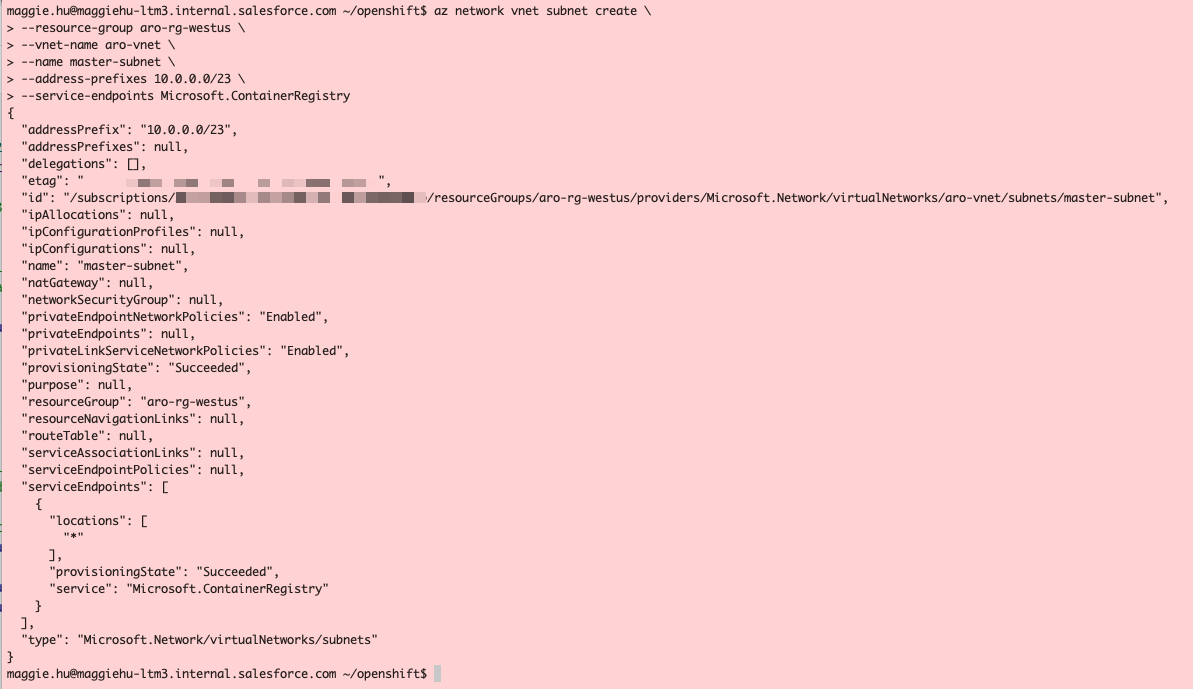
Step 4: Add an empty Azure Subnet for Worker Nodes
Run the following command:
az network vnet subnet create \
--resource-group aro-rg-westus \
--vnet-name aro-vnet \
--name worker-subnet \
--address-prefixes 10.0.0.0/23 \
--service-endpoints Microsoft.ContainerRegistry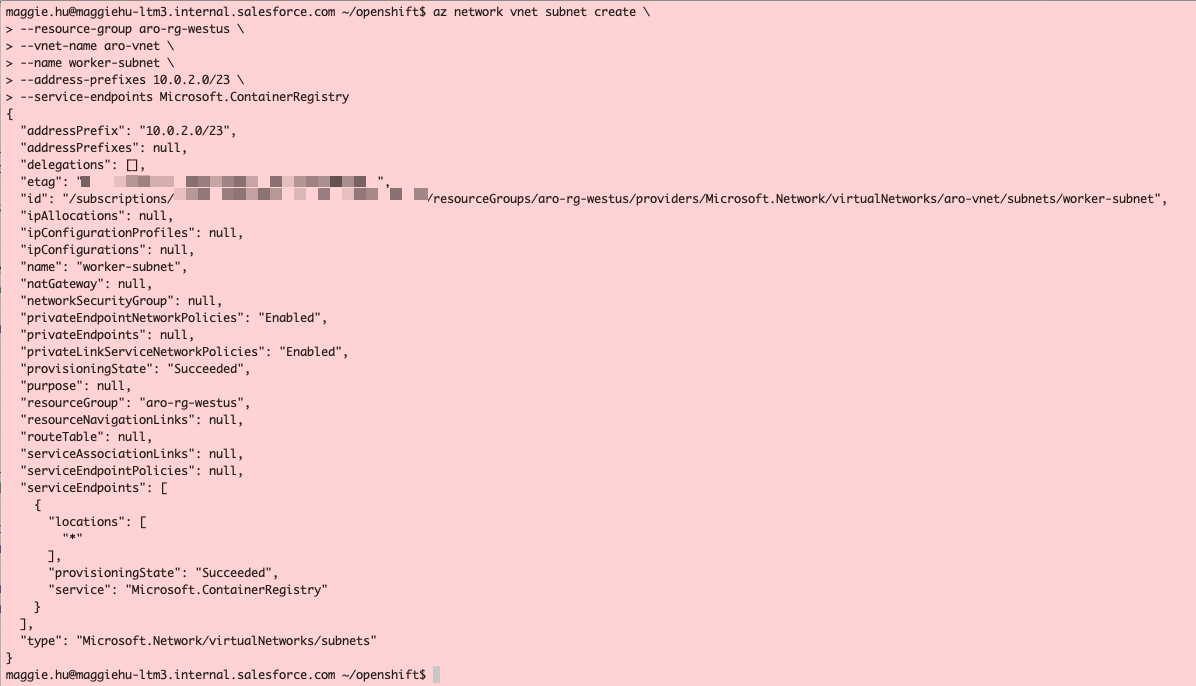
Step 5: Disable Azure Subnet Private Endpoints for Master Subnet
Run the following command:
az network vnet subnet update \
--name master-subnet \
--resource-group aro-rg-westus \
--vnet-name aro-vnet \
--disable-private-link-service-network-policies true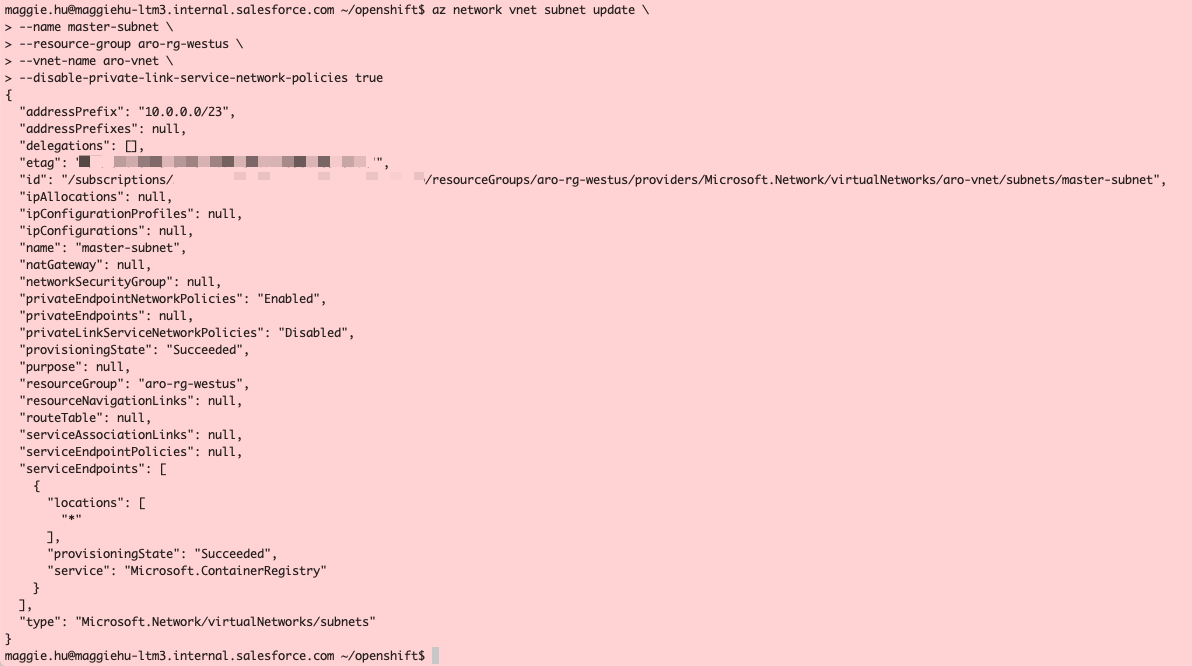
Step 6: Create Cluster
Run the following command:
az aro create \
--resource-group aro-rg-westus \
--name aro-cluster \
--vnet aro-vnet \
--master-subnet master-subnet \
--worker-subnet worker-subnet \
--pull-secret @pull-secret.txt
STEP 7: Verify Cluster and Connect
Run the following command:
az aro list-credentials \
--name aro-cluster \
--resource-group aro-rg-westus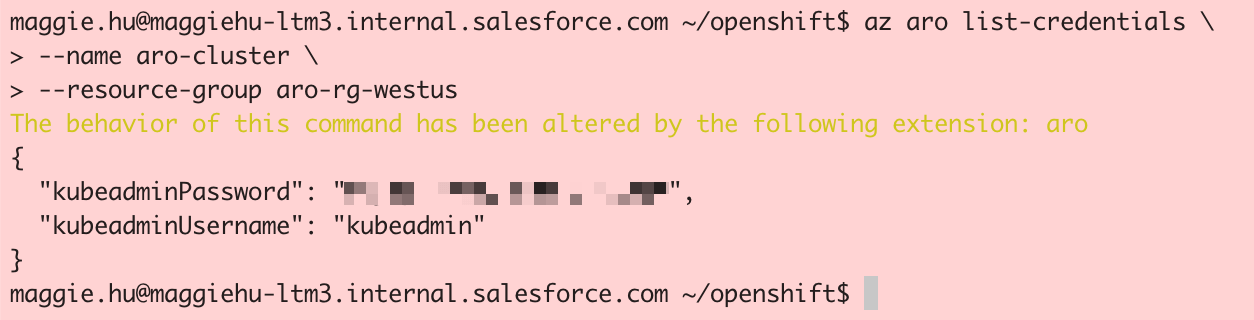
az aro show \
--name aro-cluster \
--resource-group aro-rg-westus \
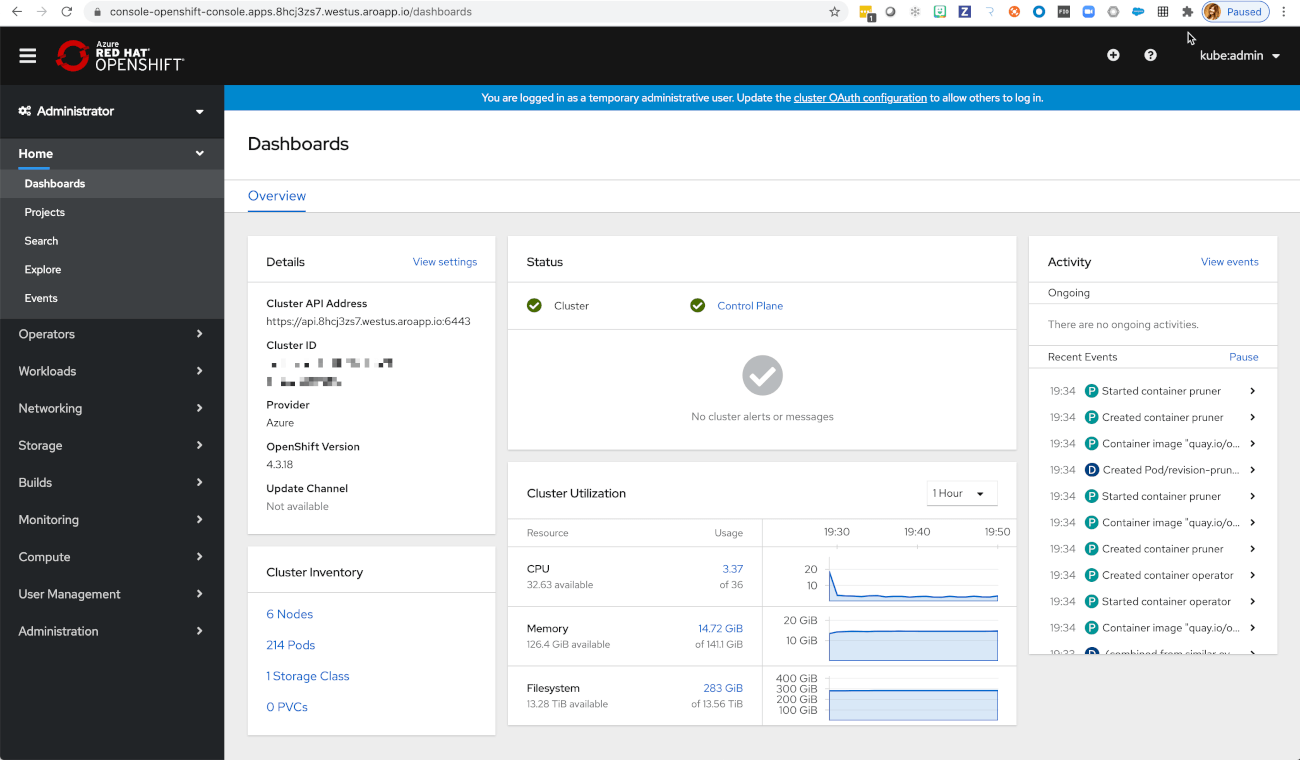
--query "consoleProfile.url" -o tsvLog in to the web admin console.
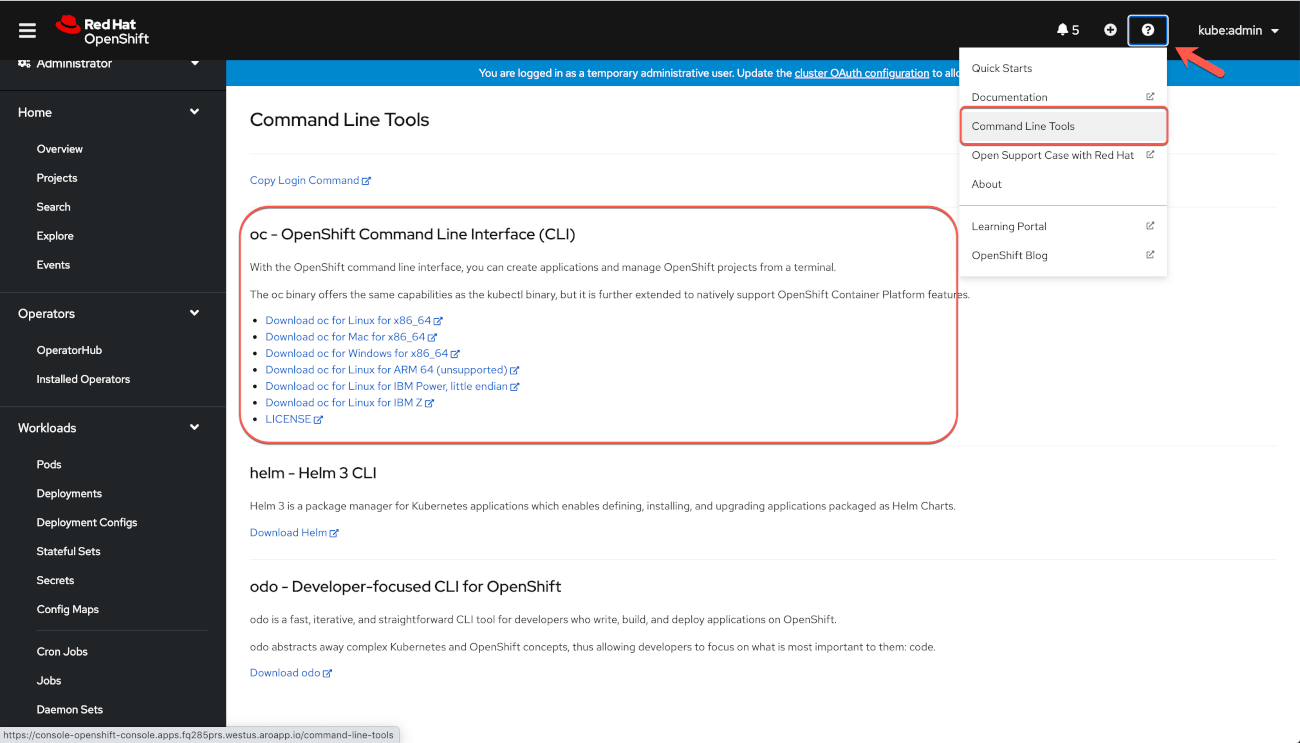
At the top right corner, click on the question-mark circle, CommandLine Tools, and download the appropriate oc - OpenShift Command Line Interce (CLI). The oc tool is just the OpenShift version of kubectl, with additional CLI options specifically for OpenShift.
Connect via the CLI:
apiServer=$(az aro show -g aro-rg-westus -n aro-cluster --query apiserverProfile.url -o tsv)oc login $apiServer -u login -p password
Verify the current Kubenetes context has been configured to point to the ARO cluster.
oc config current-context
Step 8: Download and Install Istio CLI
To install Istio we will be using the Istio CLI. For completed instructions Istio Docs. Use the following command to download Istio CLI into your directory of choice and supported by Anypoint Service Mesh (1.7.x or 1.8.x at this time).
curl -L https://istio.io/downloadIstio | ISTIO_VERSION=x.x.x sh -
Change into newly downloaded directory (the Istio version downloaded and to be installed):
cd istio-x.x.x/Add current directory directly to path:
export PATH=$PWD/bin:$PATHStep 9: Install Istio using CLI
To install Istio we will be using the Istio CLI. By default, OpenShift doesn’t allow containers running with user ID 0. You must enable containers running with UID 0 for Istio’s service accounts by running the command below.
oc adm policy add-scc-to-group anyuid system:serviceaccounts:istio-systemFrom the istio directory, install Istio using the OpenShift profile:
istioctl install --set profile=openshift
After the installation is complete, expose an OpenShift route for the ingress gateway
oc -n istio-system expose svc/istio-ingressgateway --port=http2
Verify that Istio has been installed. You should now see the istio-system namespace:
oc get namespaces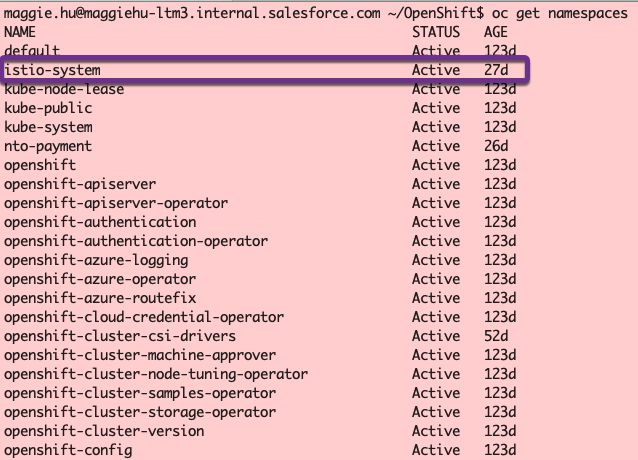
Step 10: Clone Demo Application
For our demo application we will be using Northern Trail Outfitters shopping cart application. This web-based UI will call several services to complete the order. Clone the demo application git repository onto your local machine.
git clone https://github.com/mulesoft-consulting/ServiceMeshDemo -b 1PlatformDemoChange to the ServiceMeshDemo directory and list out the contents to verify that the repository has been created correctly.
cd ServiceMeshDemo/
ls
Step 11: Deploy Demo Application
We will now deploy the demo application to your Kubernetes cluster. The deployment script takes the namespace as a parameter. We will be using nto-payment for namespace
oc create namespace nto-payment
oc label ns nto-payment istio-injection=enabled
oc create -f nto-deployment.yaml -n nto-payment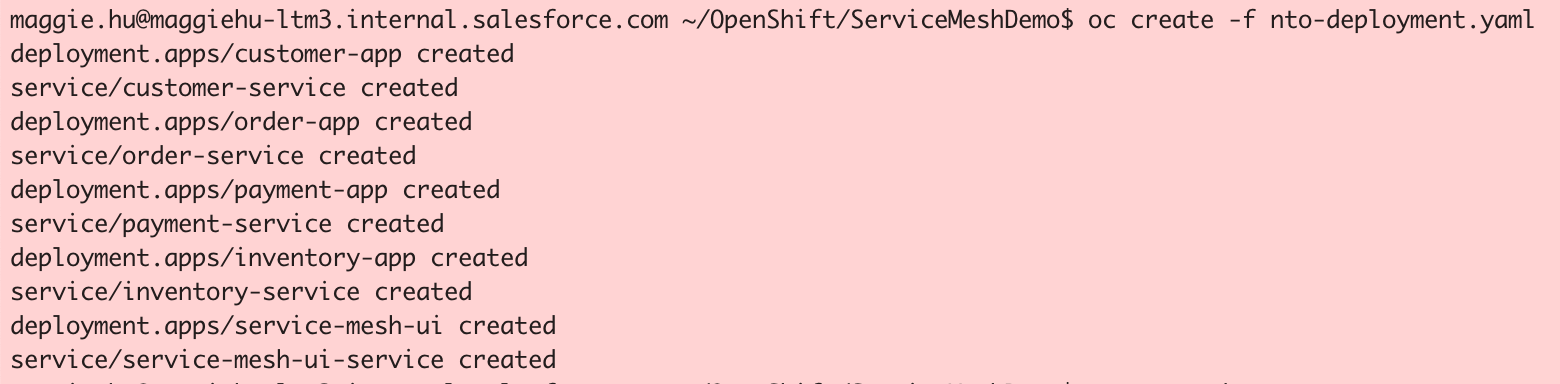
The Istio sidecar injected into each application pod runs with user ID 1337, which is not allowed by default in OpenShift. To allow this user ID to be used, execute the following commands for the nto-payment namespace.
oc adm policy add-scc-to-group privileged system:serviceaccounts:nto-payment
oc adm policy add-scc-to-group anyuid system:serviceaccounts:nto-payment
CNI on OpenShift is managed by Multus, and it requires a NetworkAttachmentDefinition to be present in the application namespace in order to invoke the istio-cni plugin.
cat <<EOF | oc -n nto-payment create -f -
apiVersion: "k8s.cni.cncf.io/v1"
kind: NetworkAttachmentDefinition
metadata:
    name: istio-cni
EOF
You can monitor the deployment with the following commands:
oc get pods -n nto-payment
oc get services -n nto-payment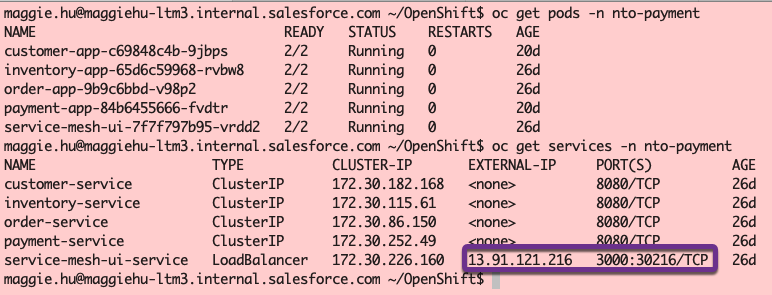
Once all services are running you can test out the application. To access the application open you browser and go to the following URL:
http://EXTERNAL-IP:3000To test out the application follow these steps:
- Select Item to purchase
- Click ADD TO CART
- Click CHECKOUT
- Leave default email and click CONTINUE
- Click AUTHORIZE PAYMENT
- Last click PLACE ORDER
Step 12: Install Anypoint Service Mesh
For complete instructions and documentation please visit MuleSoft Docs. First lets enable API Analytics by setting the disableMixerHttpReports flag to false:
oc -n istio-system get cm istio -o yaml | sed -e 's/disableMixerHttpReports: true/disableMixerHttpReports: false/g' | oc replace -f -Download the latest Anypoint Service Mesh CLI and make it executable:
mkdir -p $HOME/.asm && curl -Ls http://anypoint.mulesoft.com/servicemesh/xapi/v1/install > $HOME/.asm/asmctl && chmod +x $HOME/.asm/asmctl && export PATH=$PATH:$HOME/.asm
asmctl version
Now we are ready to install Anypoint Service Mesh. To do this we will call asmctl install. This command requires 3 parameters:
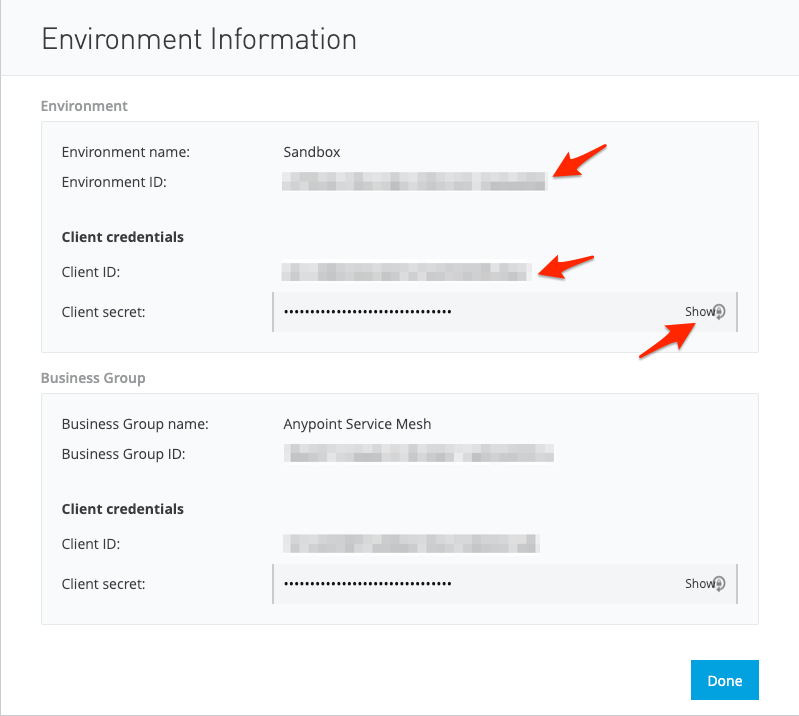
- Client Id from API Manager (Environment or Business Group)
- Client Secret from API Manager (Environment or Business Group)
- Service Mesh license
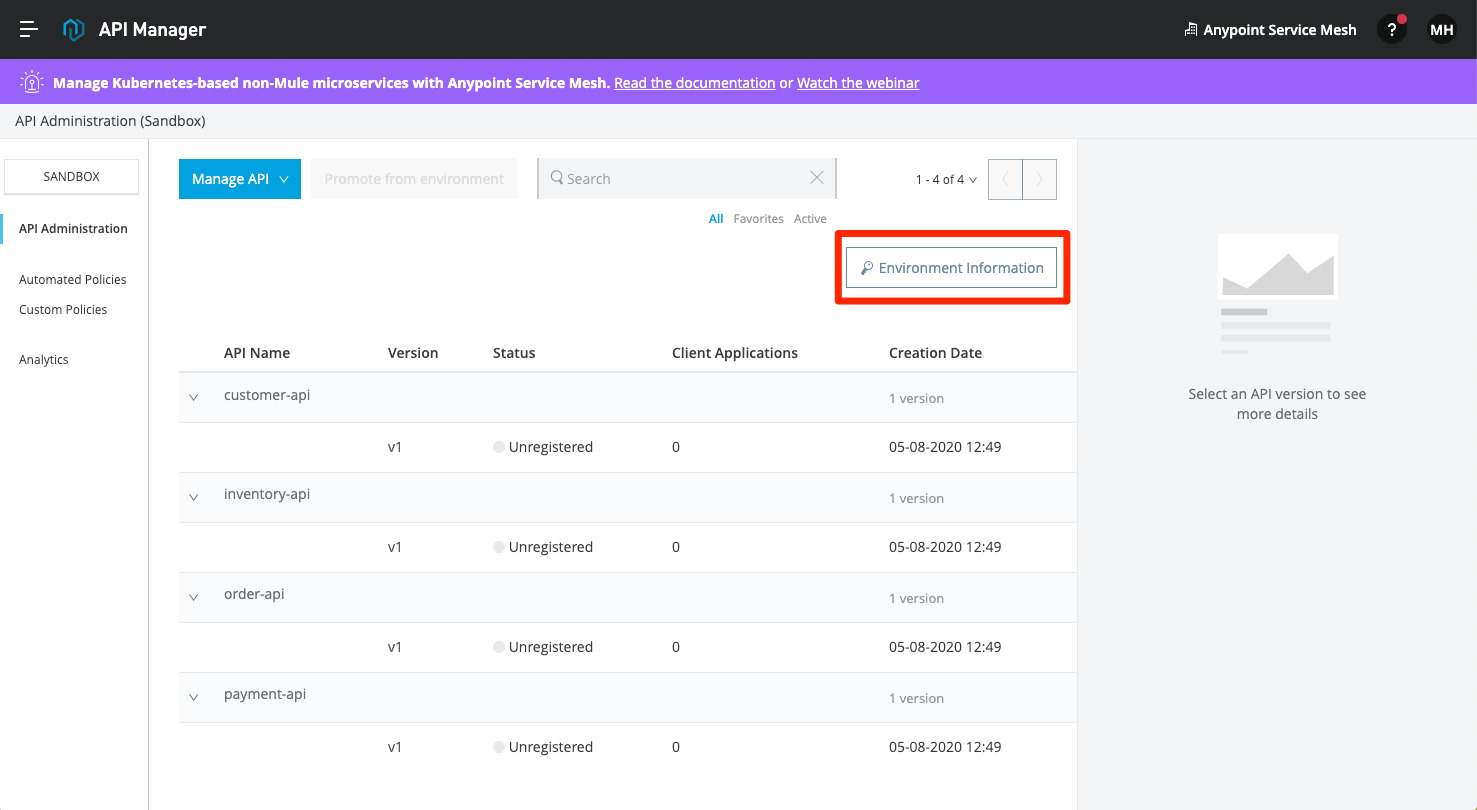
If you are not familiar with how to get Client Id and Client Secret, navigate to API Manager and click on the Environment Information button.
asmctl install
Verify that Anypoint Service Mesh has been installed correctly with the following command:
oc get pods -n service-mesh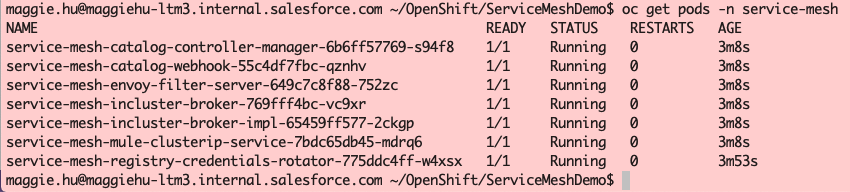
Step 13: Install Anypoint Service Mesh Adapter
Next we want to deploy the Anypoint Service Mesh adapter in each namespace that we want to monitor APIs. For this example, we will just be doing the nto-payment namespace that contains the demo application. To deploy the ASM Adapter we will be using a Kubernetes custom resource definition (CRD). In the ServiceMeshDemo repository, we have create the file nto-payment-asm-adapter.yaml that can be modified.

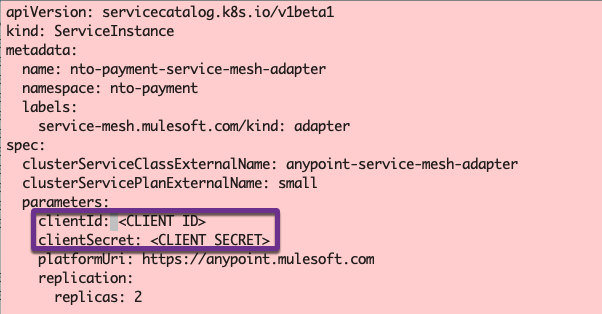
Replace CLIENT ID and CLIENT SECRET with values for your environment. Save the file and run the following command
oc apply -f nto-payment-asm-adapter.yamlUse the following command to monitor the progress. Wait for the status to change to Ready.
asmctl adapter list
After you provision the adapter, you must set the istio-injection=enabled label on the namespace by runnning the following command:
oc label ns nto-payment istio-injection=enabledRedeploy all the existing applications in the namepsace. See Step 6.2 in MuleSoft Docs
oc get deployments -n nto-payment
oc -n nto-payment patch deploy customer-app --type=json -p='[{"op": "replace", "path": "/spec/template/metadata/labels/service-mesh.mulesoft.com","value":"enable"}]'
oc -n nto-payment patch deploy inventory-app --type=json -p='[{"op": "replace", "path": "/spec/template/metadata/labels/service-mesh.mulesoft.com","value":"enable"}]'
oc -n nto-payment patch deploy order-app --type=json -p='[{"op": "replace", "path": "/spec/template/metadata/labels/service-mesh.mulesoft.com","value":"enable"}]'
oc -n nto-payment patch deploy payment-app --type=json -p='[{"op": "replace", "path": "/spec/template/metadata/labels/service-mesh.mulesoft.com","value":"enable"}]'
oc -n nto-payment patch deploy service-mesh-ui --type=json -p='[{"op": "replace", "path": "/spec/template/metadata/labels/service-mesh.mulesoft.com","value":"enable"}]'
oc get pods -n nto-payment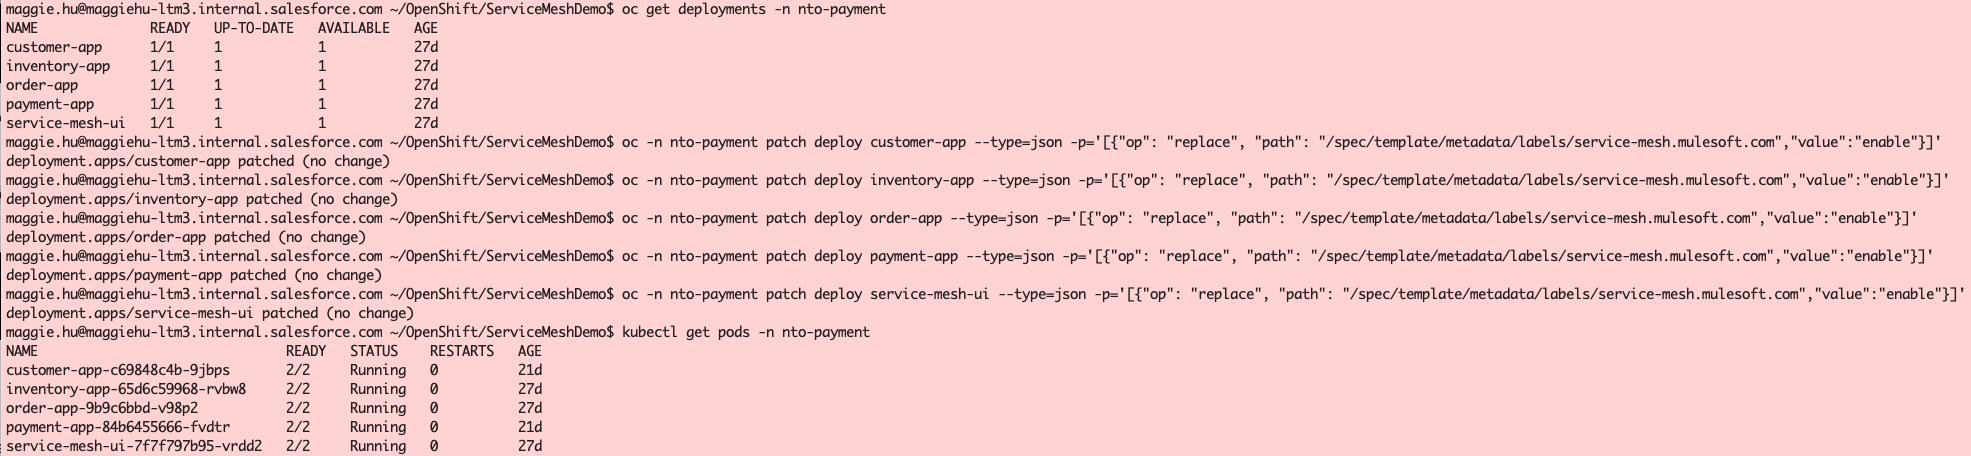
Verify the Envoy sidecar is injected within each pod in the Kubernetes Cluster by running the following command:
asmctl management check sidecar --namespace=nto-payment
Step 14: Create APIs
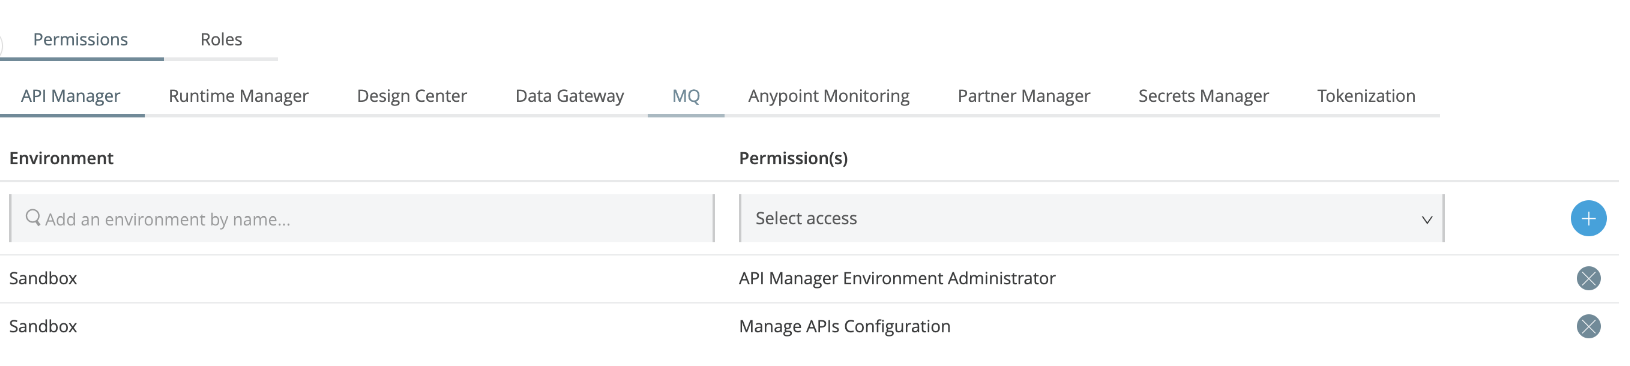
We will now use Anypoint Service Mesh auto discovery to create API’s in Anypoint Platform. We will create API’s for Customer, Inventory, Order and Payments services that are used by the demo application. Before creating the APIs, ensure the Anypoint Platform user has API Manager Environment Administrator permission, in addition, to Manage APIs Configuration. This can be done by your organization admin in *Access Management.
Modify the Kubernetes custom resource definition (CRD) file demo-apis.yaml. For each API, replace ENV ID with the values for your environment. If you are not familiar with how to get Environment Id, navigate to API Manager and click on the Environment Information button. You’ll need to Configure Connected Apps to get the client credentials into your CRD file. This requires Org Adminstrator role.

For each API, replace clientId and clientSecret with the values from the connected app configured. Keep in mind that these are not the same as the ones from either the environment or business group in API Manager. NOTE: If you run this multiple times you might need to change the version number in demo-apis.yaml, since Anypoint Platform will keep it around for 7 days.

oc apply -f demo-apis.yaml
Use the following command to monitor the progress. Wait for status to change to Ready:
asmctl api list
You can also verify that the API’s have been created in Anypoint Platform. Go to Anypoint Platform and navigate to API Manager
Step 15: Binding APIs with Services
The last step is to bind the Kubernetes Services with the Anypoint Platform API’s. To do this you will use the binding definition file demo-bind-apis.yaml. Execute the following command
oc apply -f demo-bind-apis.yaml
Use the following command to monitor the progress. Wait for status to change to Ready
asmctl api binding list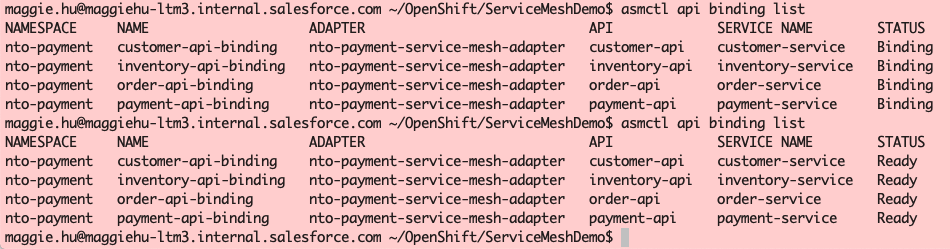
If you go to API Management in Anypoint Platform and refresh the page you will see that the API’s are now Active. You have completed the installation of Anypoint Service Mesh. If you would like to continue to learn about applying some policies against the Kubernetes services, visit this GitHub file.

Try Anypoint Platform for free
Start your 30-day free trial of the #1 platform for integration, APIs, and automation. No credit card required. No software to install.
Questions? Ask an expert.
