How DataGraph works
The average enterprise connects with over 900+ systems, so as a developer, you may be forced to create hundreds of APIs for your organization. As you create a new REST API, it starts to become significant work to parse the data you need for each project as your API library grows. You will need to create custom code in order to parse the data from each response, and with each request you get all fields—not just the ones you need.
To solve this problem, Anypoint DataGraph allows you to connect all of your REST APIs together with metadata that graphs each API schema together. This data graph runs on a single endpoint and allows you to query all fields from all of your APIs and integrations, which can save you development time and provide a better developer experience.
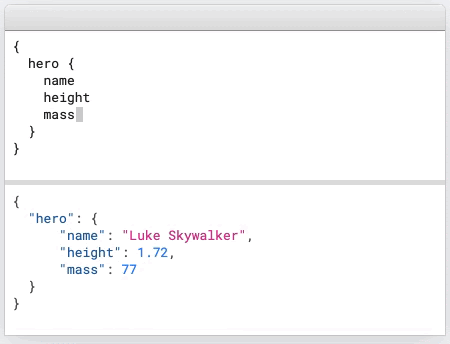
Anypoint DataGraph uses the GraphQL query language, which allows you to send a query to your DataGraph endpoint and get exactly what information you need, nothing more and nothing less. As a result, GraphQL queries always return predictable results, are fast and stable because they control the data they get, not the server. With the typical REST API, you need to get all the data your application needs in a single request; however, with GraphQL, your query accesses not just the properties of one resource but also smoothly follows the references between them. This enables applications even with slow mobile network connections to fetch data quickly and efficiently. Check out the following example to see how easy it is to fetch important data using a GraphQL query.
In this tutorial, we will be teaching you how to deploy your first API to Anypoint DataGraph from start to finish.
How to design your API for DataGraph
In this tutorial, we are going to design an API using API Designer. It’s important that you design your API specification properly, or you won’t be able to add it to Anypoint DataGraph.
If this is your first time using MuleSoft, click the signup button below to get started.
Already have an account? Sign in.
Next, navigate to the Design Center, click Create New and then click New API Spec.
When you are designing your API, make sure to click the Add Properties button manually so DataGraph can recognize each individual component of your API Specification. Make sure to create a Data Type for your API and click the Add Property button for every field in your payload.
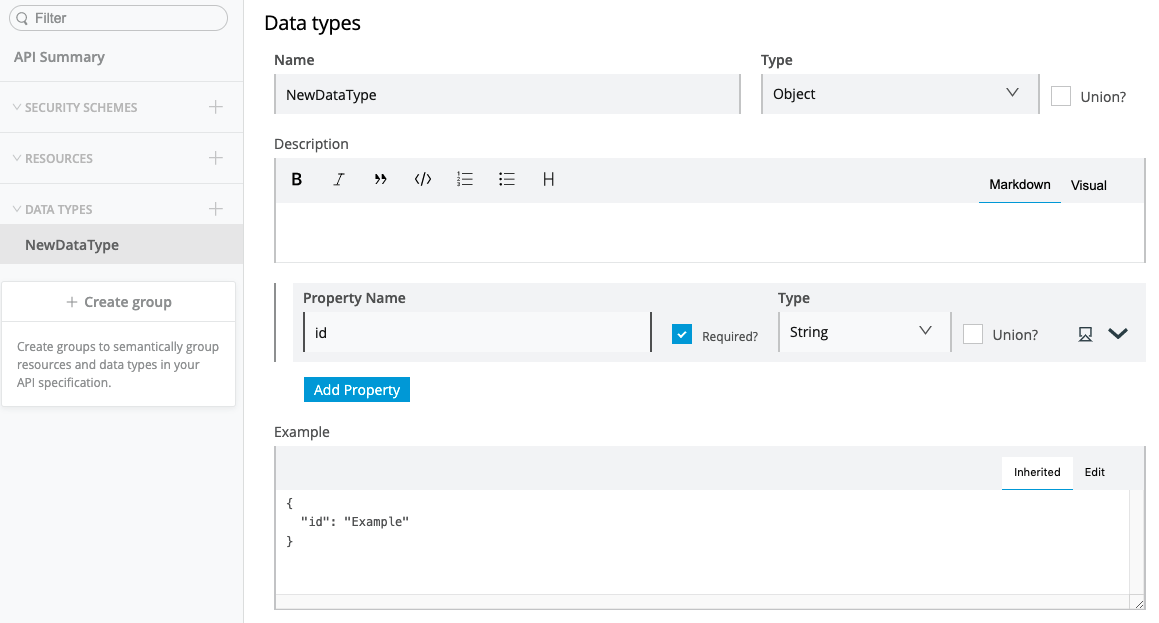
For this tutorial, we created a UsersAPI. This API contains information about the user based on the URI parameter {ID}. As you can see from the following screenshot, I’ve added every appropriate property to my API Schema in API Designer. For the address field, I’ve added an Object Type that contains multiple strings embedded in the object. Anypoint DataGraph will be able to recognize all of these properties and they will all be accessible via a single query.

If you would like to add this API to your own private Exchange so you can add it to Anypoint DataGraph, click the button below to download the API.
How to deploy your API and Mule application
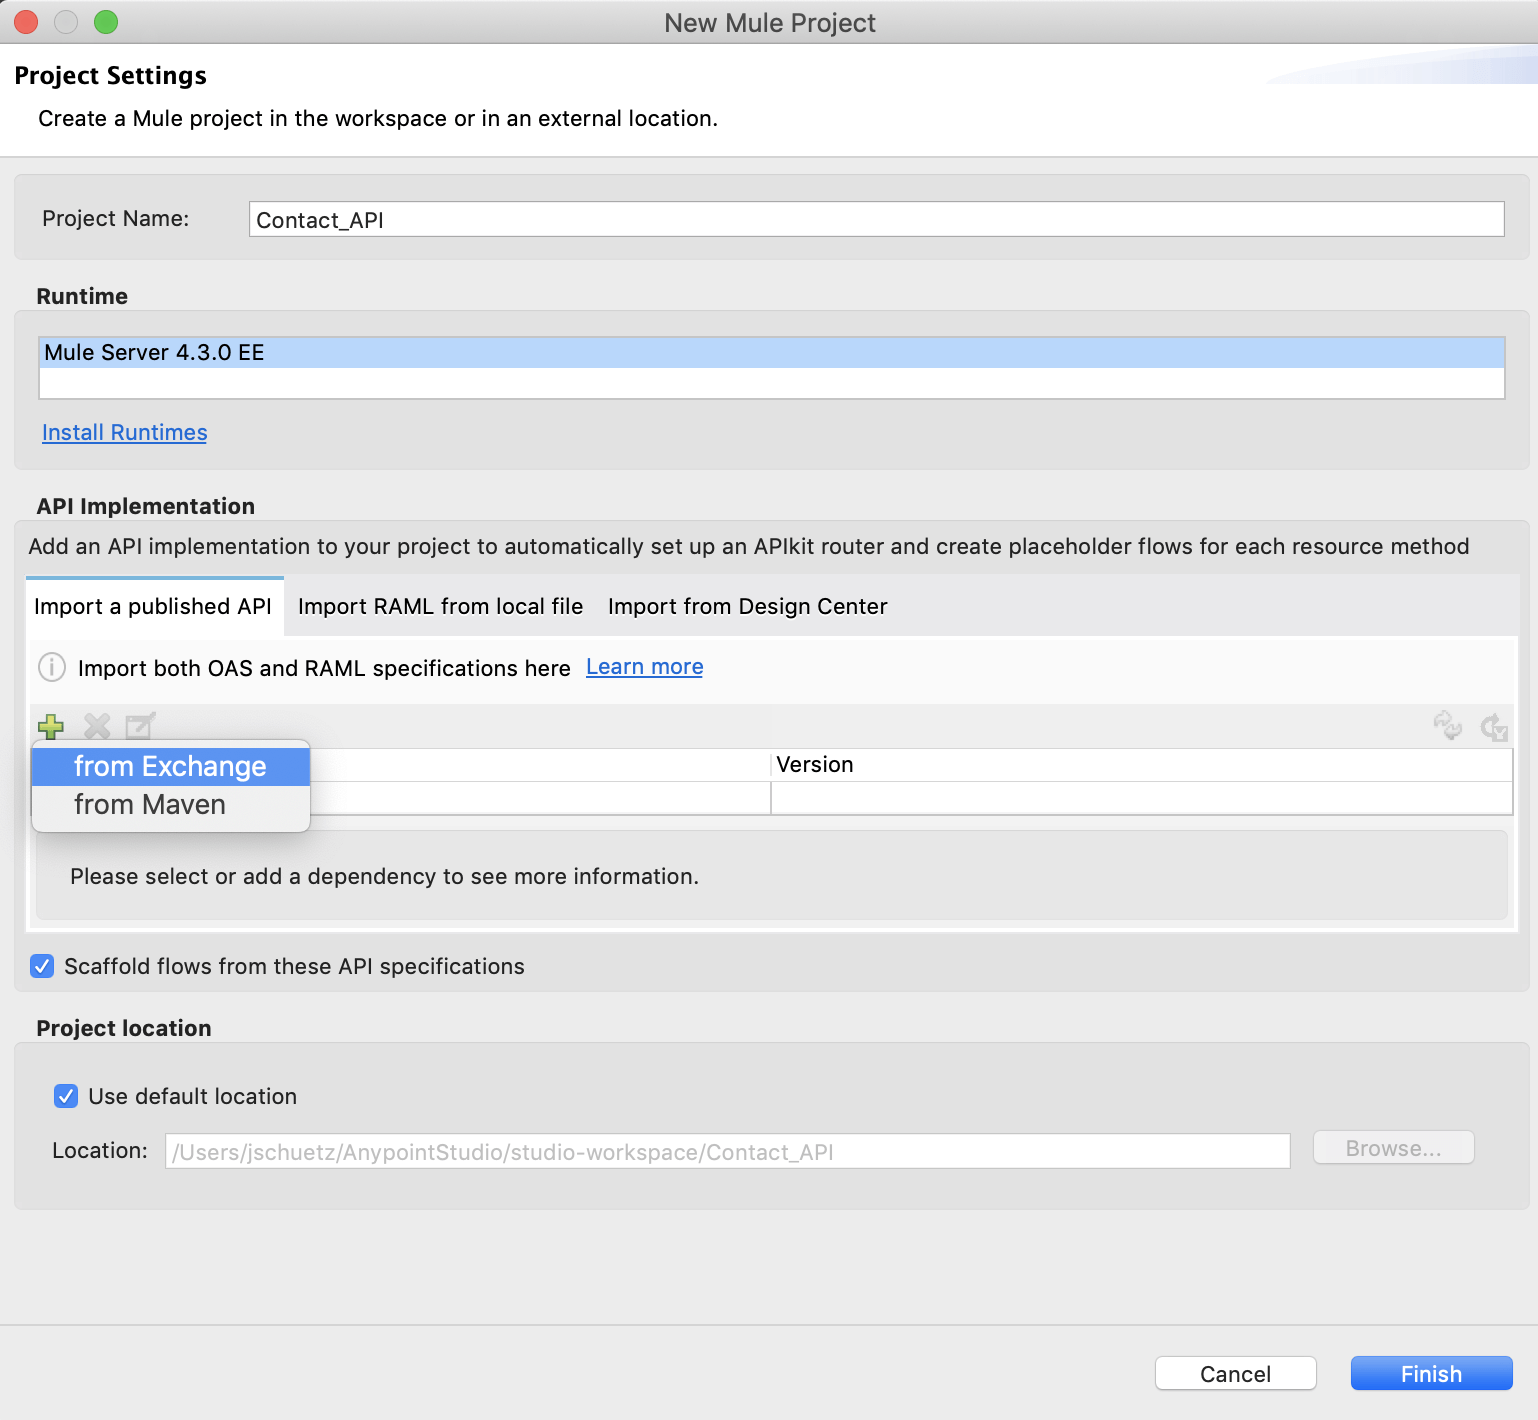
After you have designed your API, you will need to create a new project in Anypoint Studio and import your API from Exchange. Here’s an example screenshot from our tutorial on how to develop your first Mule application. For this tutorial, the important element to highlight from this tutorial is how to import your API into Anypoint Studio. The above RAML file that you downloaded needs to be imported into Anypoint Studio. You can do this one of two ways, on the Project Settings window, select Import RAML from local file and upload it that way, or you can upload the RAML file to Design Center and publish it to Exchange.
Once you have finished building your mule application, make sure that you set up API Autodiscovery. Anypoint DataGraph will need your API and Mule application to be linked in order to query results from your API specification.
We have a great tutorial on how to set up API Auto-Discovery and how to create a new API in API Manager.
How to import your API into Anypoint DataGraph
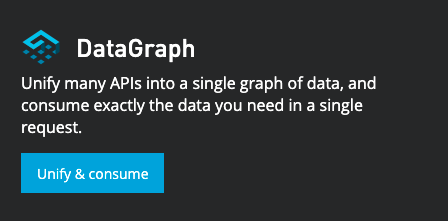
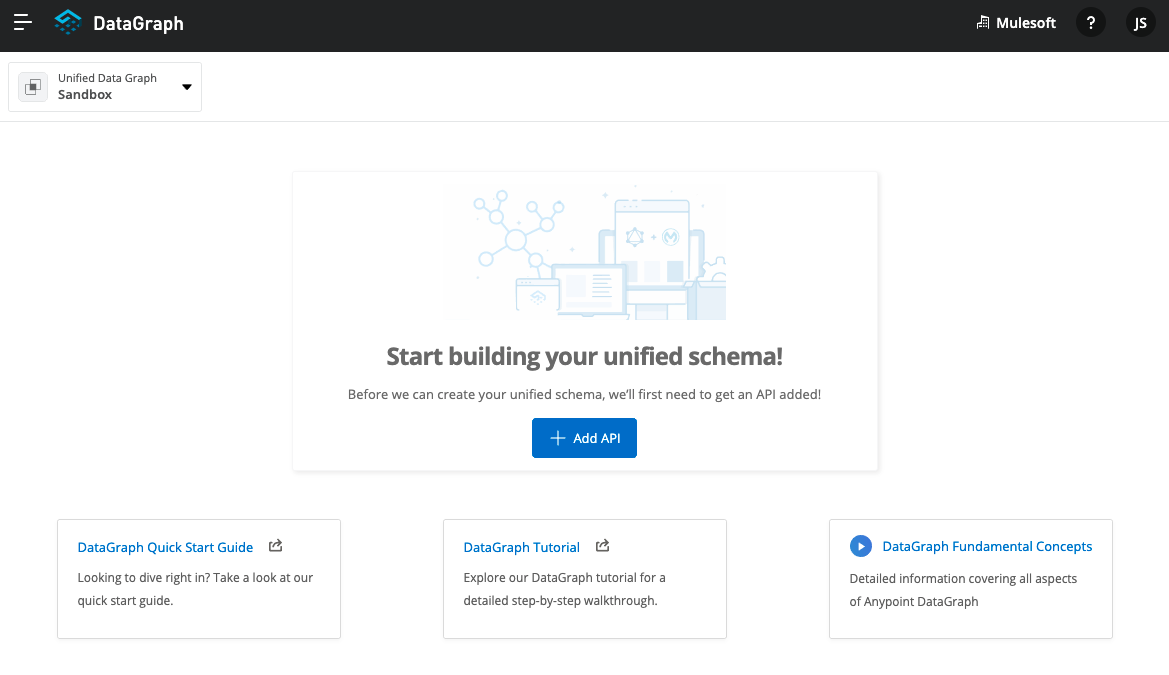
To import your API into DataGraph, log into your Anypoint Platform account and select DataGraph from the dropdown menu. Click the Unify & consume button to get started!
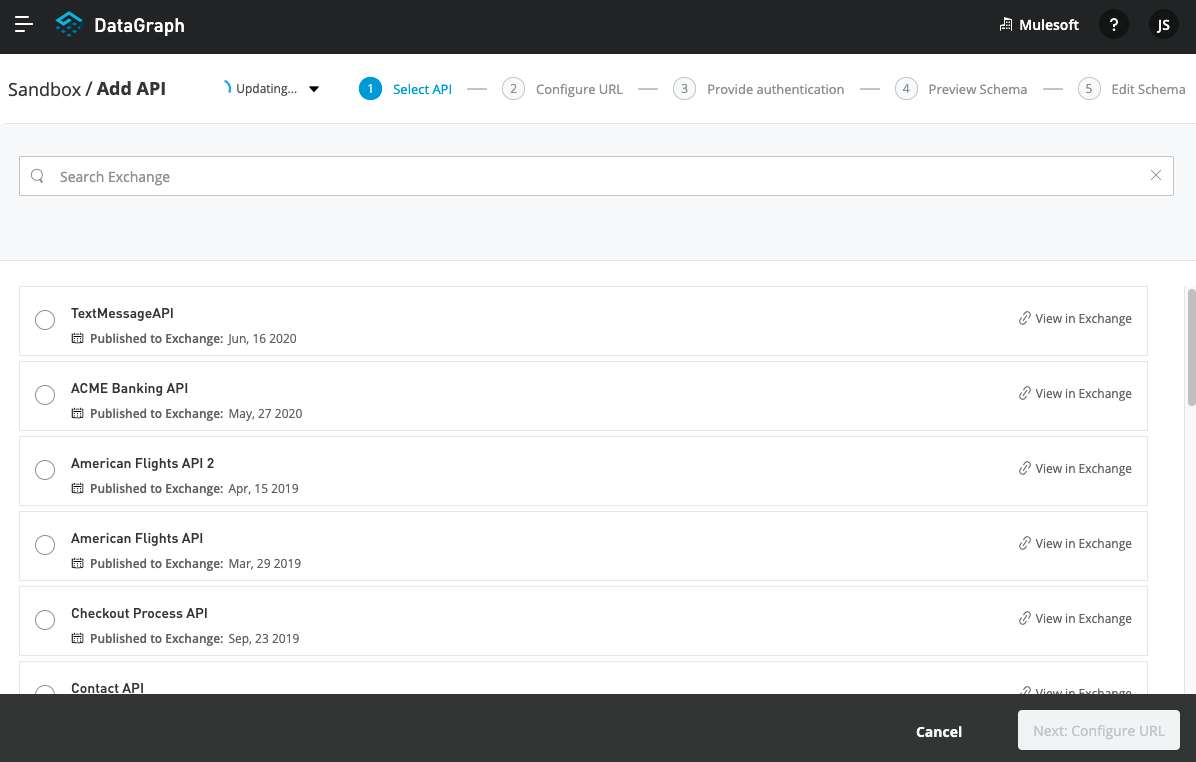
Step 1: Select an API
Next, click on the Add API button to add your API to DataGraph.
Next, select which API from Exchange you would like to import into Datagraph. Keep in mind that the only APIs you will see appear are the ones published in your selected business group for Anypoint DataGraph. Note that you can only import one API asset at a time. Once you select your API, click Next: Configure URL.
Step 2: Configure the API’s URL
Next, select which API version and asset version you want to import into Anypoint DataGraph. Once you have selected your version, click Confirm selection.

Once you click Confirm selection you will have an option to Add a new URL for Anypoint DataGraph to fetch data from.
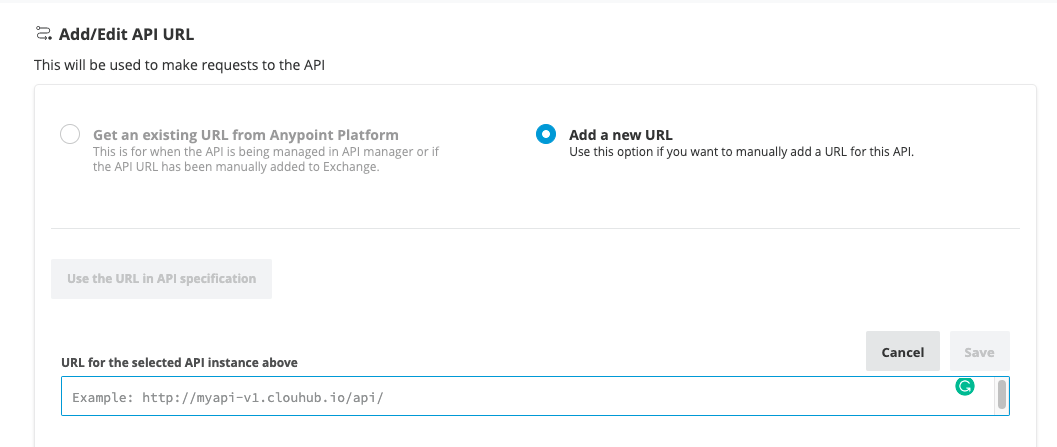
If your API is being managed by API Manager or if you manually added the URL to Exchange, Anypoint DataGraph will retrieve the URL. In this case, we will add it manually. To obtain your URL for the selected API instance, open a new window and navigate to Runtime Manager, and copy the base URI of your Mule application that you’ve deployed either to Cloudhub or OnPrem.
After you add your HTTP or HTTPS API instance, click Next: Provide authentication.
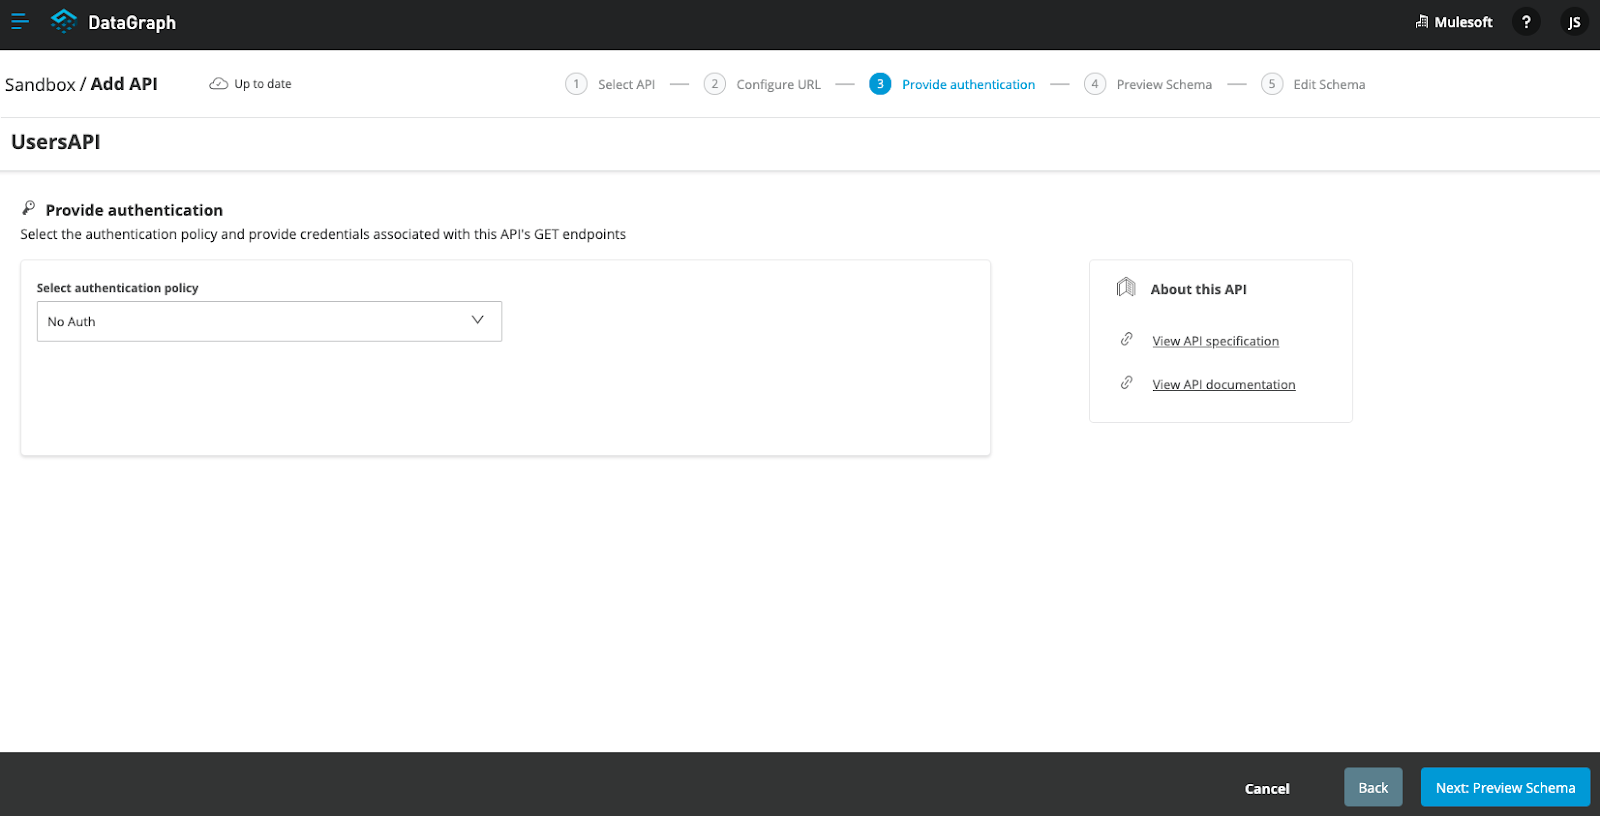
Step 3: Provide authentication for the API
Next, select an authentication policy that your current API is using. Keep in mind, the only authentication policies currently supported are Basic Auth, Client ID enforcement via header, Client ID enforcement via query parameters, or custom authentication with headers. OAuth and other authentication methods are currently not supported. When you have entered your authentication policy information, click Next: Preview Schema.
Step 4: Preview the API Schema
When previewing the schema, take a look at your API and confirm that everything looks correct. You should see all of your Field names and returned dataTypes listed out under each type.
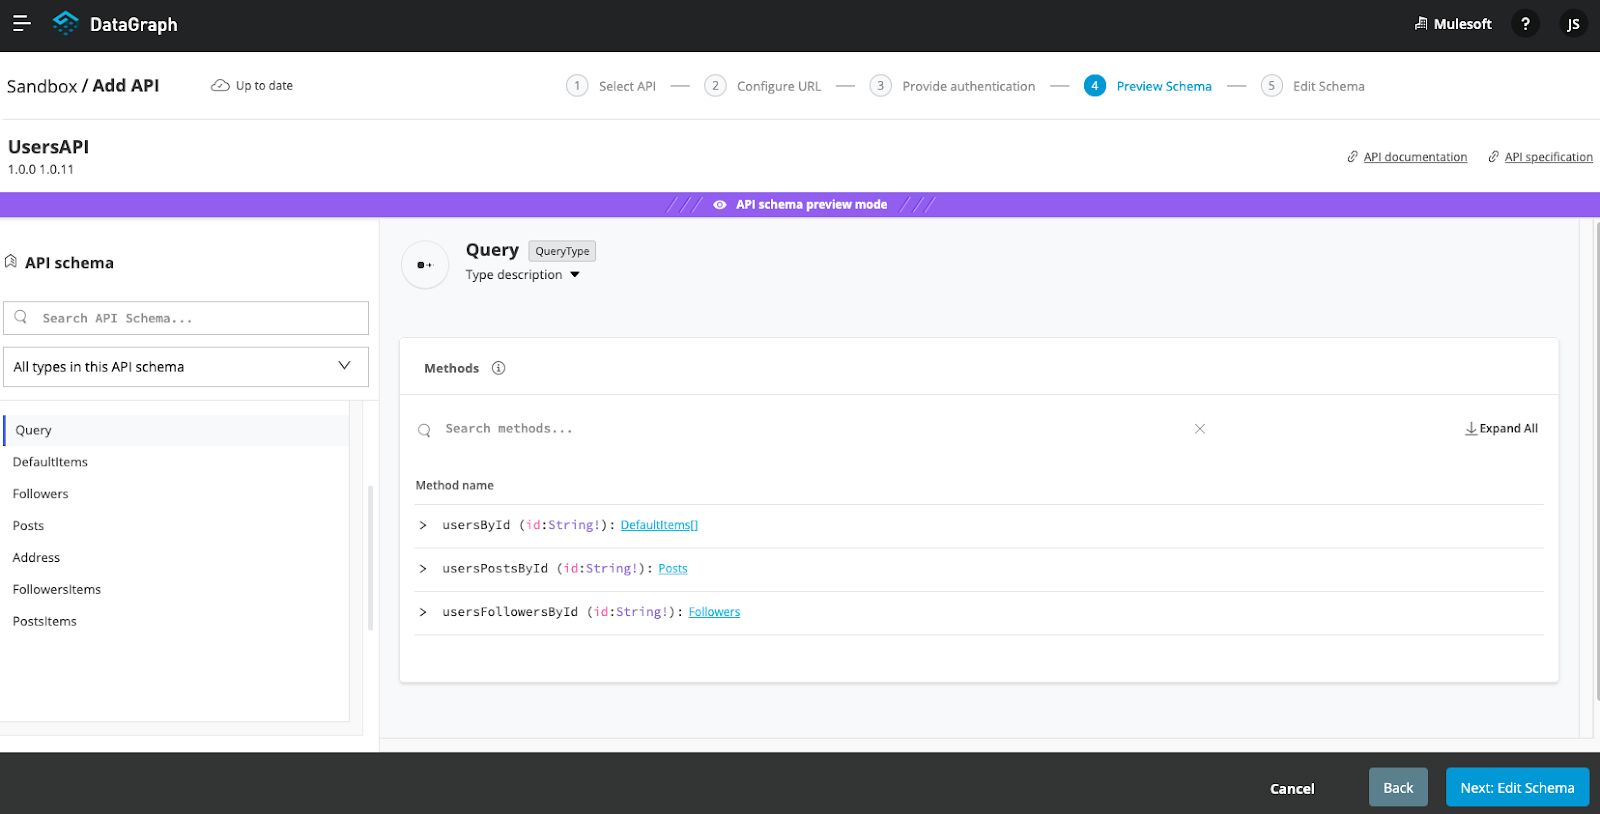
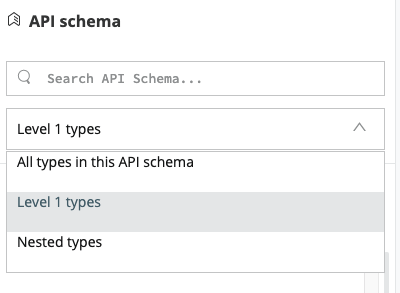
You can view your Nested types and Level-1 types by selecting the drop-down menu and sorting by type.
Once you have evaluated your API schema in preview mode, click: Next: Edit Schema.
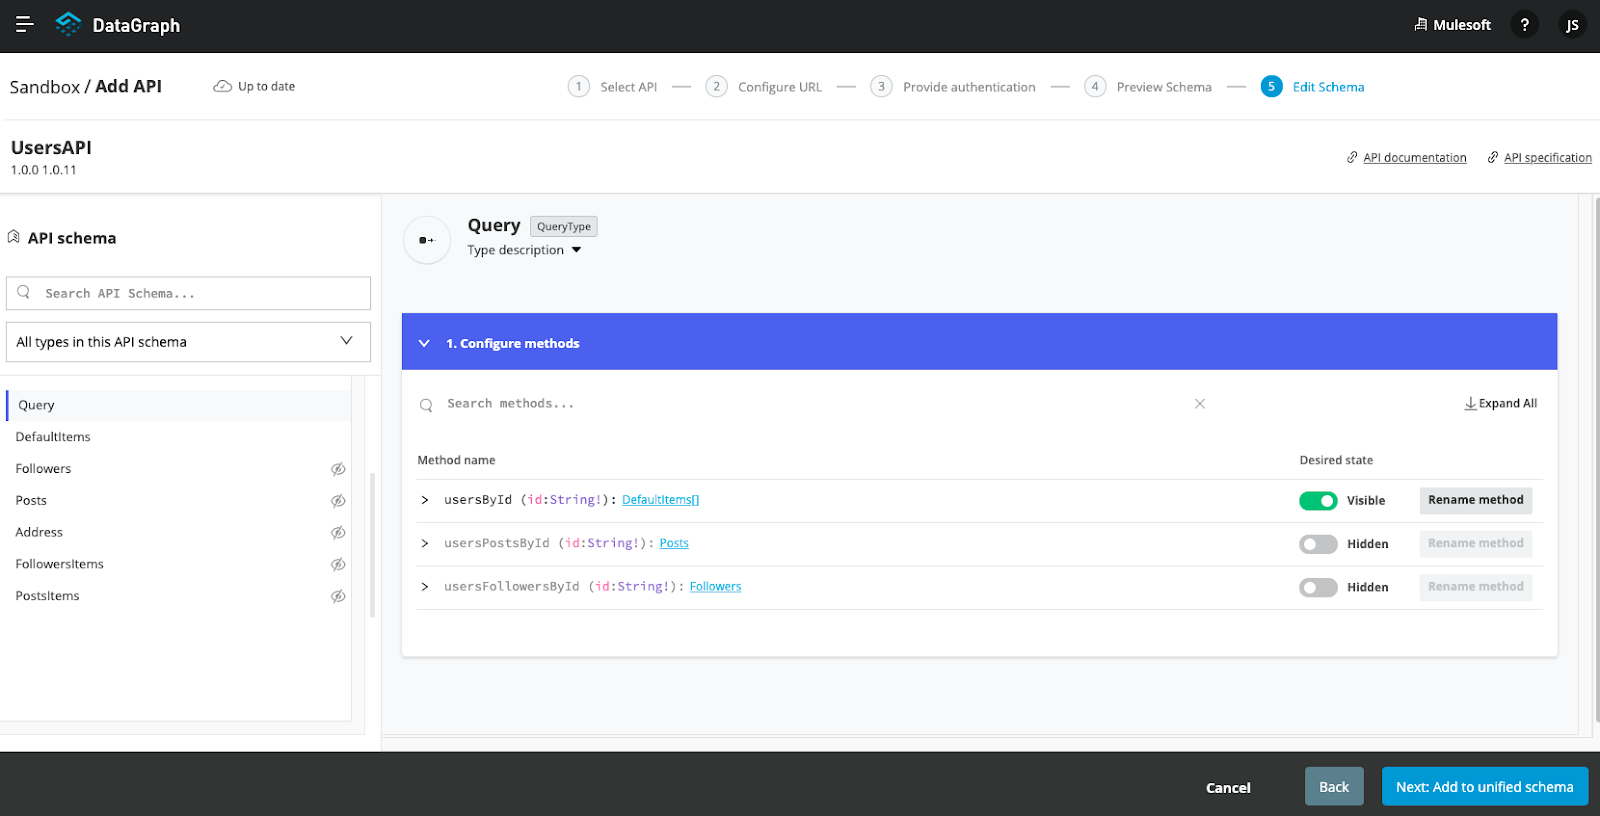
Step 5: Edit the API Schema
You don’t have to perform edit functions (enable collaboration, rename, hide/unhide, and link and merge object types) before you add an API schema to the unified schema. You can make changes to an API schema even after you’ve added it to the unified schema. However, you must resolve any conflicts raised by Anypoint DataGraph before adding an API schema to the unified schema.
Visible / Hidden desired state
When you arrive at the Edit Schema step, you may notice that some of your API schema types are visible and others are hidden. All nested types are automatically hidden by default so you can intentionally scale and make decisions on what you want to be added to your unified schema (your GraphQL endpoint). You can select the drop-down menu to sort your types by Levels, Nested, Hidden, or Types with conflict. For testing purposes, click on each desired state and make sure that each one is checked Visible and not Hidden.
Depending on your schema, you may notice that even though you check all of your methods to be visible, some components of your API schema may still be hidden. Take a look at the following screenshot:
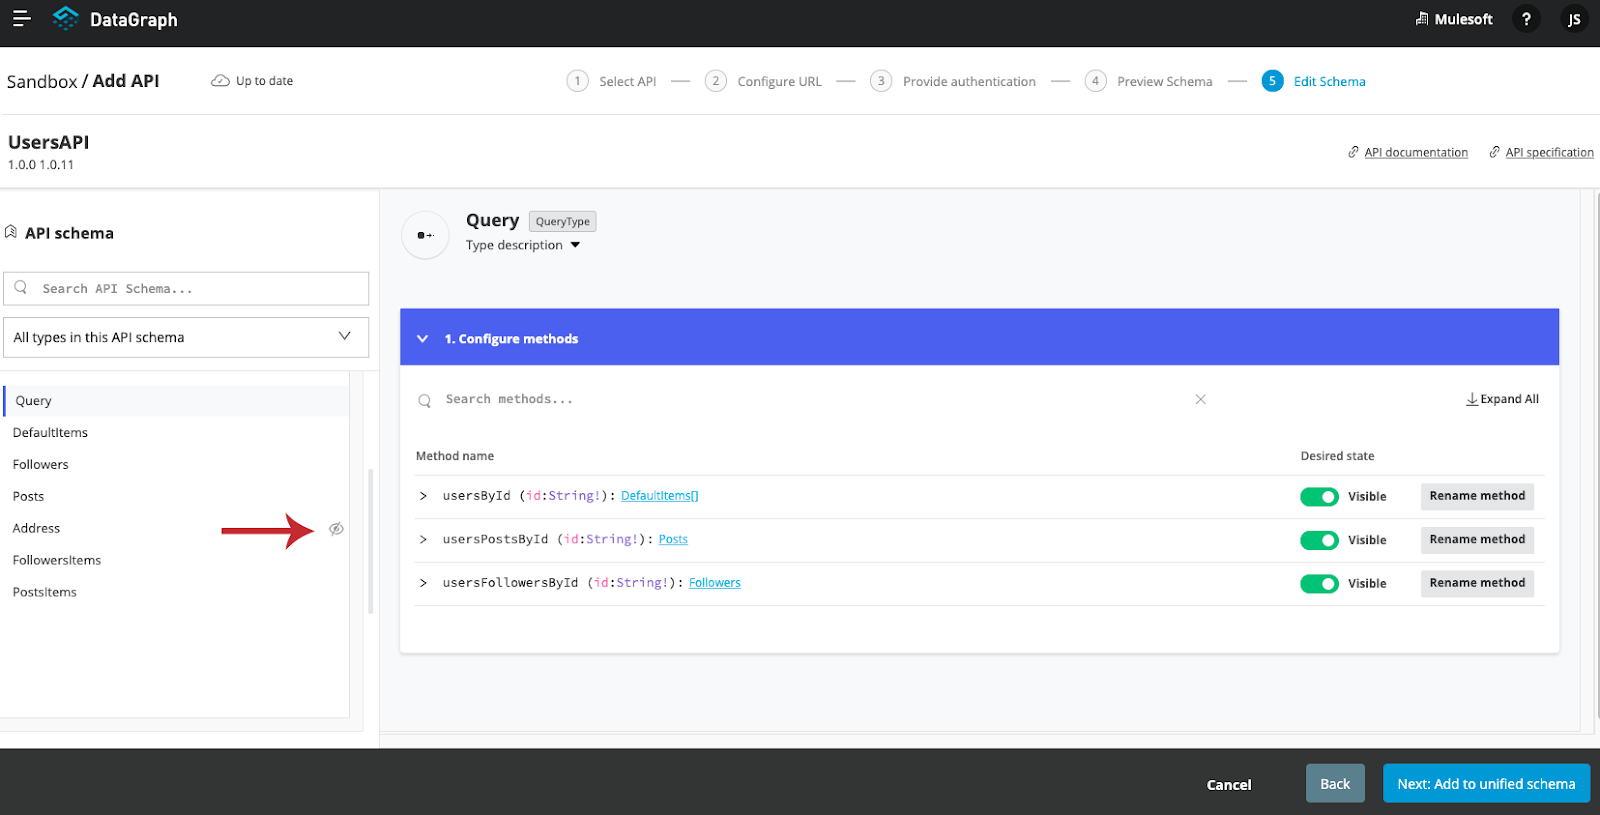
To unhide your Nested Type, click on the type in your API schema list and check the box at the top of the window switch it from Hidden to Visible.
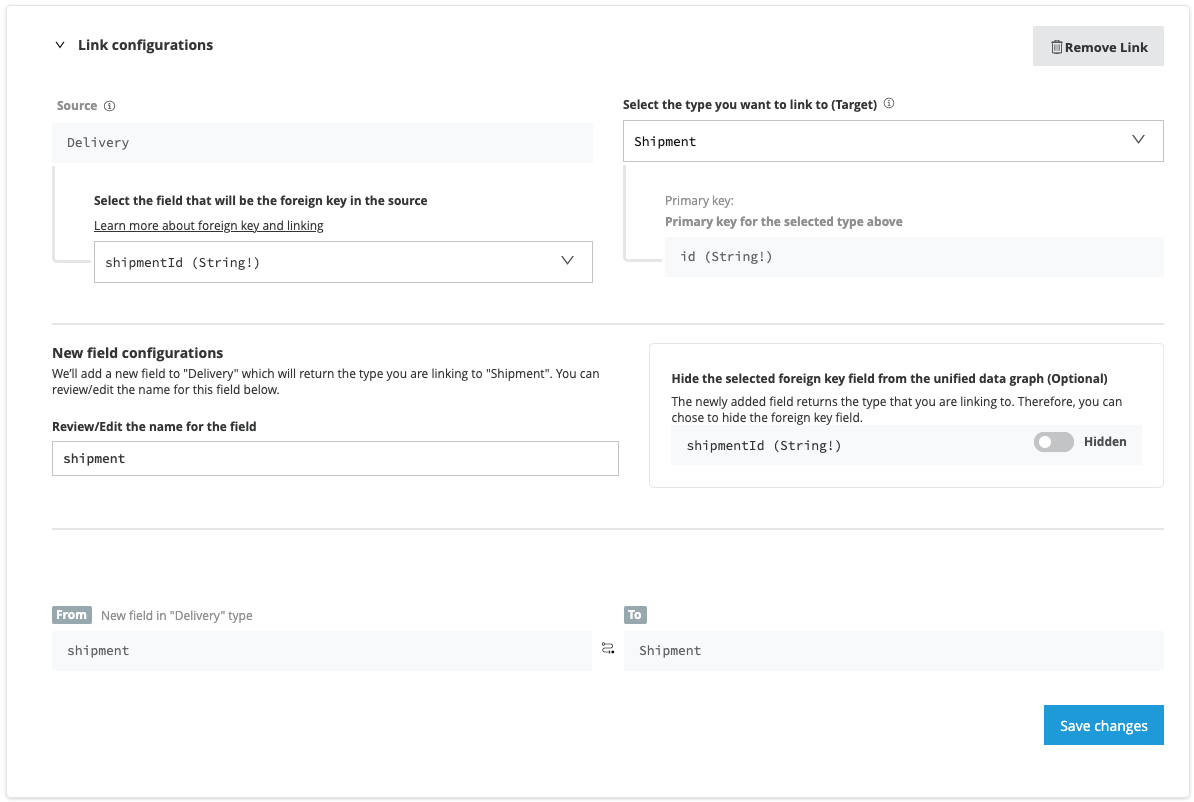
Link a type to another type
DataGraph enables you to link related types in the unified schema from the same API or multiple APIs. In this example, we have a field called shipmentID which is used as a foreign key to link the shipment type in the unified schema. In the example, we are going to link the types Delivery and Shipment so you can access all of the data under one single type.
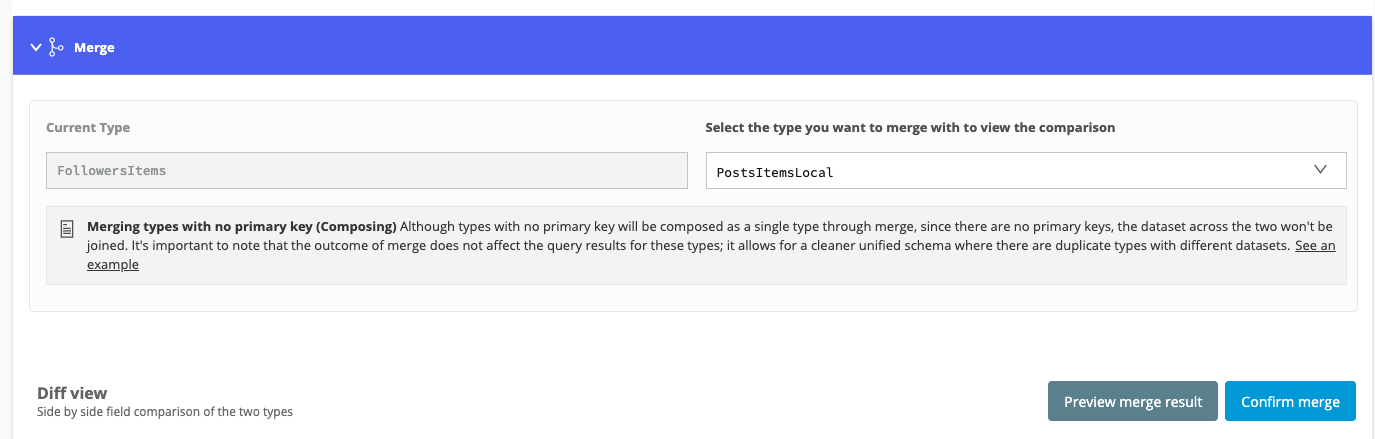
Merge types
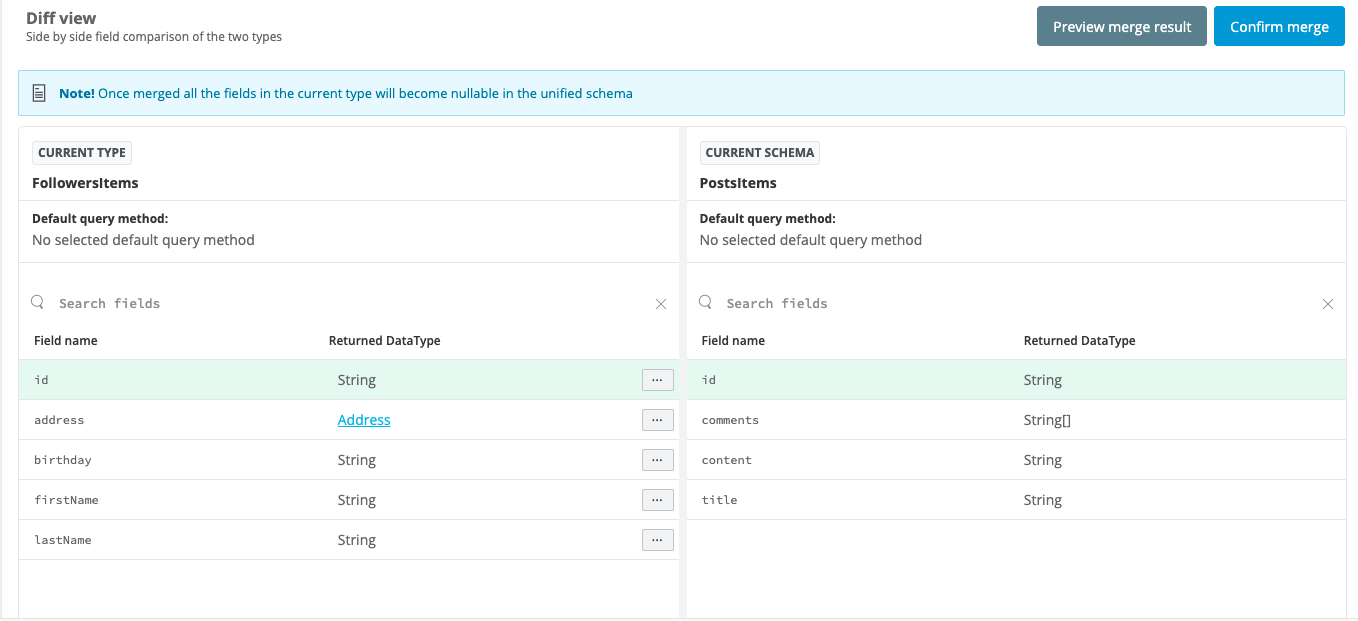
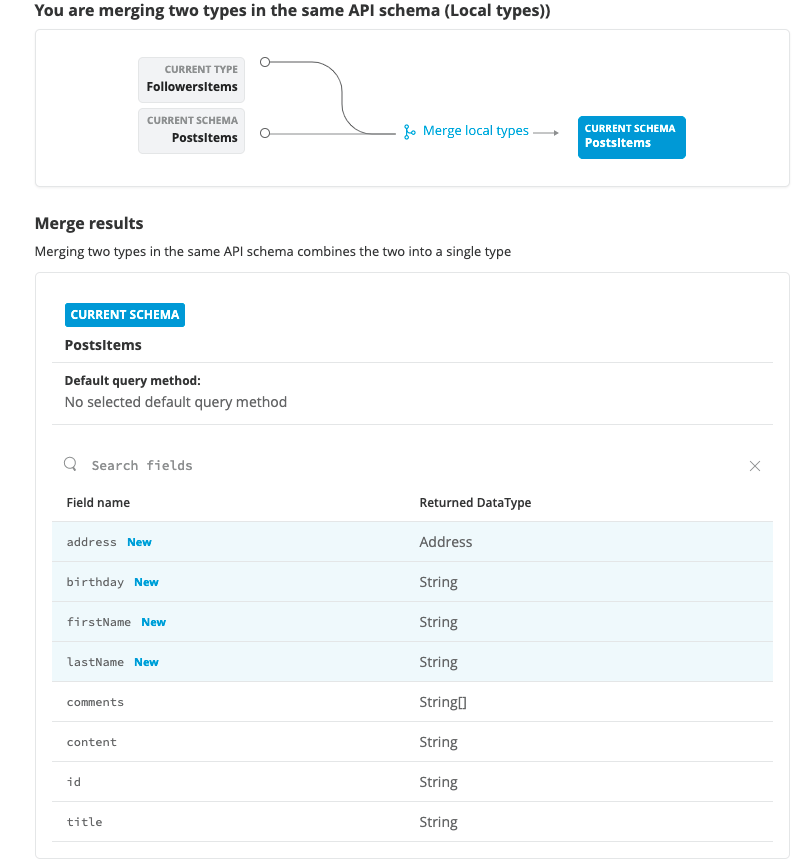
Merging enables you to merge an object type from our API schema with either another object type in our unified schema or another object type in the same API schema. When you merge a type, it allows you to combine fields and datasets that represent similar objects resulting in better query results. For instance, if you have a type named Followers with the primary key id, you may want to merge that data with the type Posts with the primary key id. In this merge example, when you execute a query, you get all of the data from both Followers and Posts under the same, single query. To execute a merge, scroll down on the Edit Schema step once you have selected the type you want to merge. Select the type you want to merge with and then click Confirm merge. You can also preview the merge result before which is highly recommended. Keep in mind that once merged, all the fields in the current type will become nullable in the unified schema.
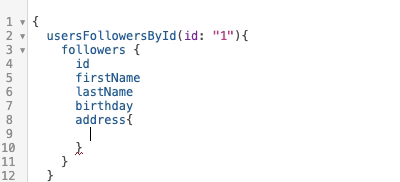
As you can see in the following screenshot, address, birthday, firstName, and lastName are now accessible under one single query when you query the endpoint. Without merging, you would have had to make two separate queries to fetch this data.
How to make your first GraphQL query using Anypoint DataGraph
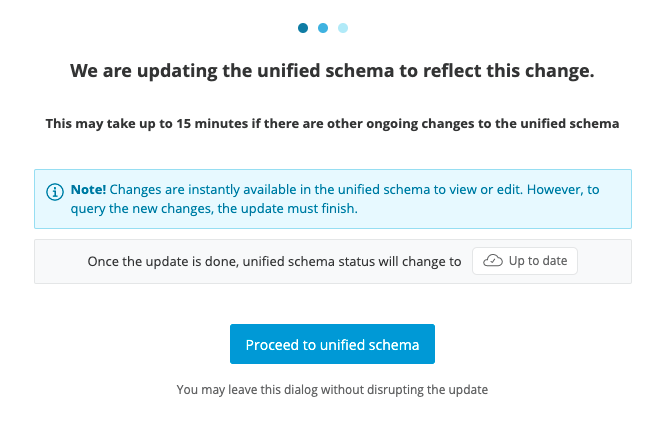
Once you have finished configuring your API Schema in Anypoint Datagraph, click Proceed to unified schema to apply changes to the unified schema. Depending on the size of your schema, it may take up to 15 minutes for your changes to go live and for you to be able to execute test queries.
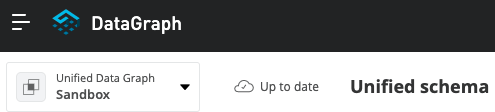
Once your Unified Schema is up to date, click Run a Query to test out your GraphQL API endpoint.
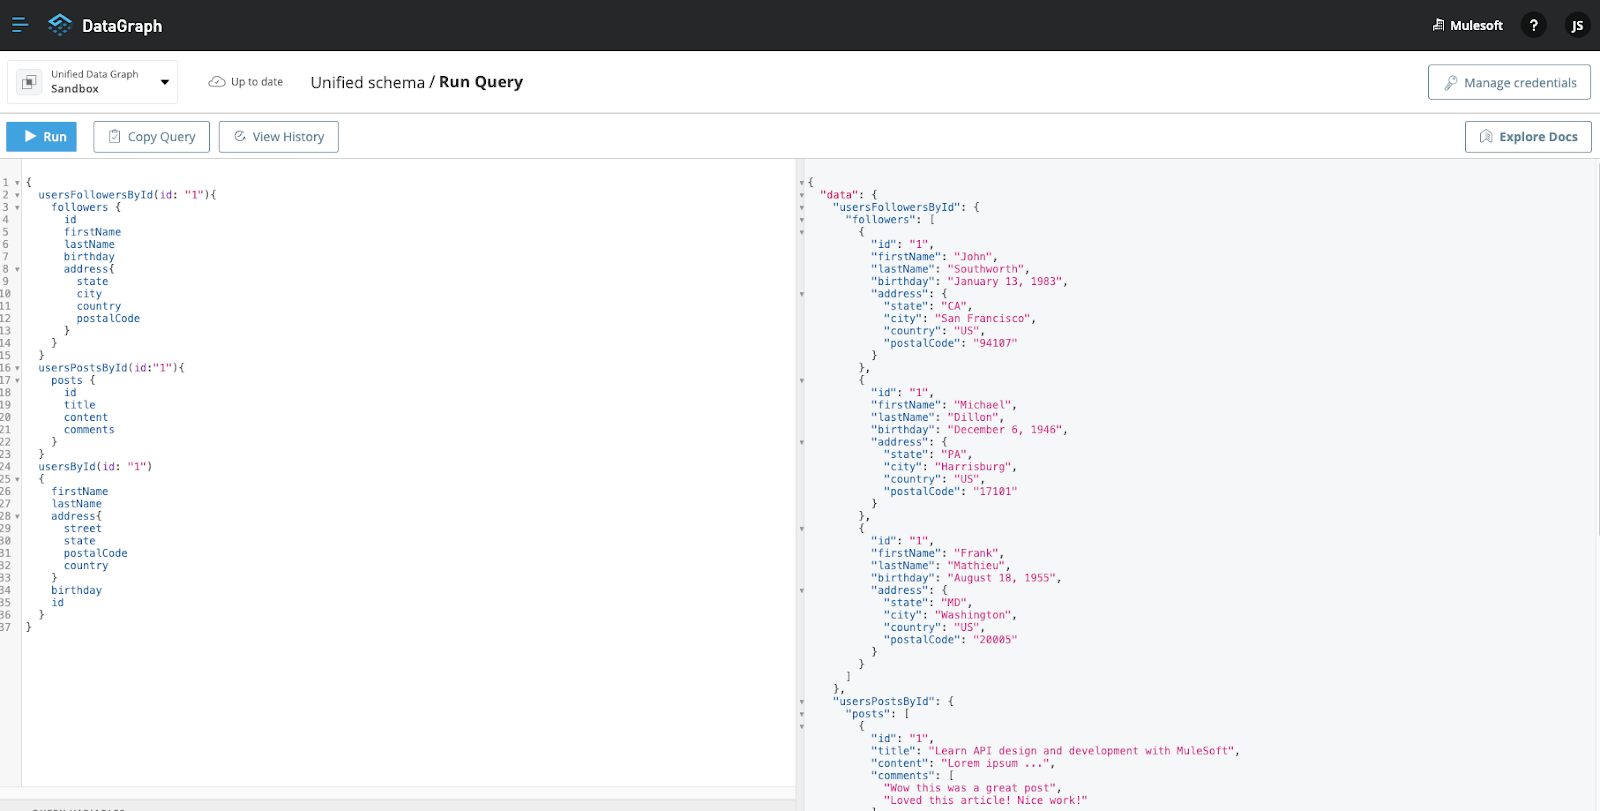
One awesome feature of DataGraph is that since you’ve already done the hard work creating your unified schema, DataGraph already knows what queries are possible to execute successfully. Just start typing and Anypoint DataGraph will give you inline suggestions of what queries are possible for you to execute.
Once you have finished building your query, click Run. The results are displayed on the right-hand side of your screen.


Try Anypoint Platform for free
Start your 30-day free trial of the #1 platform for integration, APIs, and automation. No credit card required. No software to install.
Questions? Ask an expert.
