Now that we have successfully designed our API Specification in our previous tutorial, and published our API to Exchange, let’s import our API into Anypoint Studio and build a simple integration. You can view the exchange asset that we will be importing here.
In this tutorial, we will learn how to scaffold our REST API with APIkit and connect our API to a MySQL database. Then, we will set up a data transformation using DataWeave to transform data from our MySQL database and return it in a JSON object when our API endpoint is hit. To build our first integration, we can use MuleSoft’s Anypoint Studio which enables developers to create integrations by simply dragging and dropping different connectors onto the canvas.
Prerequisites
- Anypoint Platform - We’ll need an Anypoint Platform account to design our first API. You can sign up for a free trial account here.
- Anypoint Studio - This is MuleSoft’s IDE! Anypoint Studio enables you to start building APIs and integrations quickly with hundreds of pre-built connectors, templates, and examples. Download Anypoint Studio here.
- REST Client - Download and install any REST Client of your choice. There are plenty of options out there for you to use, you can download MuleSoft’s Advanced REST Client, or you can use the popular REST Client Postman. We’ll be using Postman throughout these tutorials.
Import your API into Anypoint Studio
Before we import our API, let’s outline what we are trying to accomplish with this integration:
- We have 100 entries sitting in a MySQL database that includes customers: FirstName, LastName, Email, and Company.
- When an HTTP GET request is made to our API, we want our API to return all of the database values in the body of that response
- The challenge: All of the data lives in a database and we need to display the data in a JSON format in our HTTP request
Now that we have outlined what we need to accomplish in our integration, let’s build it in just a few minutes.
When you log in to Anypoint Studio, make sure to sync your Anypoint Platform account with Anypoint Studio. If you have not already done that go to Anypoint Studio -> Preferences -> Anypoint Studio. If you see your account name there, skip this step. If you don’t see your account name, click the Add button and login to your Anypoint Platform account.
Next go to File -> New -> Mule Project.

Name your project ContactAPI, and click the green plus in the “Add a dependency” section. Select from Exchange, then select the Contact API that you created and published to Exchange in the last tutorial.

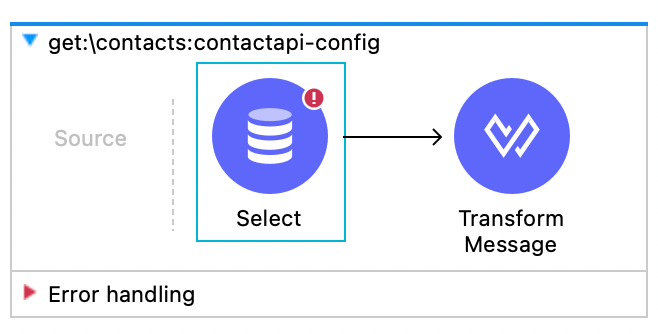
Select Finish and create your project. When you import your API Specification from Exchange into Anypoint Studio, APIkit will automatically create API scaffolding based on the API Specification we created in Design Center. As you can see, APIkit has split our project into three flows, contact-api-main, contact-api-console, and get:\contacts:contact-API-config. Additionally, APIkit automatically generates error handlers which will return a message to the API consumer if they send an invalid HTTP request to the /contacts endpoint.

Connect to a database
Next, scroll down to the get:\contacts:contact-api-config flow. This flow will run when an HTTP GET request is sent to the /contacts endpoint. The first step to building this integration is we need to fetch data from an external source. On the right-hand side of your Anypoint Studio window, you should see the Mule Palette. In the search bar, search for Database and drag the Select connector to the flow get:\contacts:contact-api-config.
Click on the Database connector, and set up your connector configuration by clicking the green plus. Select MySQL Connection at the top Connection dropdown field.

Then, click the Configure button and select Add recommended libraries to automatically assign drivers to your connector.

Once you add the JDBC Driver, add the following database credentials:
| Host | mudb.learn.mulesoft.com |
| Port | 3306 |
| User | mule |
| Password | mule |
| Database | training |
Next, click OK and then click the Test Connection button to verify that the connector is able to successfully connect to the database. Next, in the Query field, add the following MySQL Query Text:
1
SELECT * FROM customers;
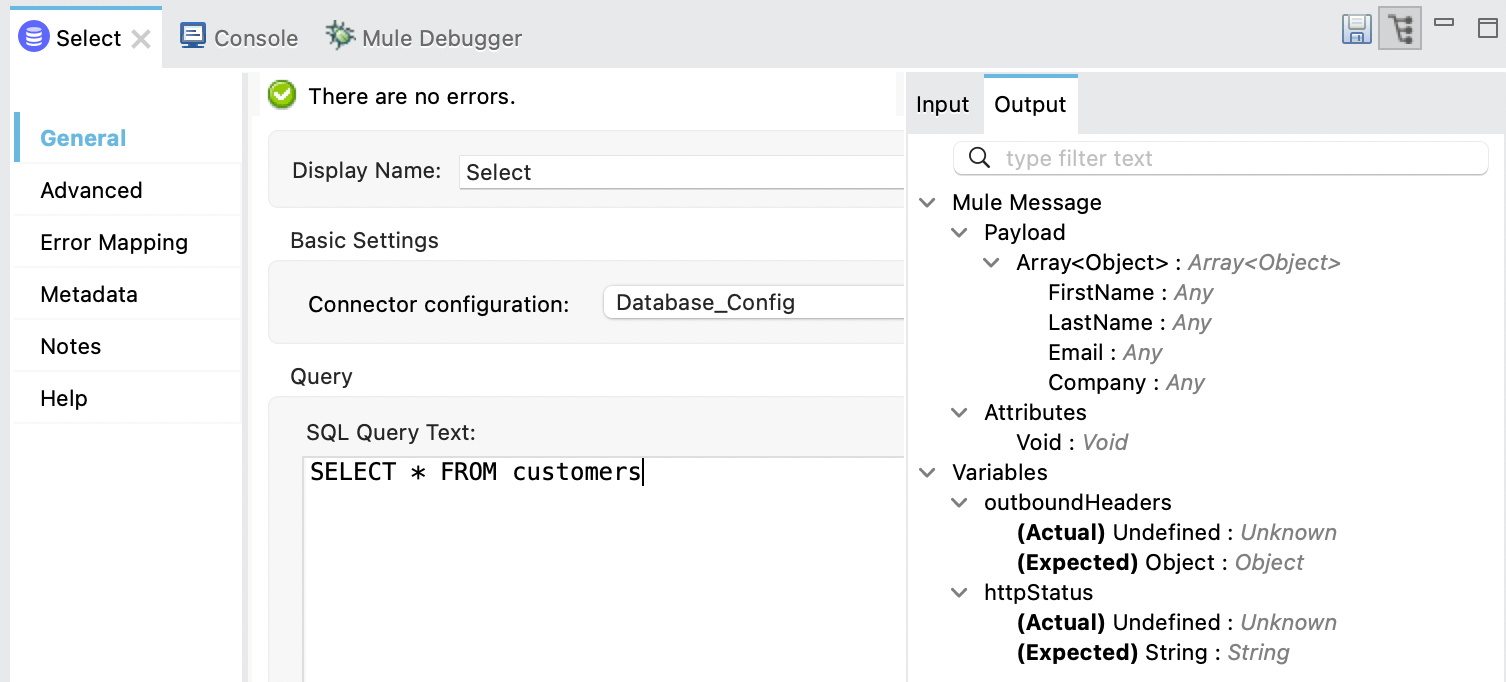
Save your changes. In the Output tab verify the Payload returned from the database table shows the table schema with the FirstName, LastName, Email, and Company columns.
Transform the data
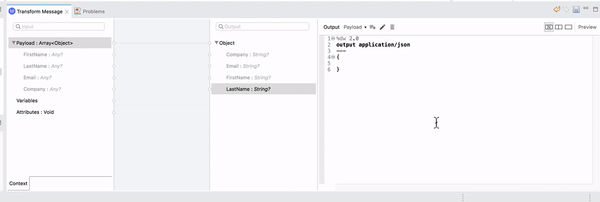
Now that we have successfully added our Database connector to our flow, we need to add a Transform Message to specify how we want our data to be formatted and served to the consumer of our API. To add a Transform Message connector, go to your Mule Palette and drag out the Transform Message connector and drop it as the next component in the get:\contacts:contact-api-config flow.

For our Contact API, we want the Transform Message to output each entry in the database as a separate object in an array. Luckily, this transformation is easy to make using DataWeave. DataWeave is the MuleSoft expression language for transforming data as it travels through a Mule Application. Let’s add the following DataWeave code to our Transform message to:
1
2
3
4
5
6
7
8
9
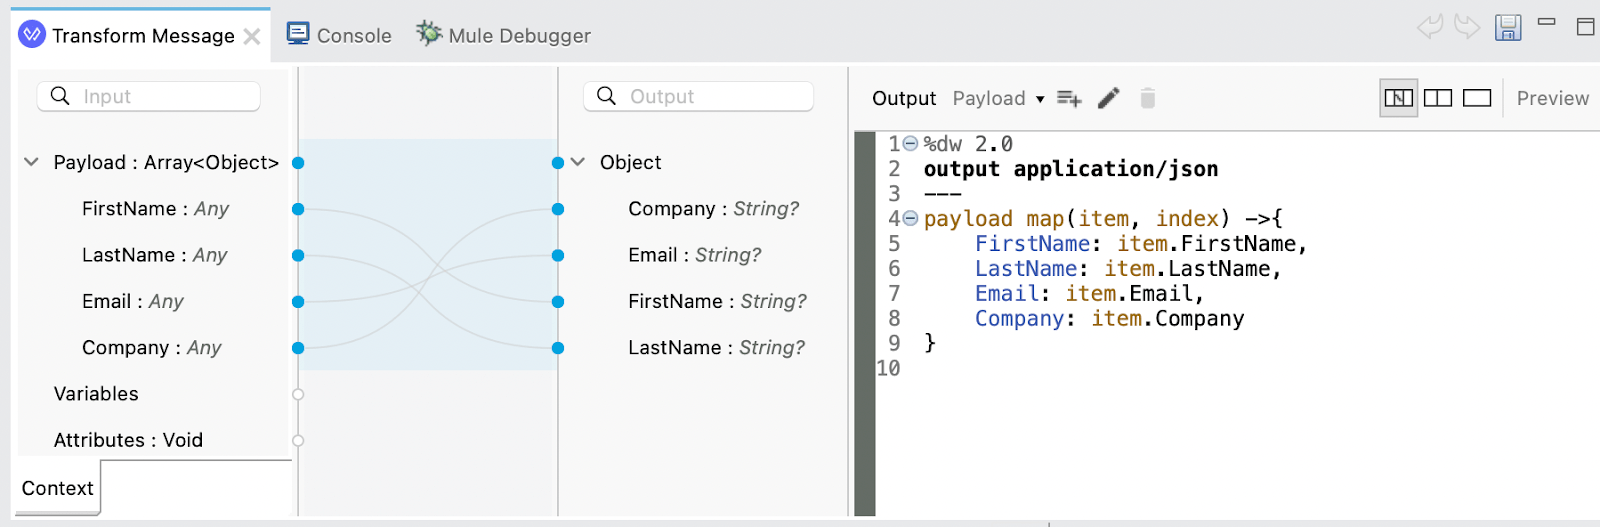
%dw 2.0
output application/json
---
payload map(item, index) ->{
FirstName: item.FirstName,
LastName: item.LastName,
Email: item.Email,
Company: item.Company
}
This DataWeave code creates a custom output that lists each database entry as a separate object in an array. As you can see in the below screenshot, the auto-mapper will connect each piece of data together, and you can simply drag and drop each value to transform the data between systems.
Next, save your project then right-click on your canvas and select Run project contactapi. If you navigate to Window -> Show View -> Console you can view the command line to see if any errors occurred during the build process. Congrats, you have completed the second step; continue to the final step to test out our first integration.
Test your API using localhost
Now that our project is running, let’s open up Postman to see if our API integration is working as expected. Send a GET request to http://0.0.0.0:8081/api/contacts.
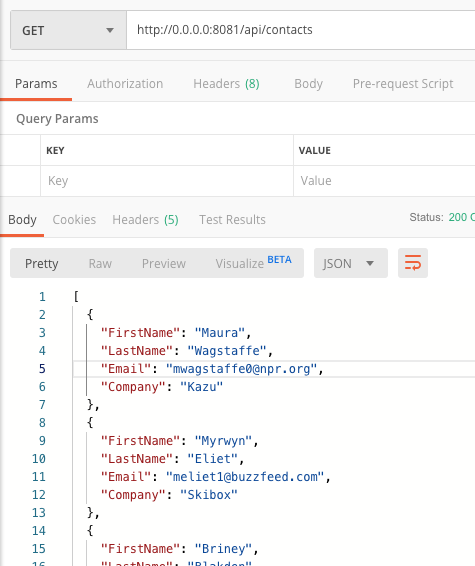
Because this is a GET request, you can also test this in a web browser window.

You should now get a successful 200 response which returns all of the database data in the body of the request. Keep in mind, this request might take up to 30 seconds to process. If you don’t receive a valid response, read the tutorial again to confirm you didn’t skip any steps.
Next steps
Congratulations on building your first mule application using Anypoint Studio. In the next tutorial, we will learn how to publish our integration to CloudHub, and set up API Manager to set policies and rate limits to our API.
Click on the Next button below to continue to the next tutorial.


Try Anypoint Platform for free
Start your 30-day free trial of the #1 platform for integration, APIs, and automation. No credit card required. No software to install.
Questions? Ask an expert.
