Getting started
If you haven’t read the first part of our Getting Started with DataWeave Series, click the link to learn how to build simple transformations using the DataWeave language. In this tutorial, we will be diving deep on how to build more complex data transformations using DataWeave.
Many developers that are using DataWeave have experience using map, filter, and reduce to build complex data transformations. Map allows developers to create a new array by applying a transformation function to each element of the input array, and filter allows developers to create a new array with elements that are removed from the input array. Map is a powerful tool that allows developers to customize one set of data from one data source to another. The filter function works great for removing elements that shouldn’t go into the data source and providing an output with the correctly formatted data structure. Lastly, the reduce function understands how to reduce a string, number, object or array, and output that results in a single value. All of these functions are highly beneficial when developing integrations using DataWeave, and by the end of this tutorial, you should have a better understanding on how to use map, filter and reduce in your DataWeave code.
Dynamic elements
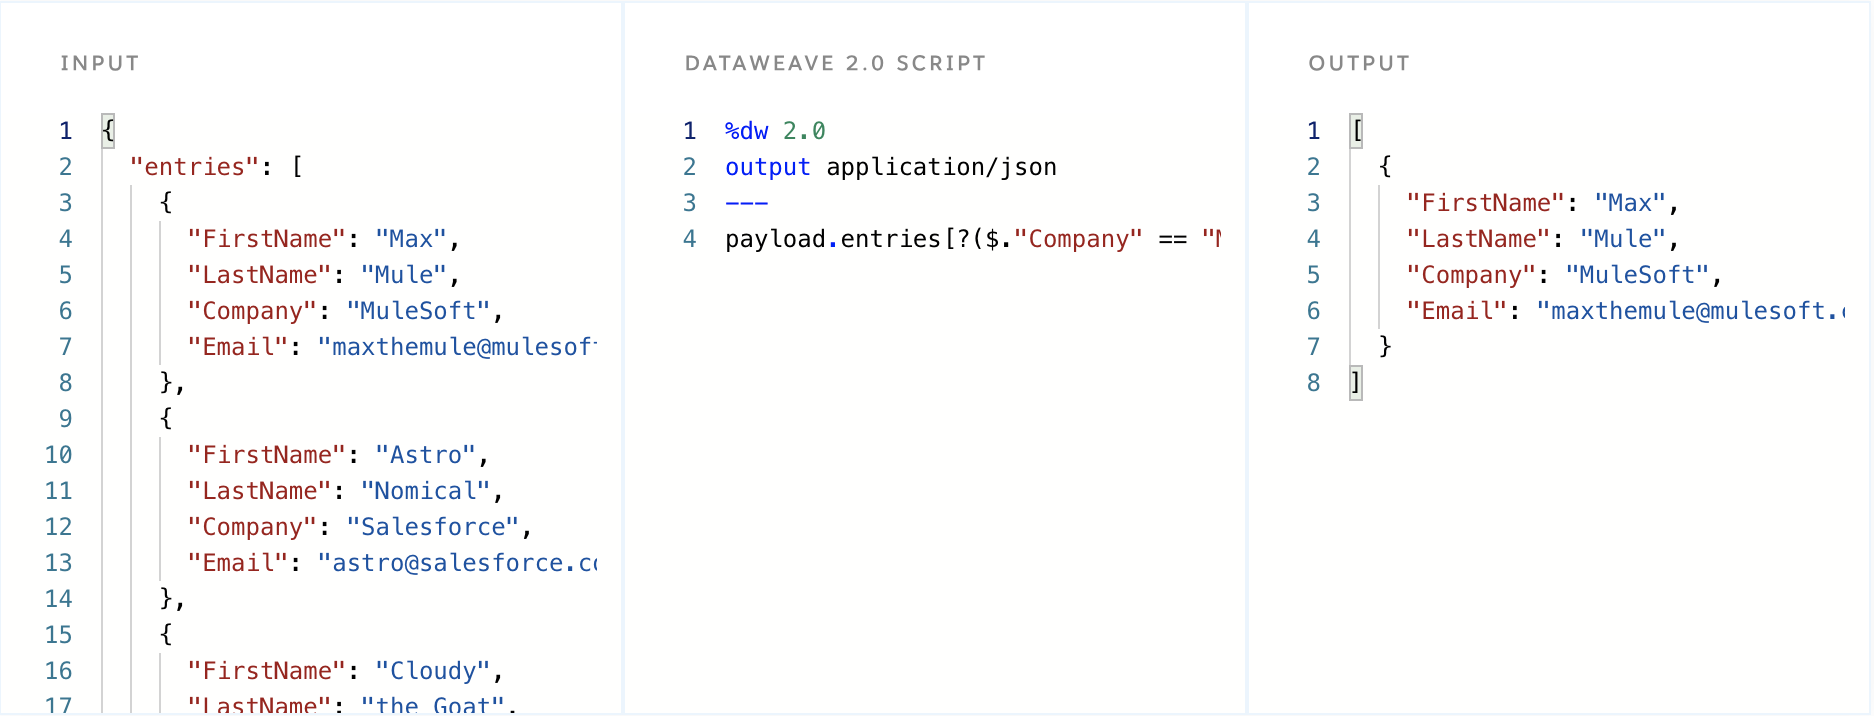
In DataWeave, there are multiple instances where you will need to output a list of elements from an array but not based on the index. In DataWeave, we have special syntax known as dynamic elements which allows you to add the result of an expression key-value pair of an object. In the example below, we return all of the entries in the array that match with the string in the conditional. First, we call the array by payload.entries, then in the square brackets, we use the filter selector defined by the question mark, which searches through an array or object for all key-value pairs. The condition is defined by a $ followed by a single-value selector which will return any value that belongs to its corresponding key. The dollar sign variable allows the code to gain access to each item in the array.
Map
Map is one of the most used functions in DataWeave and helps integration developers perform complex transformations that would have been previously a challenge. The map function in DataWeave is used when we want to modify elements in an array and perform a series of tasks on each entry. Map essentially transforms one payload into another format which is desired by the target endpoint. One important concept to understand is that the map function isn’t actually modifying the array, it’s creating a new array from the specifications that you define in the map function. Nothing in DataWeave in mutable, which essentially means that once a specific element is created, it can’t be changed again.
Let’s take a look at how the map function works on the most basic level by checking out the example below. In order for the map command to work, we must be calling the map function on a data type structured as an array. In the below example, the input is formatted in JSON and the data is wrapped in an array. When the map command is run on the input, we specify that we want a Full Name field instead of a separate FirstName and LastName field. In order to achieve this transformation, we mapped the payload by specifying the desired output format in our DataWeave script.

Mapping using selectors
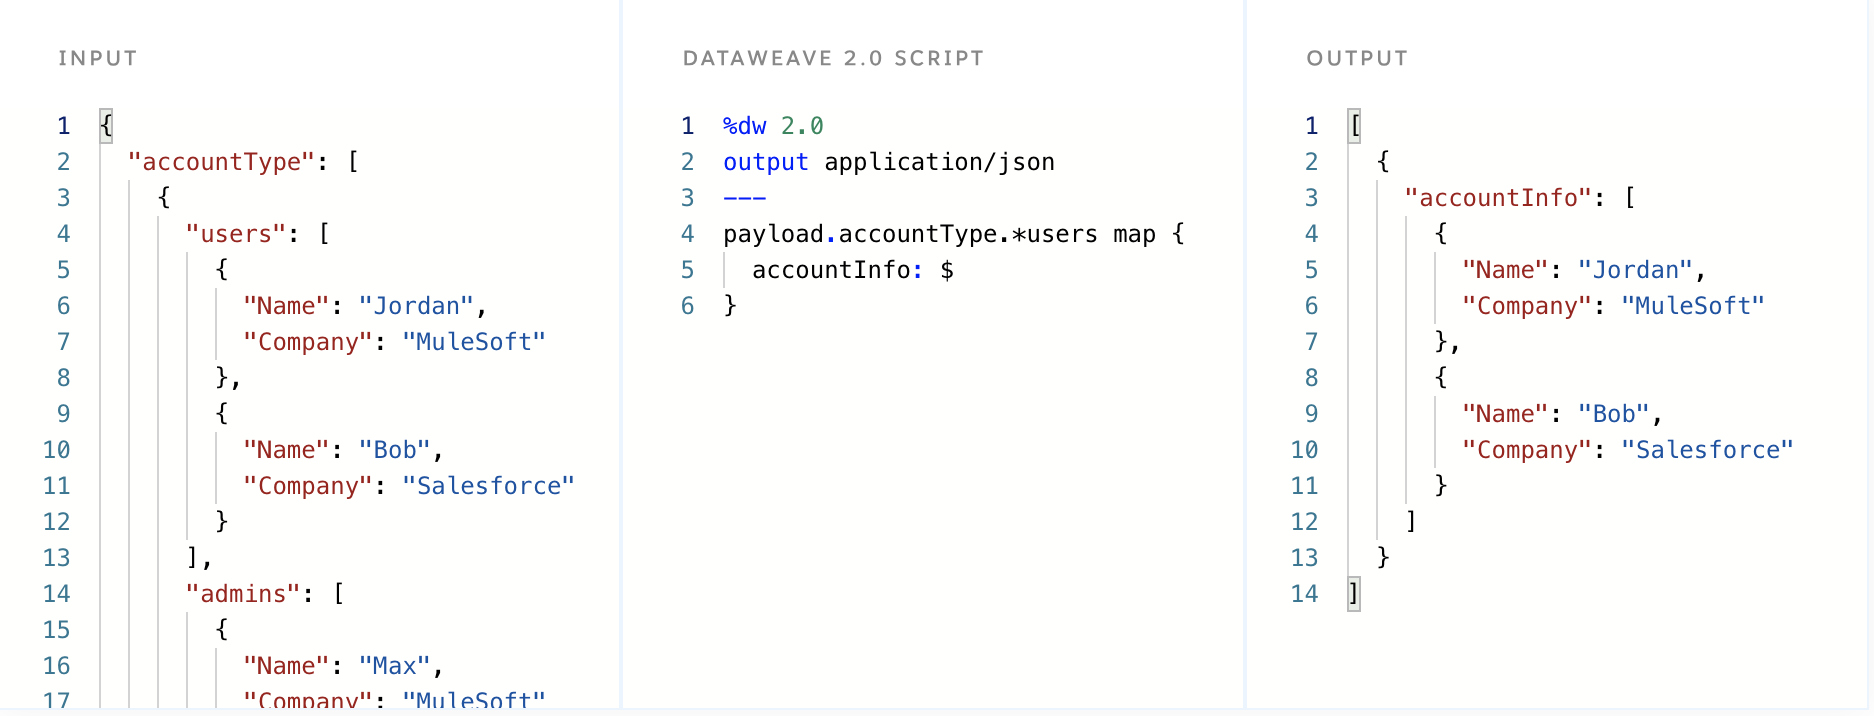
Now let’s move on to a more complicated map example using selectors. In the demonstration below, the sample input data has all of its elements listed under accountType, where there are two sub-sections, users and admins. Inside of each of these arrays is user information which includes the person’s Name and Company. The goal is to list out ONLY the data under the users array which will be remapped under the array named accountInfo.
To achieve this transformation, we start off by defining that we want to map the payload.accountType array. We then use a multi-selector, signified by *users, which is used to run the map command on entries matching with the name users. In DataWeave, you can represent the index count by using a double dollar sign $$ and can represent the element with a single dollar sign $. In this example, we use the single dollar sign to list out the elements in each object.
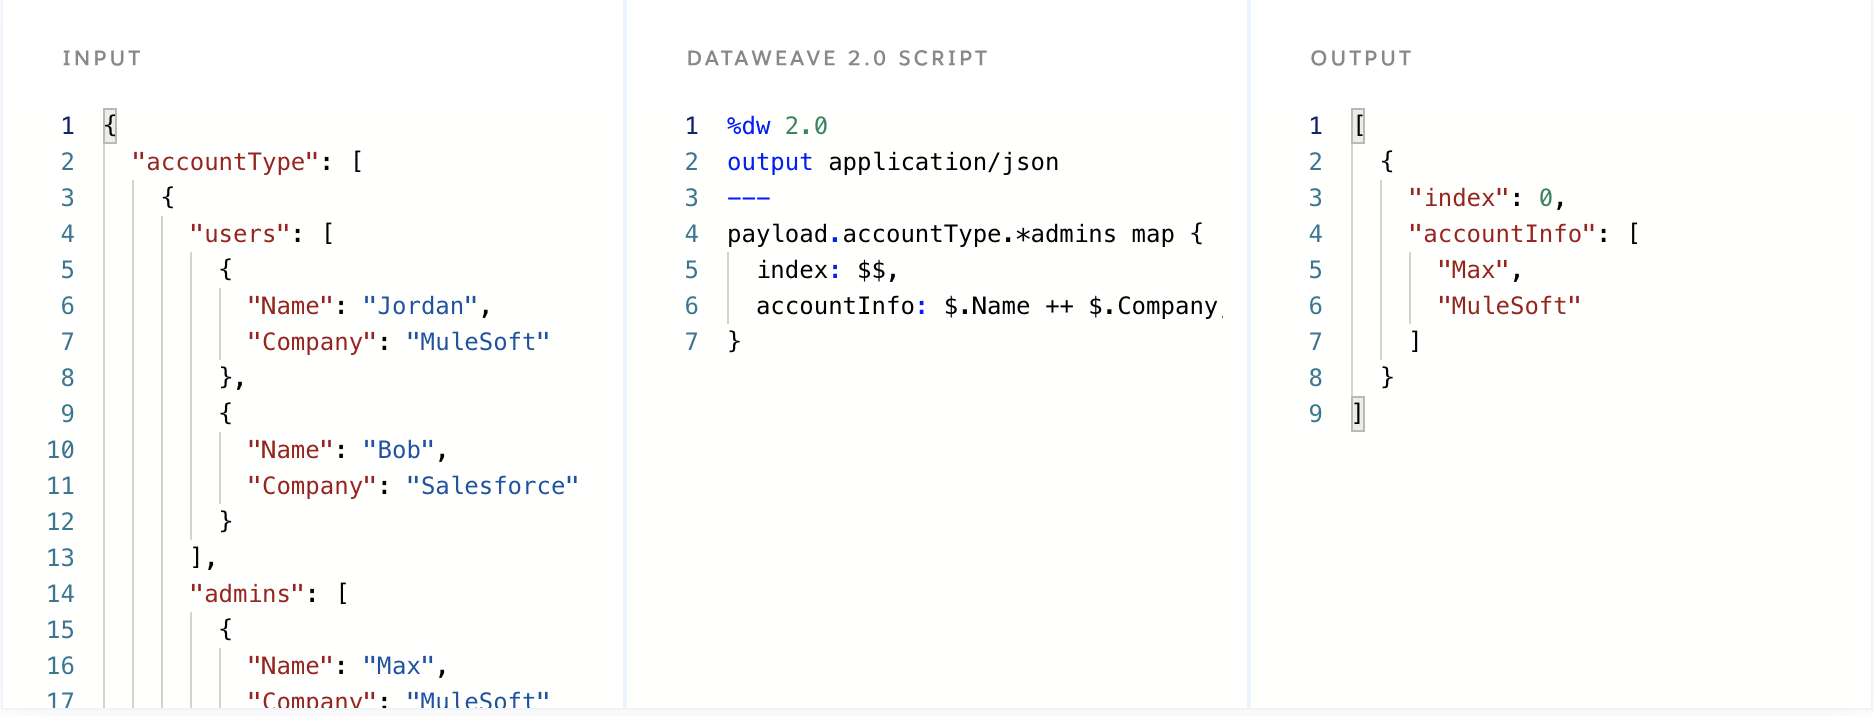
In the example below, we changed the multi-selector to now only look at the admins fields, and additionally added an index for the output. Additionally, we use the $.Name to grab only the name elements out of the input. Additionally, we added $.Company to the accountInfo array as well.
mapObject
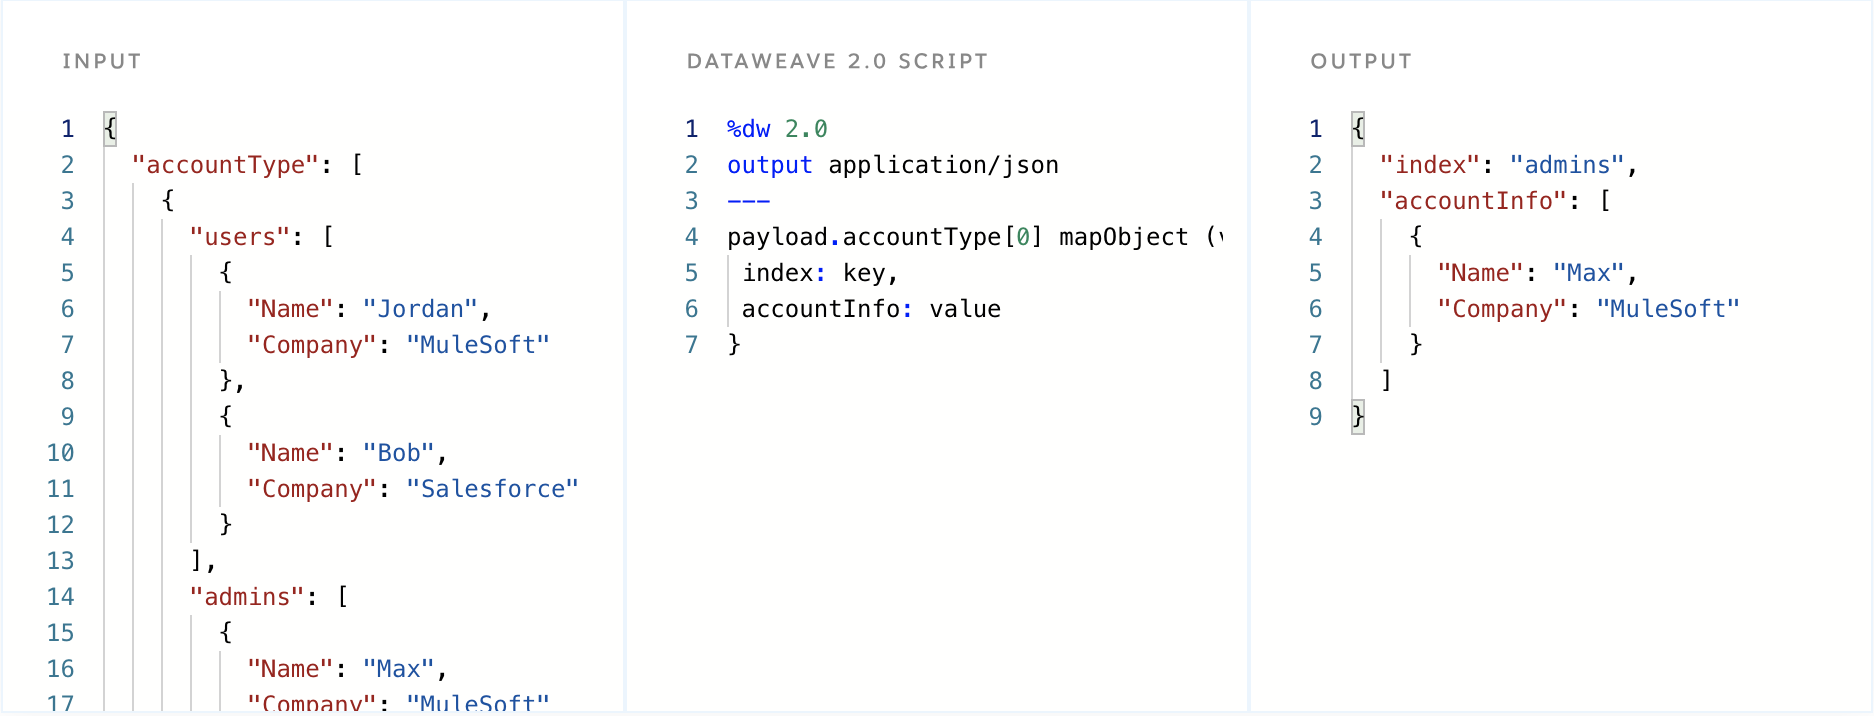
The mapObject function processes both keys and values, and returns an object with the key-value pairs that result from processing the object through the function. In the example below, the mapObject iterates through the accountType array and returns each key (which are users, and admins in this case). In the output, each value is nested under each key based on the structure in the input payload. Each value is sorted and displayed under the key that the data originally was found. The mapObject function requires the input payload to be an object. If you look at the mapObject output vs the map output, you will notice that mapObject returns an object while map returns an array.
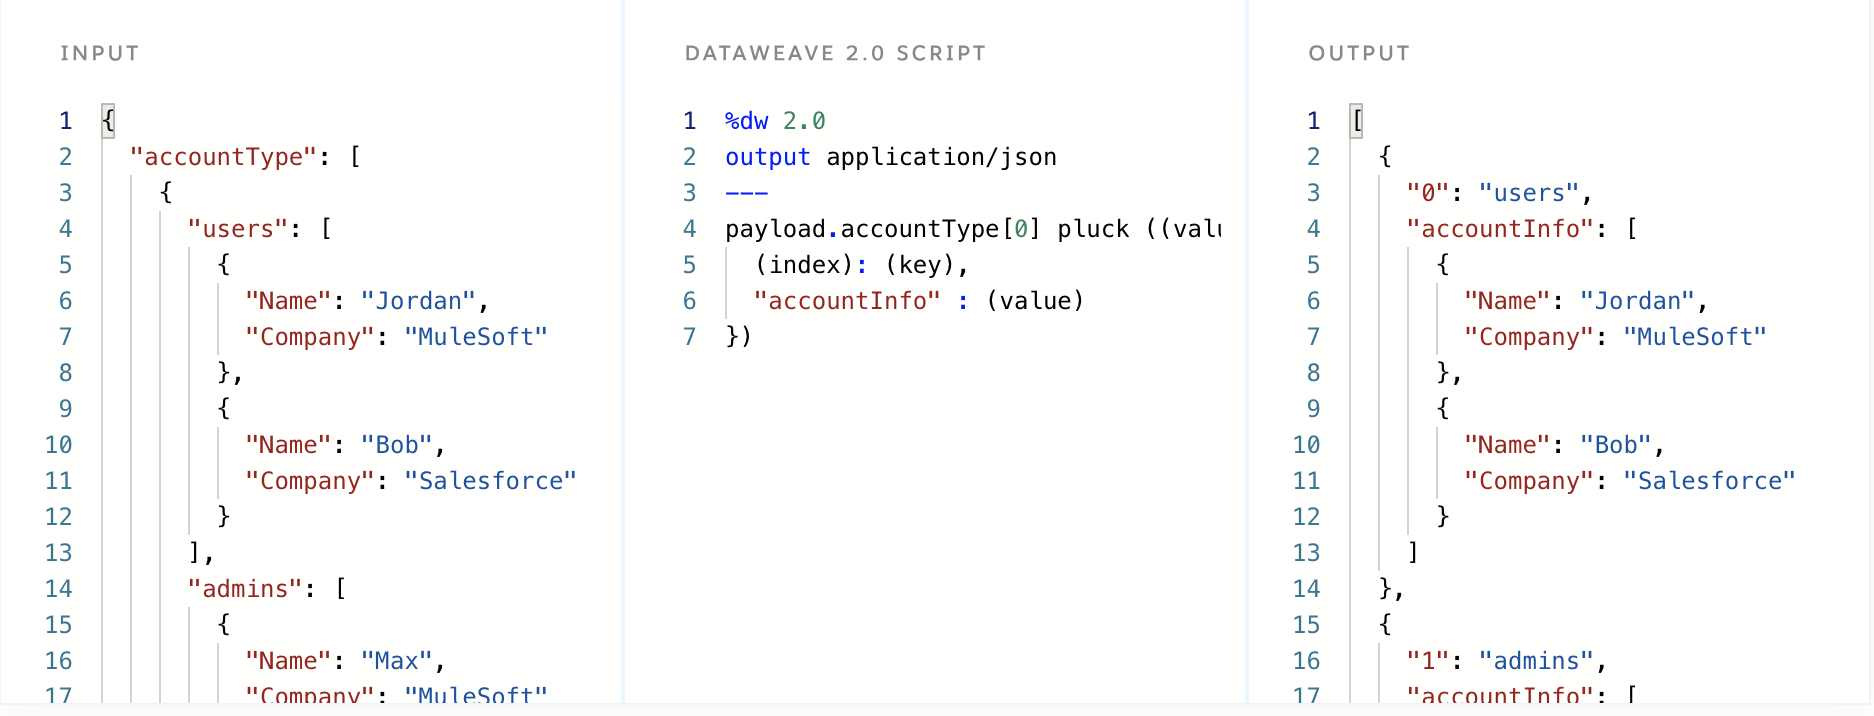
Pluck
The pluck function is an alternative to the mapObject function. Pluck is used to map objects and return the resulting payload into an array. Pluck works by iterating over an object and returning an array of keys, values or indices from the object. In the demonstration below, we are formatting the output in the same format as the mapObject example. The main difference between Pluck and mapObject as demonstrated below is the output is an array instead of an object.
Filter
The filter function iterates over an array and applies an expression that returns matching values of that expression. The expression must return either true or false, and if the expression provided has no matches, the output will return an empty array. In the demonstration below, notice how the output only returns items that are greater than or equal to 2, and the items that return false are omitted from the output. Keep in mind that the filter function will only work on array inputs. If you want to filter objects checkout the filterObject function next.

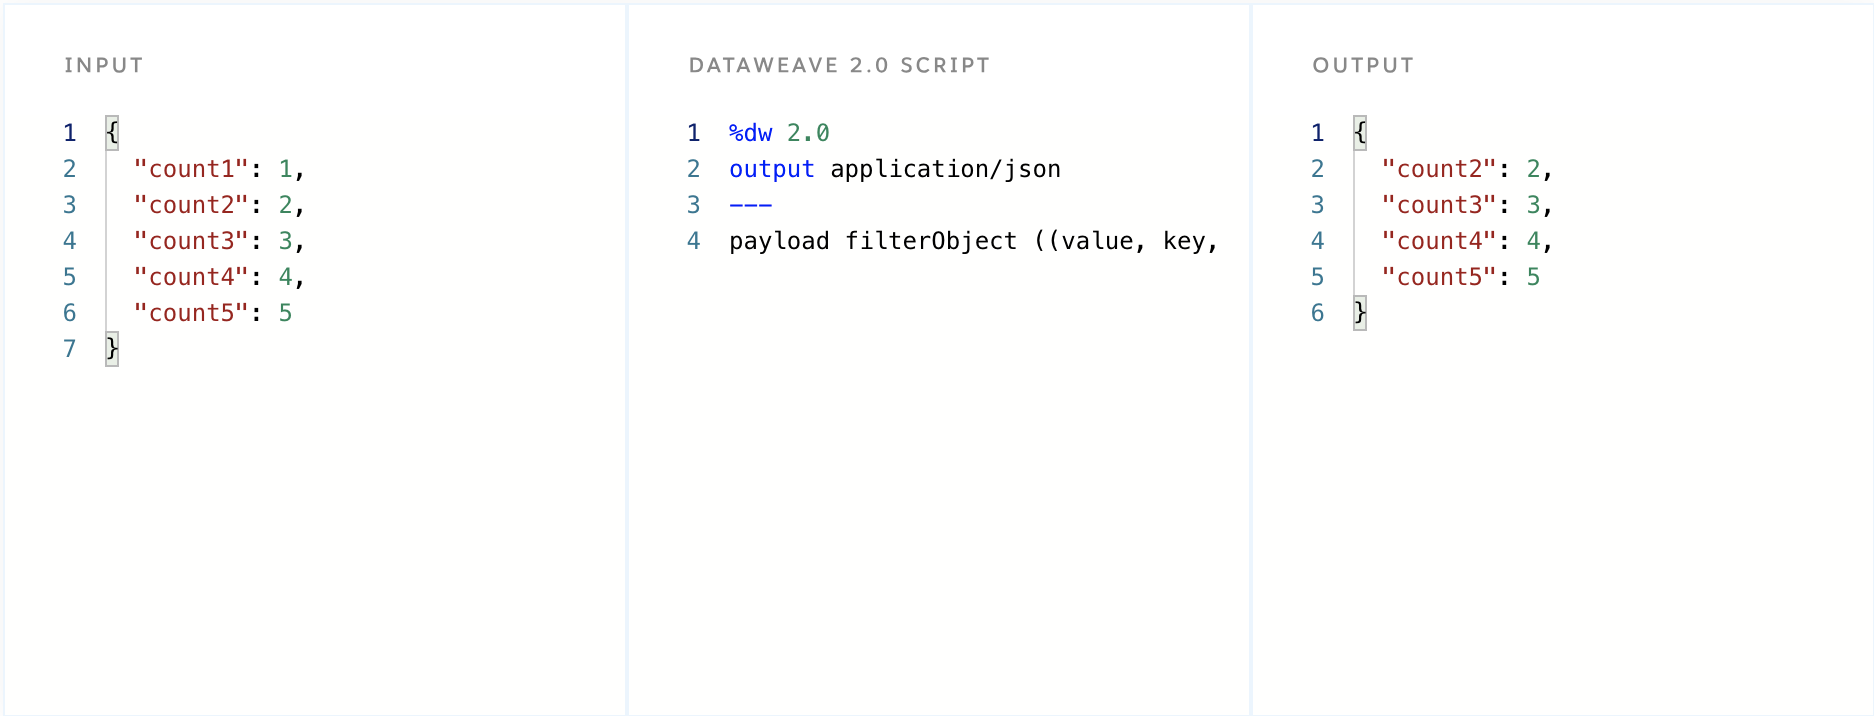
filterObject
The filterObject function works in a similar fashion to the filter function, however, instead of returning an array, it lists out the key-value pairs in an object and applies an expression that returns only the matching objects. If the expression provided has no matches, the output will return an empty object. Additionally, the expression must only return true or false. If true, it will return the object, and if false the object will be filtered out. To demonstrate this, look at the example below. Notice in the demonstration below, that all values greater than or equal to 2 will return true, and any value that is below 2 will return false. That is why the output does not include the first value that was included in the input.
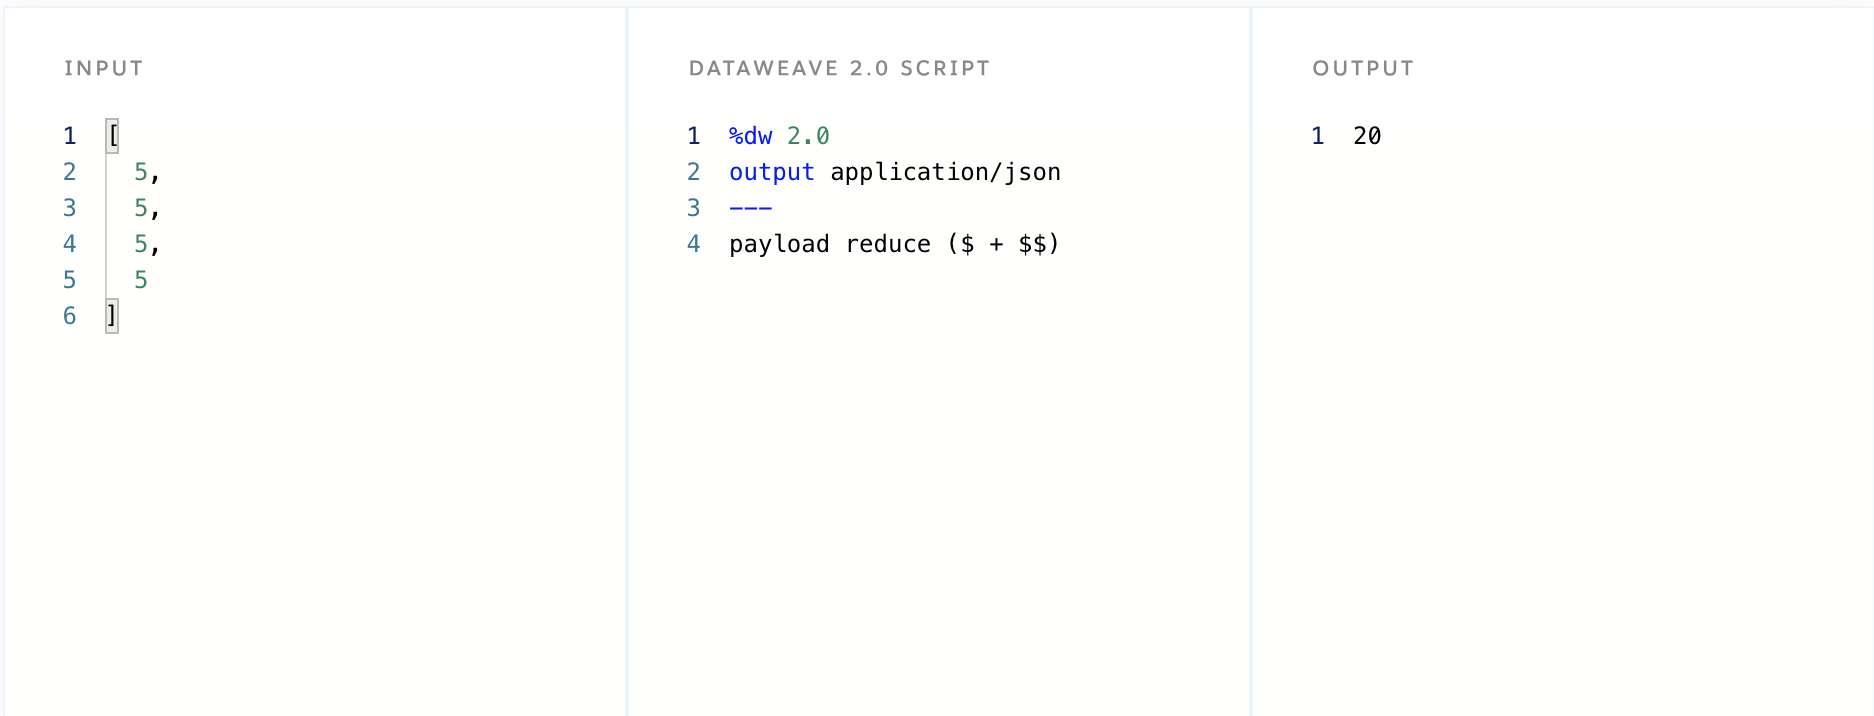
Reduce
The reduce function operates on each value of an array and returns a single value as the output. Reduce takes two arguments, the first represents the current value of the iteration, and second is the accumulator which stores the most recent result after each iteration. The accumulator can be viewed as the output variable since it contains each output as the iteration is run through the array. In the demonstration below, each item and accumulator are added together in order to get the final output of 20. The item is referenced as a $ and the accumulator as a $$. You can think of this as ( 5 + 5 + 5 + 5 ) = 20
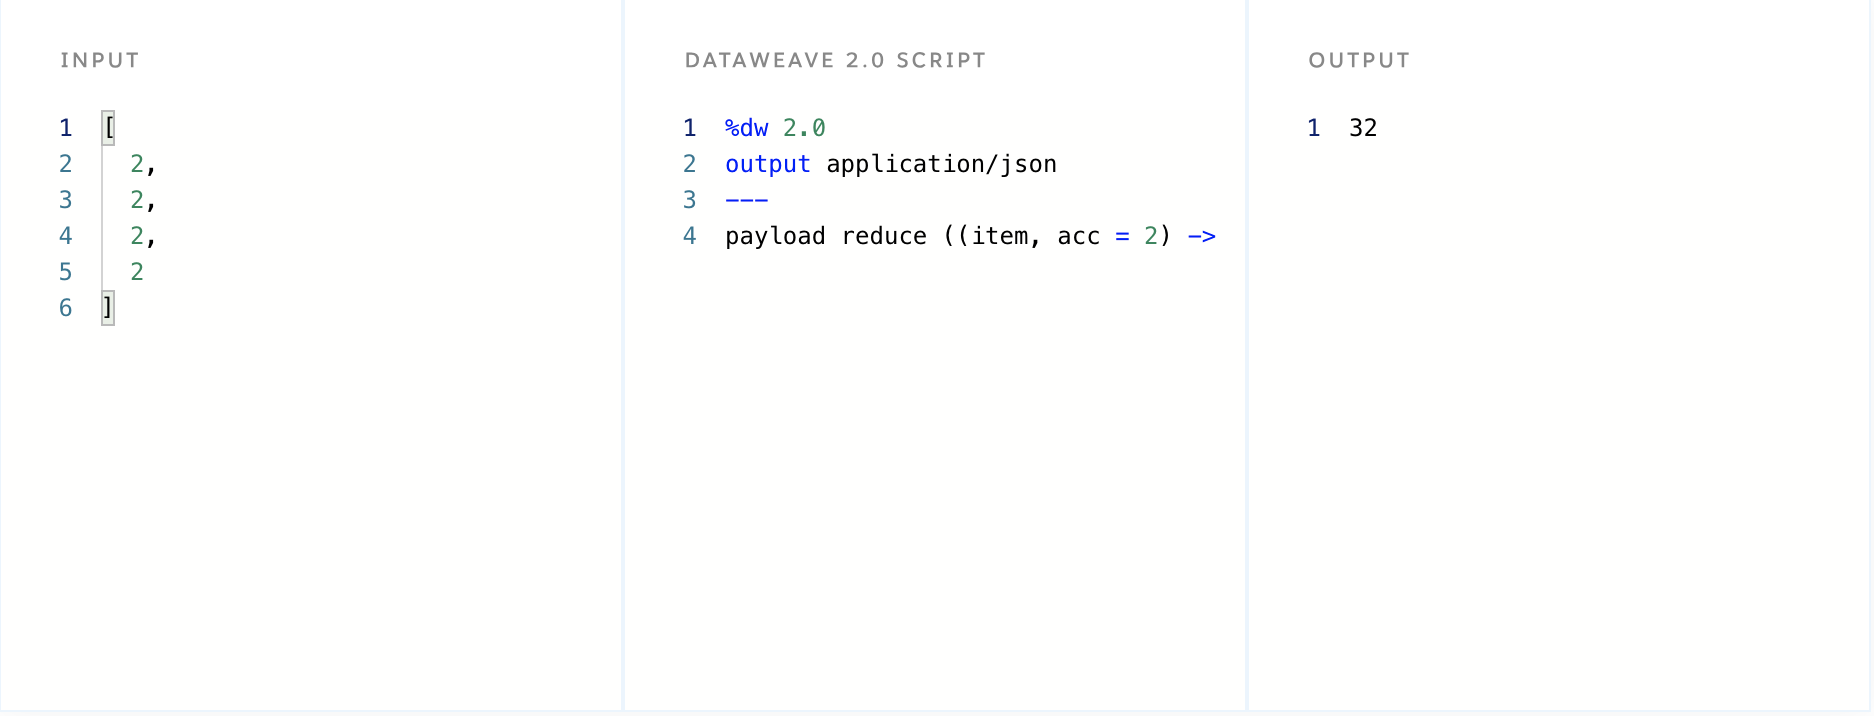
In the example below, we used reduce on the payload [2,2,2,2], except this time passed an accumulator with the value of 2. In the script below, the output is 32 and this is calculated by the equation (2* (2*2*2*2)).
Conclusion
Now that you have a better understanding of how to use map, pluck, filter and reduce, click on the Next button below to continue to the next tutorial to learn how to get started with strings and equations in DataWeave.


Try Anypoint Platform for free
Start your 30-day free trial of the #1 platform for integration, APIs, and automation. No credit card required. No software to install.
Questions? Ask an expert.
