Overview
MUnit is the Mule application testing framework that enables developers to create, design, and run unit and integration tests on Mule applications created within Anypoint Studio. If this is your first time learning about MUnit, check out our tutorial on how to create your first MUnit test in Anypoint Studio.
In this tutorial, we will learn how the MUnit test recorder works and how it can simplify the testing process. The test recorder allows you to create tests for your application without the need of writing any code, empowering you to build more robust applications and ensure their quality to meet any test coverage requirements.
Step 1: Signup for free and download Anypoint Studio
To get started, click the button below to create a free Anypoint Platform account.
Already have an account? Sign in.
If you have already done this step, make sure you are logged in. If you haven’t read the previous two tutorials, start by creating your first API by clicking here.
Next download the latest version of Anypoint Studio for FREE by clicking here.
Step 2: Creating an example application
For the purposes of this tutorial, we will create a simple app that will help us explore the different capabilities of the tool. To do that, open Anypoint Studio and select File > New > Mule Project.
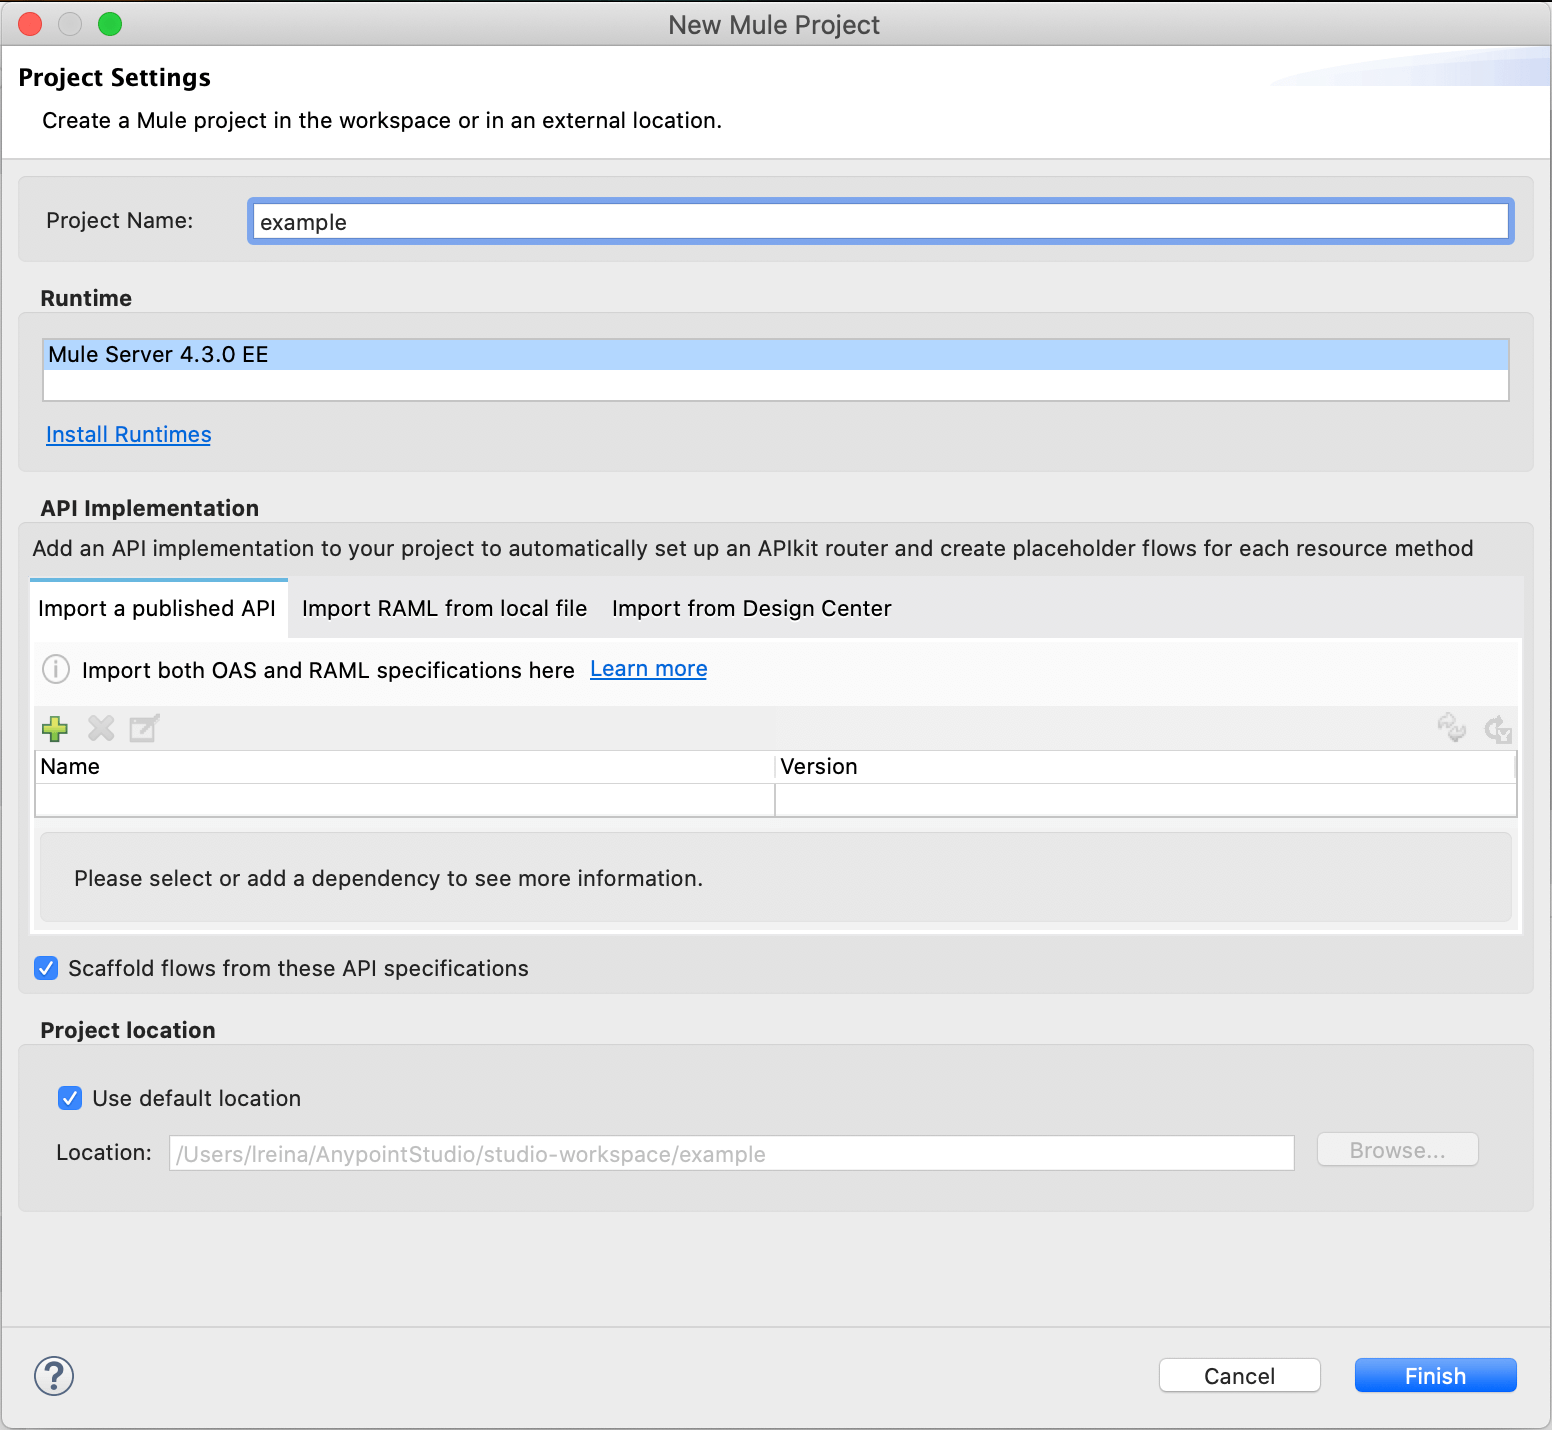
Give your project a name and then select a runtime. Note that the recorder requires at least Anypoint Studio 7.5 and Mule runtime 4.2.2 to work. Leave the remaining default options as they are and click Finish. You should now have a view similar to the one below.

Before anything else, we need to add a module that we will be using in our example. On the palette on the right, click on Add Modules and look for ObjectStore.
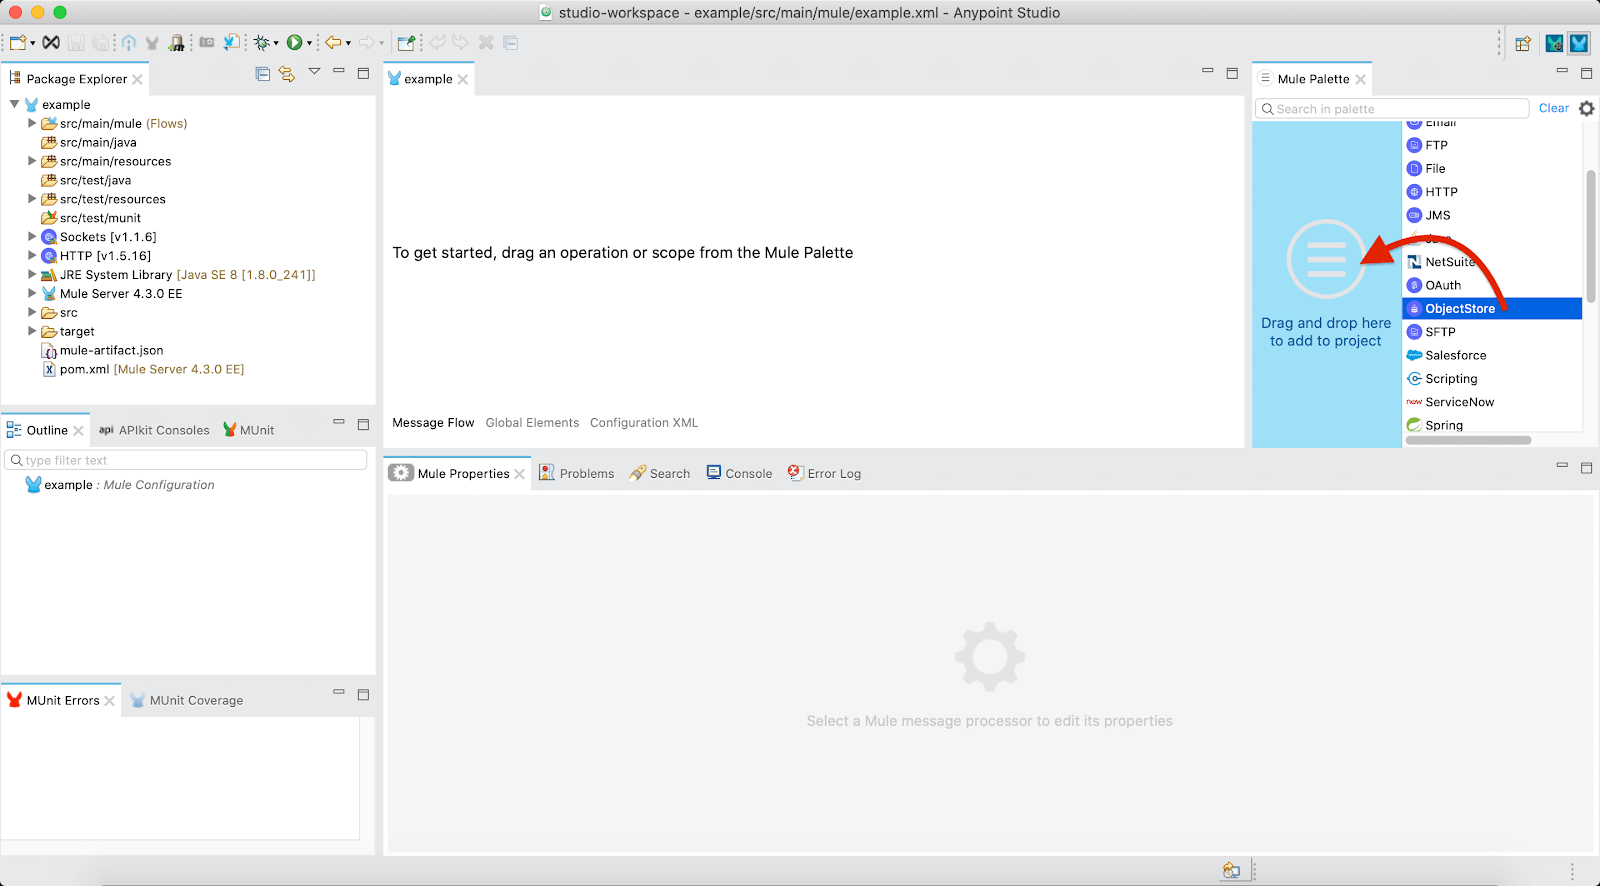
Drag and drop the module from the right column to the left one in order to add it to your project. A pop up will show up to specify the version of the module. Leave the default value and simply click Add.
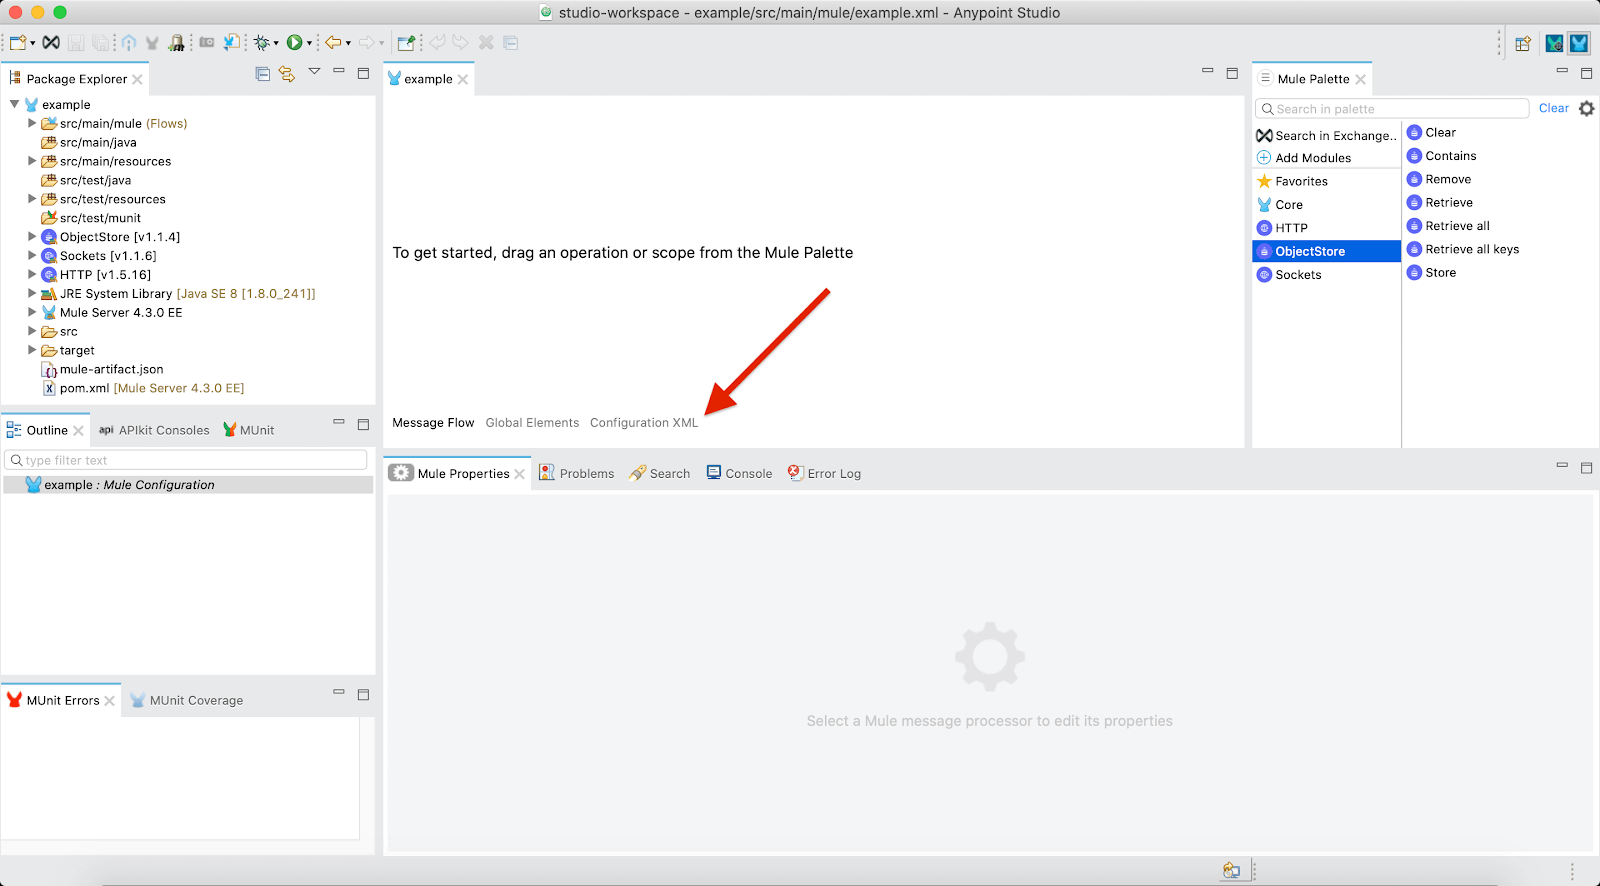
Now we just need to create a flow to be tested. Click on Configuration XML and paste the following snippet of code, overriding any previous content:
This is a flow that receives a list of numbers and a name used to store said numbers, and returns either ‘SUCCESS’ if the name and the list were valid, and ‘FAILED’ otherwise. While a little trivial, this should help us understand the usage of the MUnit test recorder.
Step 3: Start the recorder
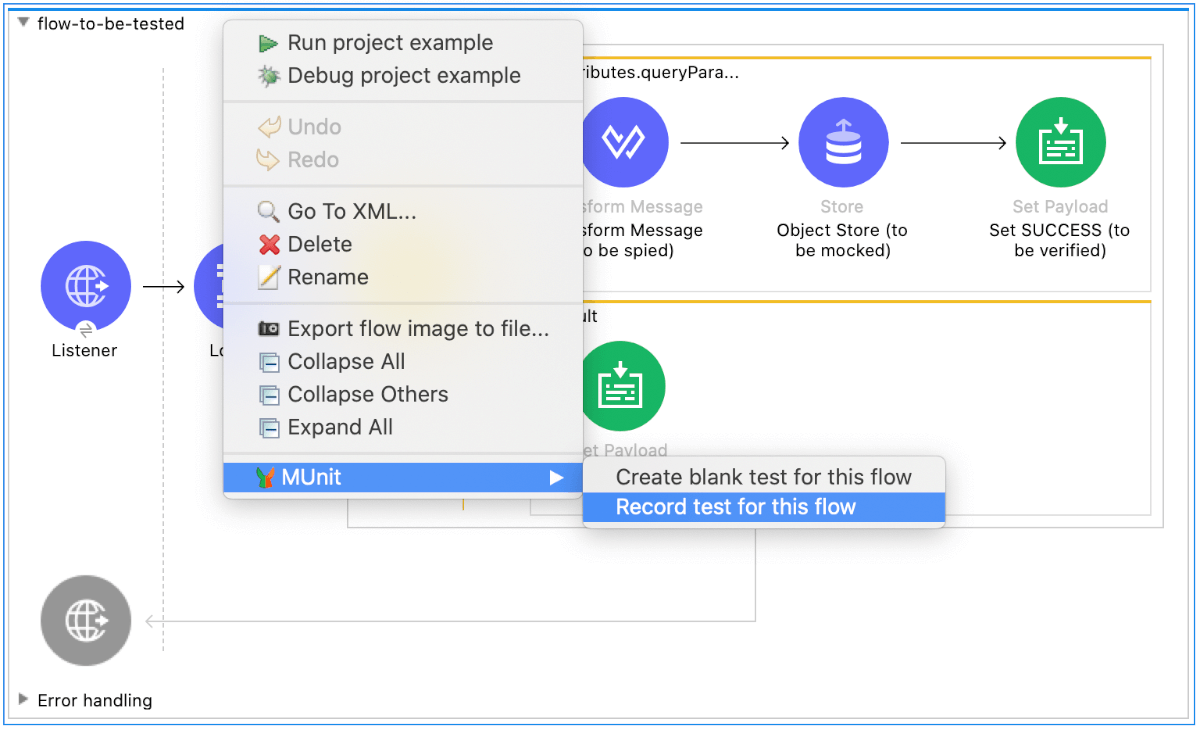
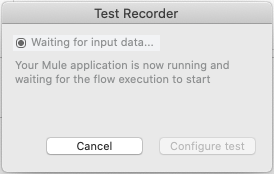
To start the recording, right-click on the flow and select the option MUnit > Record test for this flow. This will launch the application and show a pop-up.
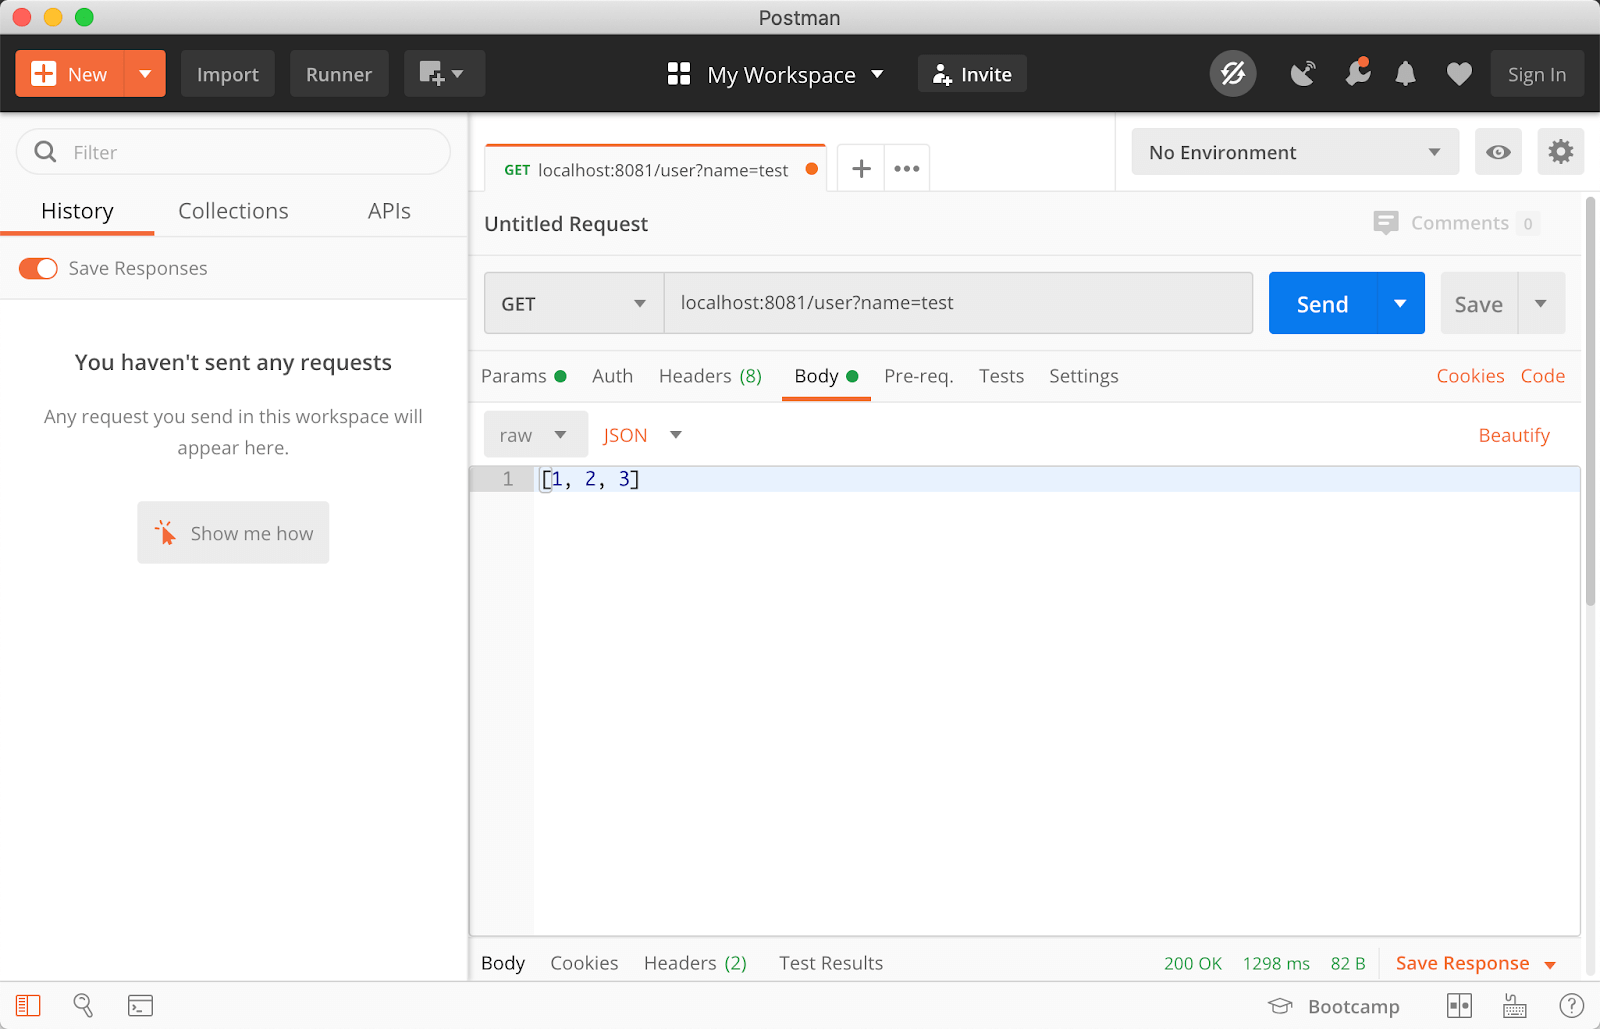
Now we need to invoke the flow. In this case, it has an HTTP listener as a source, so we should send a request. We could, for example, use curl to do this by running in a terminal:
curl --header "Content-Type: application/json" -d "[1, 2, 3]" "http://localhost:8081/user?name=test" -w "\n"
Or we could use a tool such as Postman, in which case it should look something like this:
Once the flow has been started with your weapon of choice, the Recorder will start inspecting the information moving through your app. After the execution finishes, the Recorder will be ready for configuration.
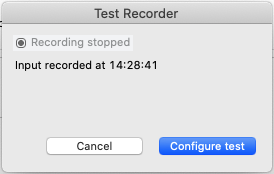
Now click on Configure test and we will move on to the configuration of your new test.
Step 4: Configure the test
By now you should be looking at a screen like the following:

This is the welcome screen of the recorder wizard. Here you can set the name of the file where your test will be created, along with the name of the test itself. For this example we will leave the default values, so simply click next.
Step 4.1: Input and output
Now we move to configuring the test content. In this step, the view is split vertically in two parts. To the left, there is a tree view of the flow being tested and its processors. To the right, there is a description of the possible MUnit actions for each processor.
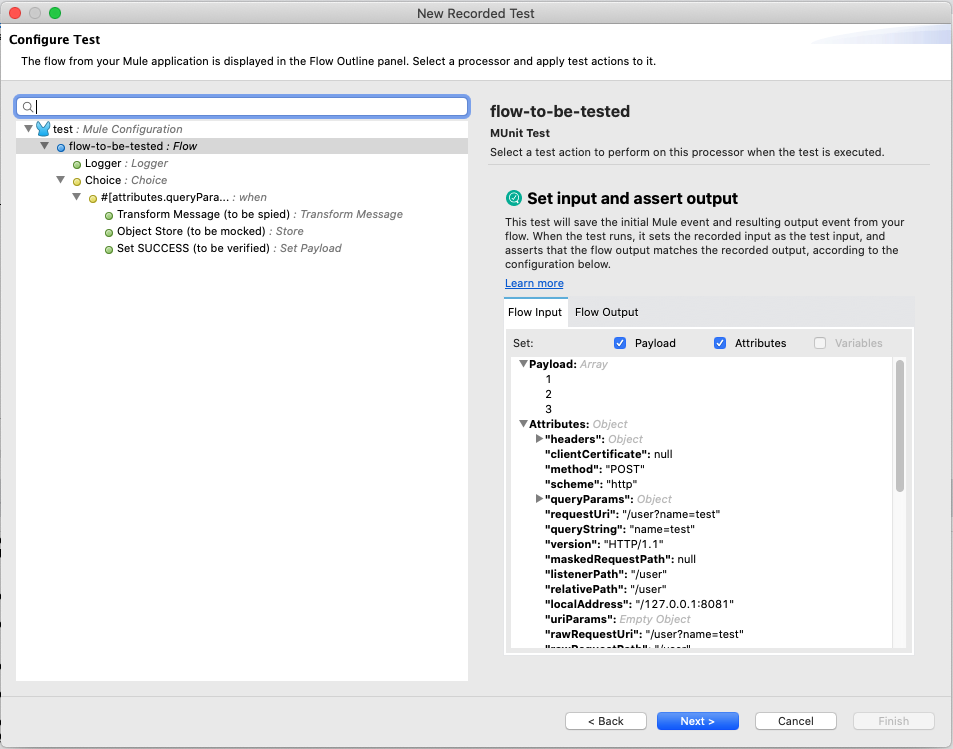
Notice that processors that were not called do not appear. This is because only relevant processors (i.e. those with intercepted information) are shown. On the right, the current configuration for the selected item can be found. The first tab is where the configuration for the test input can be done, and on the tab right next to it the output assertions can be customized as well. Since the default values are exactly what we want, we won’t touch anything in this case.
While we could leave things as they are and the test would work, we will configure some more actions in order to make the test a little more robust. Before we click next, let’s add some other MUnit tests.
Step 4.2: Spying
Let’s start by selecting Transform Message (to be spied) on the left side, and on the right we will choose Spy this processor. This action will let us check that the input and output of a single processor are as expected. In this case we would be checking that the DataWeave script is working as expected.
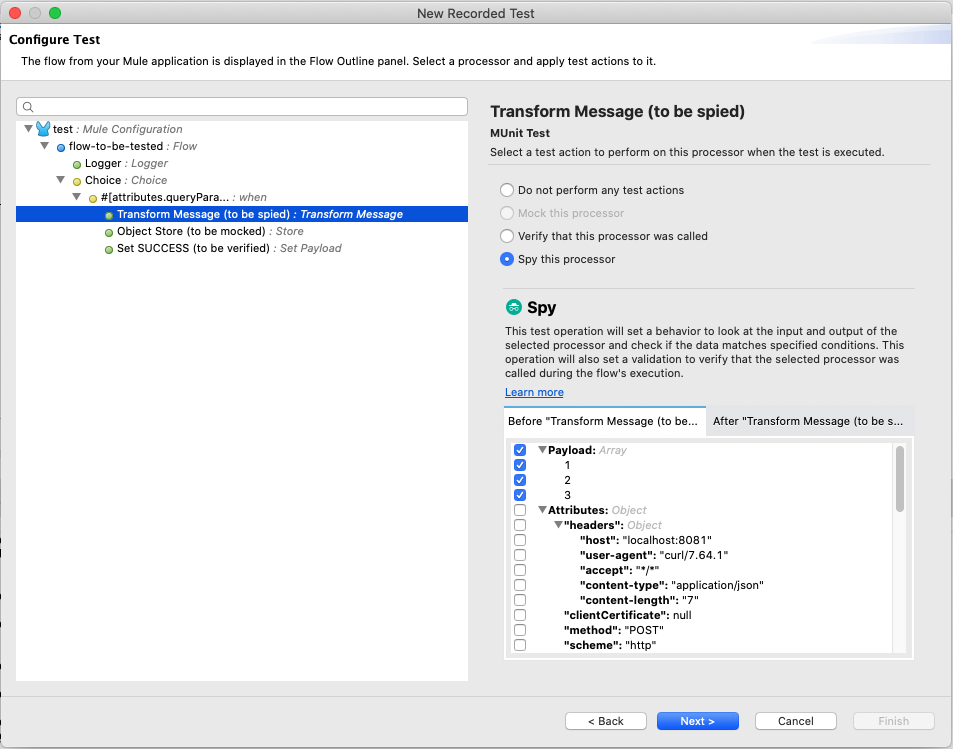
Once again, the default configuration is exactly what we want for this so we will leave them alone.
You may have noticed that Mock this processor is disabled for this processor. That is simply because Transform Messages cannot be mocked using MUnit, so the wizard grays it out automatically. Before we click next, let’s add some more MUnit tests.
Step 4.3: Mocking
During tests we usually want to avoid storing data or modifying external systems, so it is good practice to mock such behavior. With this in mind, and as its name would suggest, we should mock Object Store (to be mocked). To do this, we select it on the left and Mock this processor on the right.

This configuration will allow us to skip the execution of the real processor, and return the selected elements instead. By doing this we avoid any side effects that could happen otherwise.
The test recorder has selected the appropriate default value for this case, so no changes are needed here. Before we click next, let’s add some other MUnit tests.
Step 4.4: Verifying
The last remaining option is the verification. This one simply counts how many times the processor executed, and then compares it to a given number. To try it out let’s select the last processor in the list, as well as the correct configuration on the right.
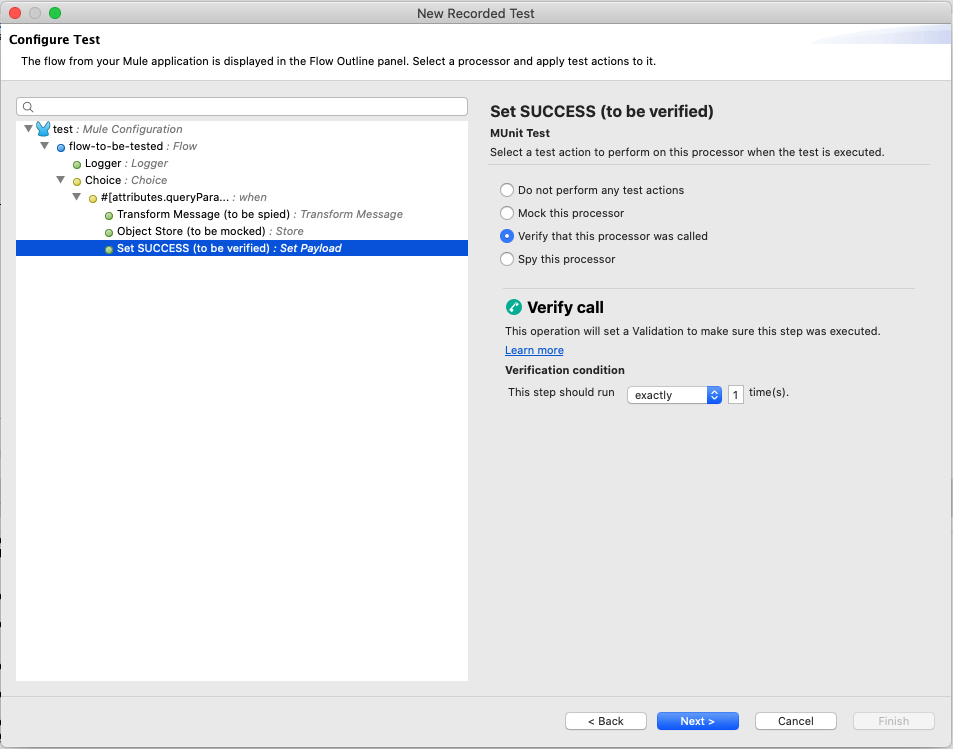
The only configuration available here is a field for inputting a number and a menu for choosing if the execution count should be at least, at most, or exactly equal to the number. The Recorder defaults to the exact amount of executions that were recorded, so in most cases, this configuration will remain untouched.
Step 5: Wrapping Up
Once you have configured the test to your liking, click Next. You should see a summary of the test that will be created, that should look something like this:

If everything looks ok, click on Finish and the test recorder will begin doing its magic to create a test to meet your specifications.
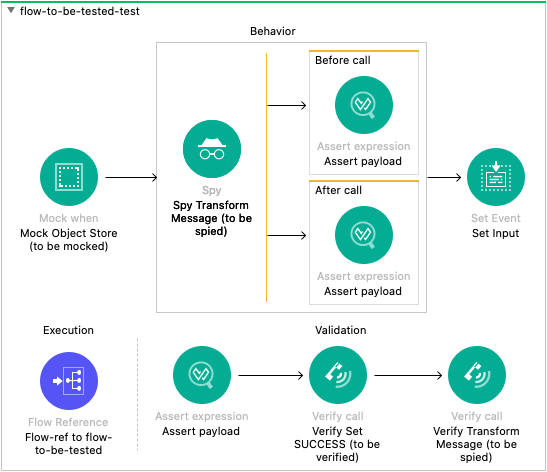
Feel free to poke around to see what exactly it is that the test recorder generated and even modify it as you please. As you could see we did not need to code a single line, and with only a few clicks we could create our first test.
We hope that the MUnit Test Recorder will help to make it easier to start testing your own projects. You can head to the MUnit Test Recorder documentation page for more information, or read more tutorials about MUnit on our tutorials page.


Try Anypoint Platform for free
Start your 30-day free trial of the #1 platform for integration, APIs, and automation. No credit card required. No software to install.
Questions? Ask an expert.
