Getting started
MUnit is a powerful application testing framework built into Anypoint Studio, which enables developers to create, design and run unit tests on APIs and integrations created within Anypoint Studio. As a MuleSoft developer, unit testing is a critical part of the development process to confirm that your APIs and integrations are executing as expected and are built to be reusable across systems. MUnit enables developers to catch any potential errors in their flows due to malformed payloads or other easily preventable errors.
There will be many situations when developing in Anypoint Studio where developers will have to build integrations and make modifications to data on a production database or another live system. Running a test on a live system poses a huge risk, what if your code breaks your systems or deletes important customer data? Luckily MUnit is here to help you prevent a mistake such as this! Instead of making a change on a live system such as a database, you can simulate your existing systems in a mock, local environment, which lives solely on your computer. In this tutorial, we are going to cover some of the main features of MUnit, and cover how to host a mock database on your local machine to run unit tests.
MUnit Features
MUnit is divided into two main sub-modules, one is called MUnit and the other MUnit Tools. Additionally, there are Utilities available for import such as a Database Server, FTP Server, or a Run and Wait Scope. Here is an overview of some of the different MUnit features that you can implement into your unit testing.
MUnit Operations:
- Test: Creates a new test “flow” broken down into three sections: Execution, Behavior, and Validation. The behavior scope sets all the preconditions before executing the test logic. The execution scope contains the testing logic which will wait for all processes to finish before executing the next scope. The validation scope contains all the validations for the results of the execution scope.
- Set Event: Allows you to define a Mule Event. Usually used at the beginning of an MUnit test to define the first message to send to the flow being tested.
- Set null payload: Defines a null payload to test how your flow will handle a null value.
- After Suite: Runs after executing all of the MUnit tests and runs just once. For instance, let’s suppose you have an MUnit Test Suite File with four tests. The code inside an MUnit After Suite, runs just once, after all of your tests.
- After Test: Runs after executing an MUnit test. For instance, let’s suppose you have an MUnit Test Suite file with four tests. The code inside an MUnit After Test runs after each of your four tests; it runs four times.
- Before Suite: Runs before executing all of the MUnit tests and runs just once. For example, suppose you have an MUnit Test Suite file with four tests. The code inside an MUnit Before Suite runs just once, before all of your four tests.
- Before Test: Runs before executing an MUnit test. For instance, let’s suppose you have an MUnit Test Suite file with four tests. The code inside an MUnit Before test runs before each of your four tests; it runs four times.
MUnit Tools:
- Assert That: Allows you to run assertions to validate the state of a Mule event, such as checking to see if a payload equals a certain value.
- Fail: Useful in validating that a test should fail if that point is reached in the flow. The processor throws a java.lang.AssertionError.
- Mock When: Use this processor to mock an event, such as sending a mock POST request with a mocked payload.
- Run Custom: Allows you to assert the Mule event content against a custom assertion.
- Verify Call: Allows you to verify if a processor was called.
- Spy: Allows you to see what happens before and after an event processor is called in your Flow. Usually, you will tell the Spy processor to run a set of instructions before and after the execution.
Step 1: Signup for free and download Anypoint Studio
The first step is to Sign up for Anypoint Platform for free. Click the button below to create a free account.
Already have an account? Sign in.
Step 2: Developing our flow
Let’s set up our very first Munit test! To get started, go fo File -> New -> Mule Project, and name your project whatever you wish. On the main canvas, drag an HTTP connector from the Mule Palette into the flow. Click on the HTTP listener, and under Connector configuration, click the green plus to set up a default HTTP Listener Configuration. Under path, type /submit and the save your flow. Next, from the Mule Palette, drag the Database Select connector as the next component in the flow. Click the green plus button to add a new default Database Configuration, Select MySQL Connection from the Connection dropdown menu, and for driver information, click Configure and select the Add Recommend Libraries option. Next, enter the following Database information:
- Host: congo.c3w6upfzlwwe.us-west-1.rds.amazonaws.com
- Port: 3306
- User: mulesoft
- Password: mulesoft
-
Database: congo
- In the SQL Query Text section, add the following query:
SELECT * FROM contacts;
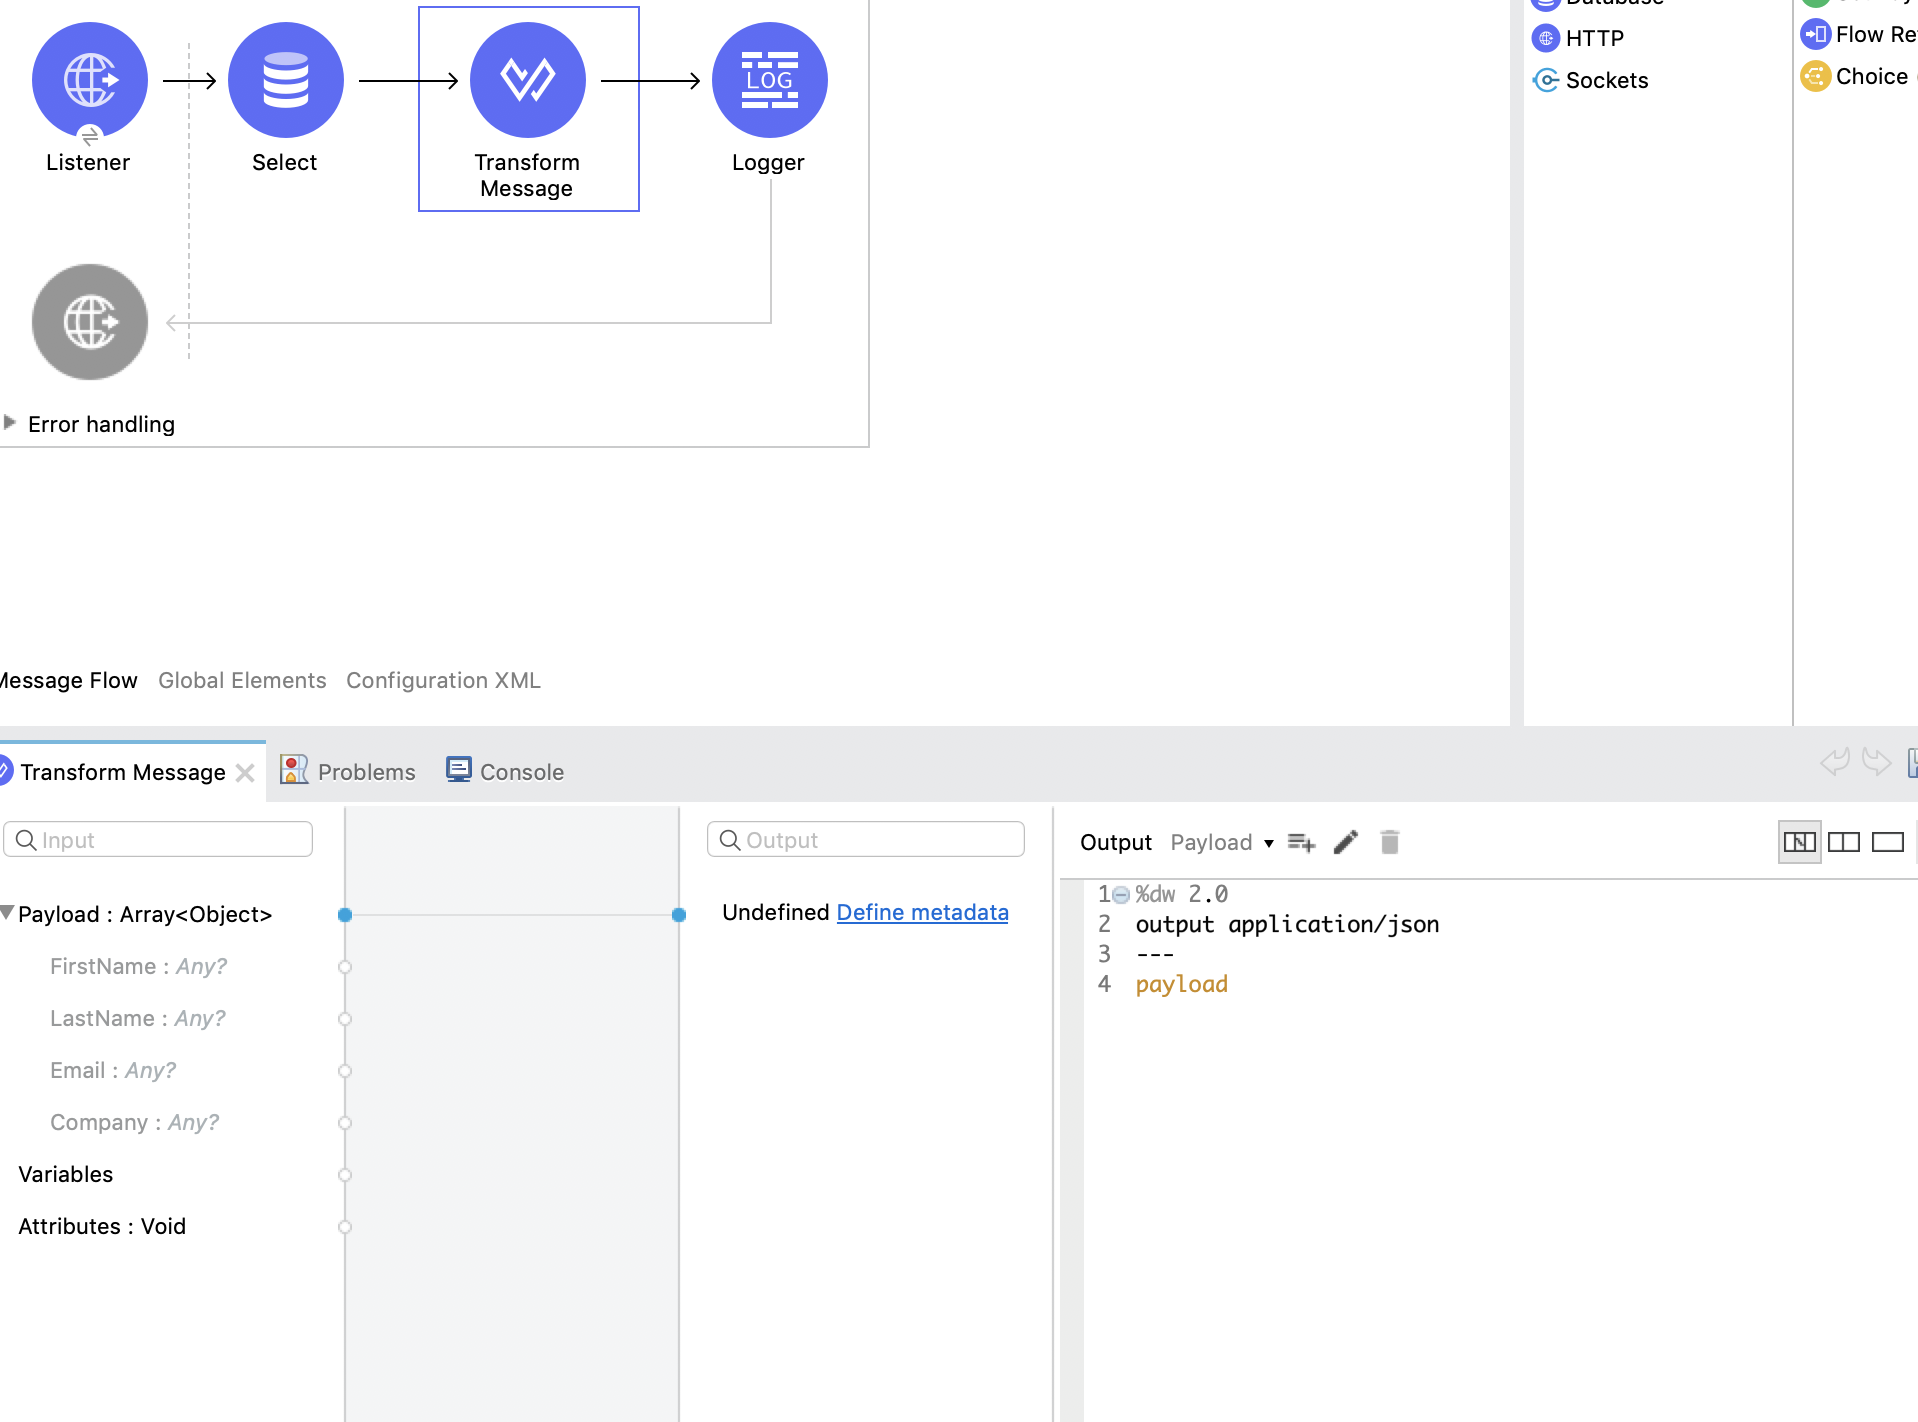
Next, drag a Transform connector into the flow. This transform message is going to take each entry from the database and convert it into a JSON format. To complete this data transformation, simply replace the DataWeave script with the one provided in the below screenshot.
Next, add a Logger component that prints out the payload. In the Message field on the Logger connector, click the FX button and type payload.
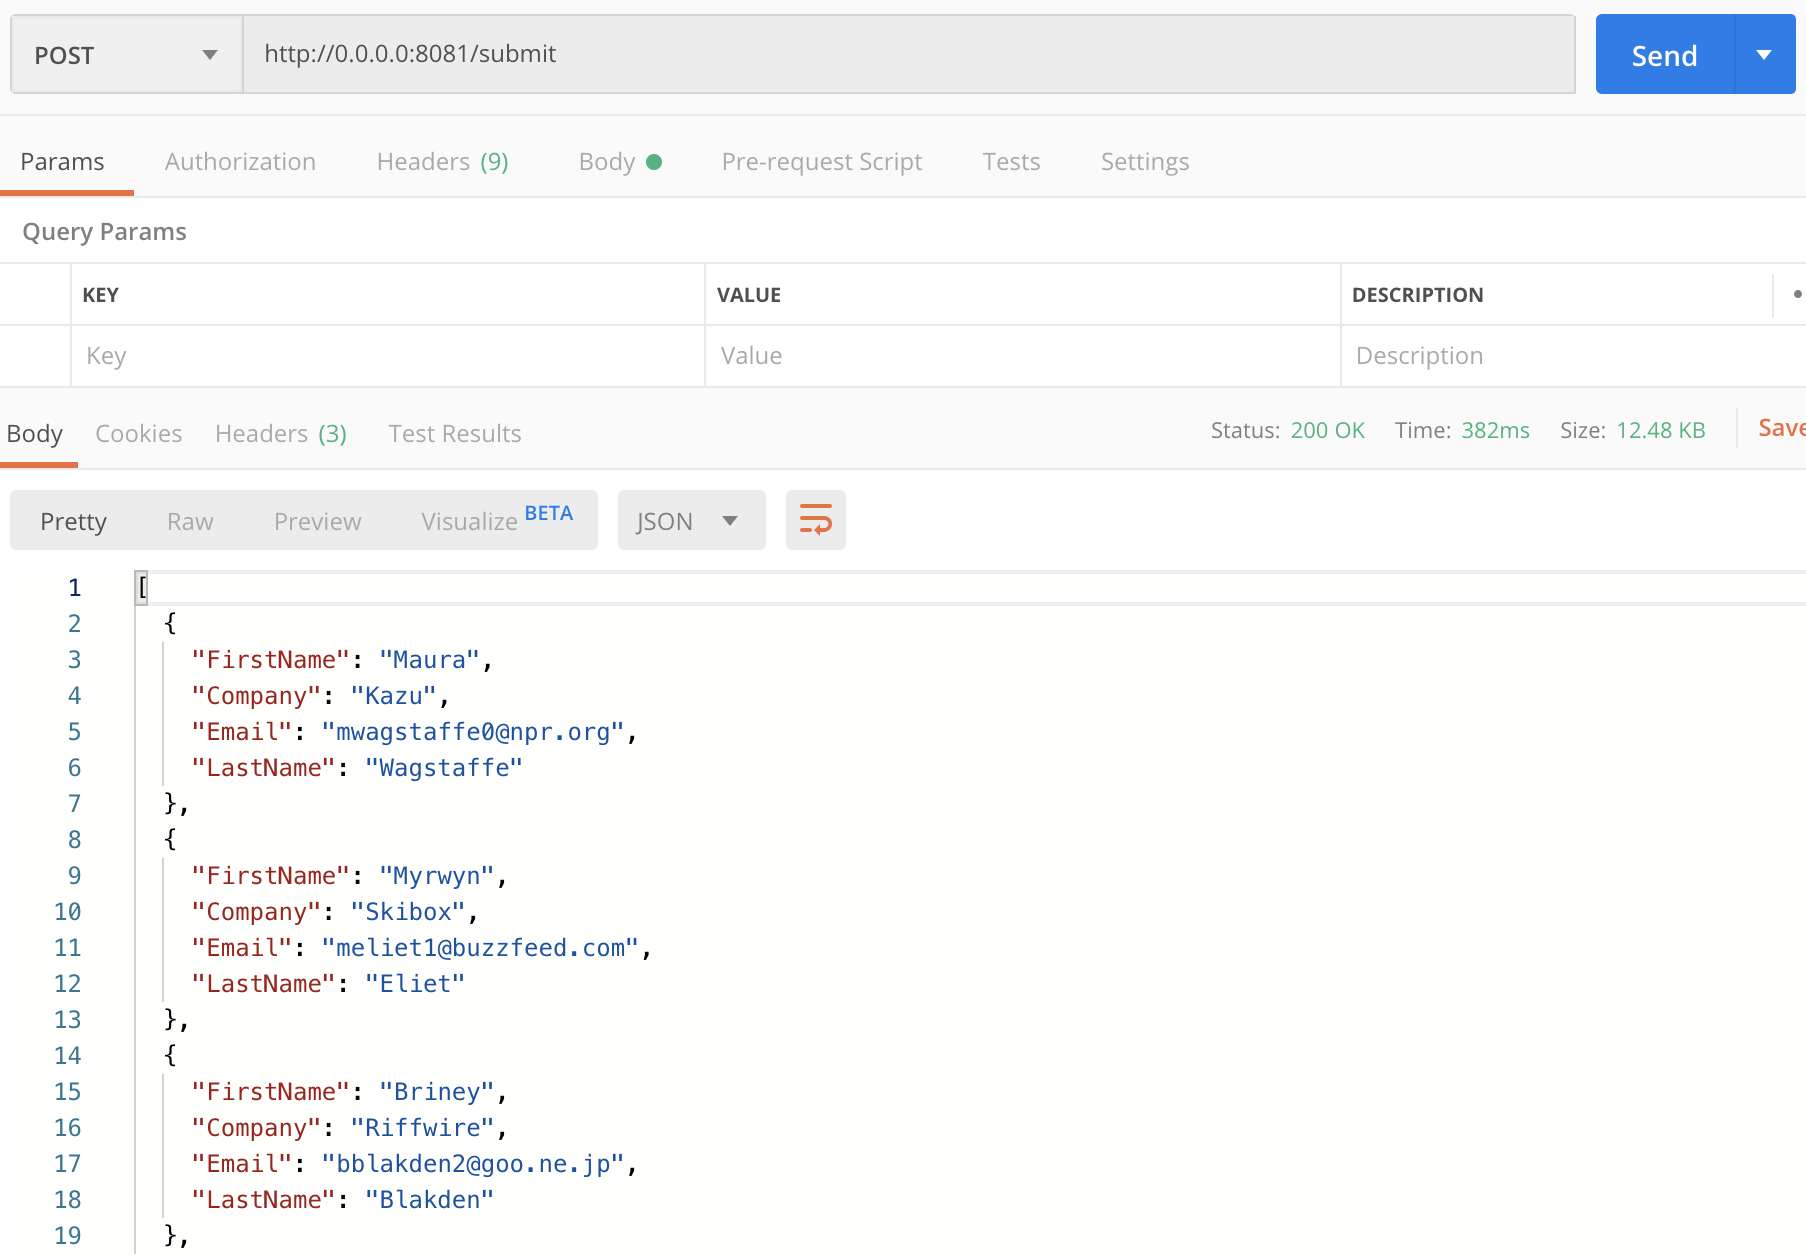
Test the flow by right-clicking on the canvas, and selecting Run project. If you go into Postman, and send an HTTP post request to the address: http://0.0.0.0:8081/submit, you should get a payload with 100 entries returned as a JSON payload. Now, let’s set up a MUnit test to use a local database instead of our production database.
Step 3: Setup the MUnit DB Server
In this final step, we are going to unit test our flow using a local database on our machine instead of calling the live production database as we just did in step 2. There will be many situations where you are developing an integration that requires you to not make requests to a live database since malformed information could potentially corrupt important user data. To test our database in a local environment, we can use the MUnit DB Server to unit test a sample CSV file that has the same data structure as our live production database.
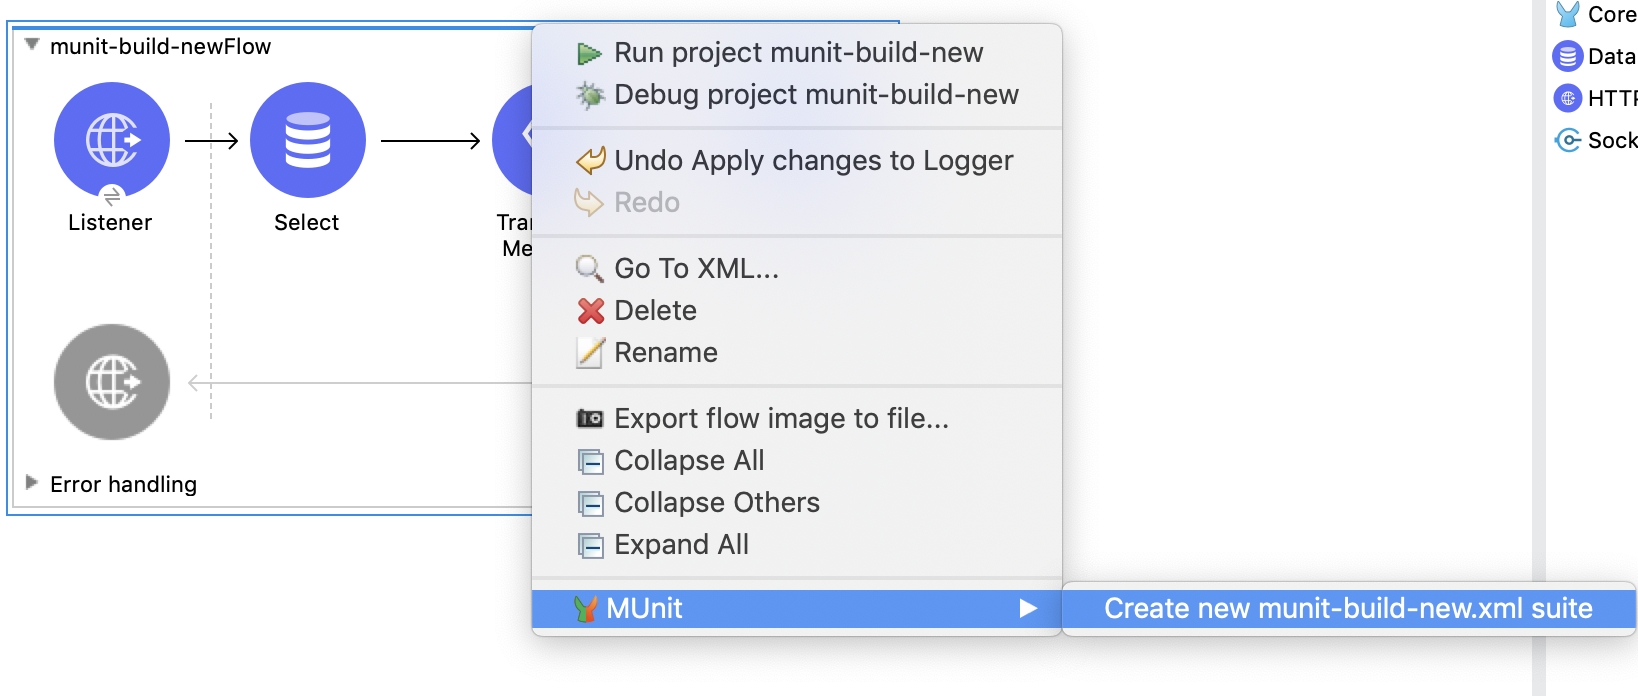
The first step to creating a MUnit test is to right-click on the flow, and select MUnit, and select Create new MUnit suite. In this tutorial, we are going to be using a local CSV file to test our flow.
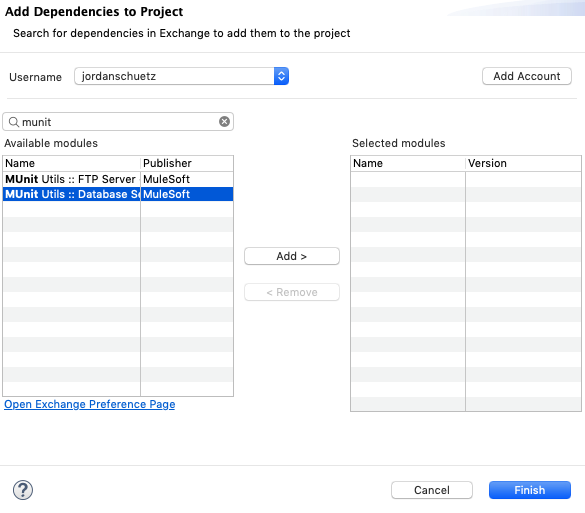
Next, let’s add the MUnit DB Server dependency to our project. In your Mule Palette explorer, click the Search in Exchange button, and search for MUnit. Click the add button on the MUnit Utilis :: Database Server module and click Finish to add the module to your project.
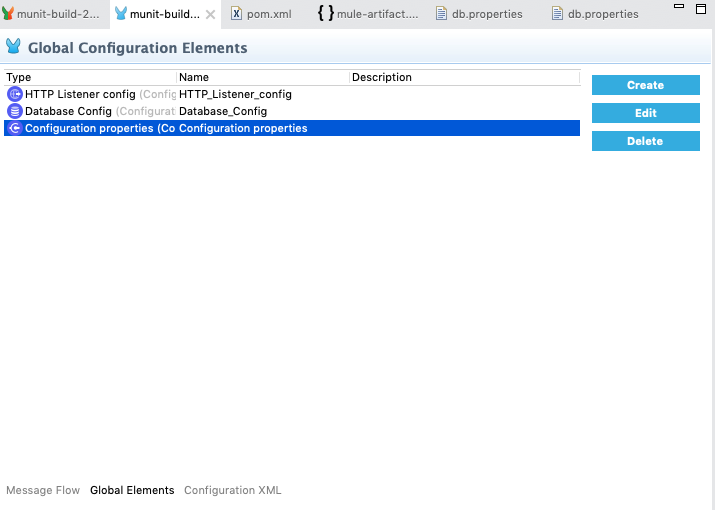
Now that you have added the MUnit Database Server dependency to your project, let’s create a few elements in the Global Elements tab. The first element that we are going to create a mock database by adding a new MUnit DB Server Config. To add this element, navigate to the section in Anypoint Studio listed in the screenshot below, and click the Create button.
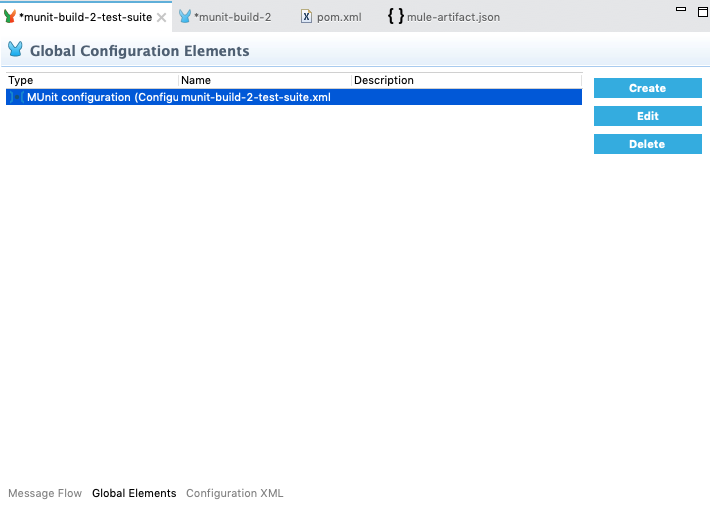
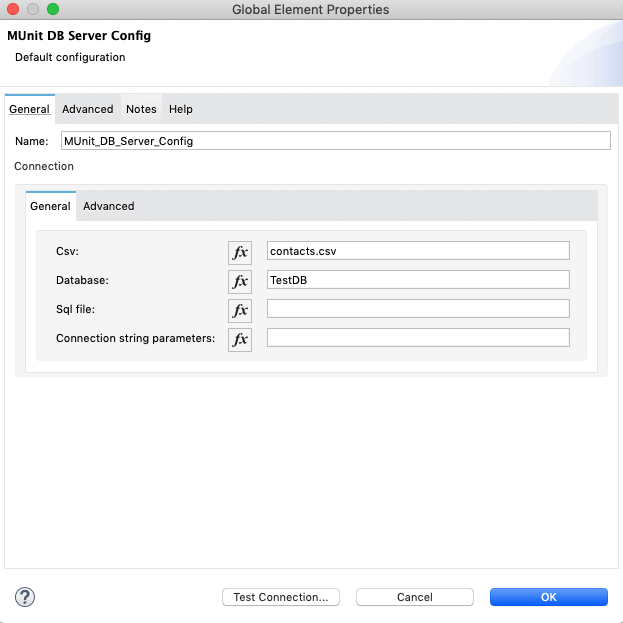
Once you click the Create button, search for MUnit, and select MUnit DB Server Config and click OK. Then in the CSV field, type in: contacts.csv and in the Database field, type in: TestDB as shown in the screenshot below.
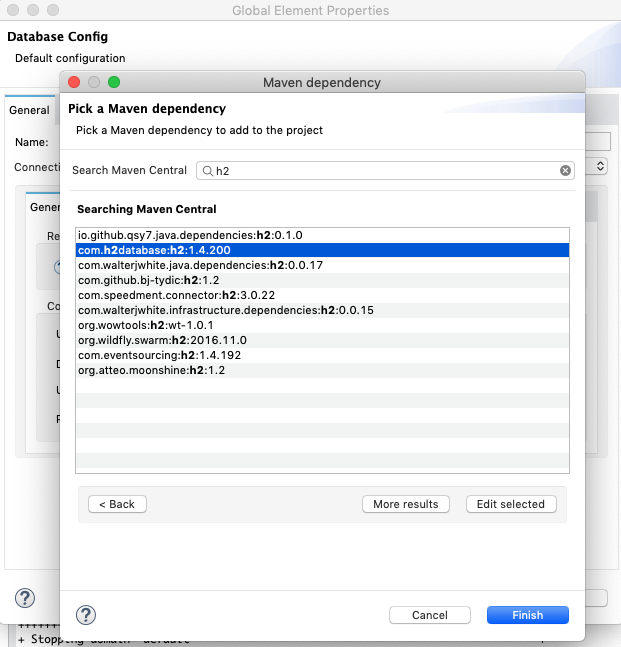
Next, click the Create button again, search for Database Config, and click OK. Make sure to name your local Database Config: Test_Database and then select Generic Connection as the connection type. Next, go to the Required Libraries section and click the Configure button and select Add Maven Dependency. We are going to search for h2 to find the com.h2database:h2 Maven dependency and click the Finish button.
Once the Maven dependency has been added, enter the URL: jdbc:h2:tcp://localhost/mem:TestDB and the Driver Class Name: org.h2.Driver

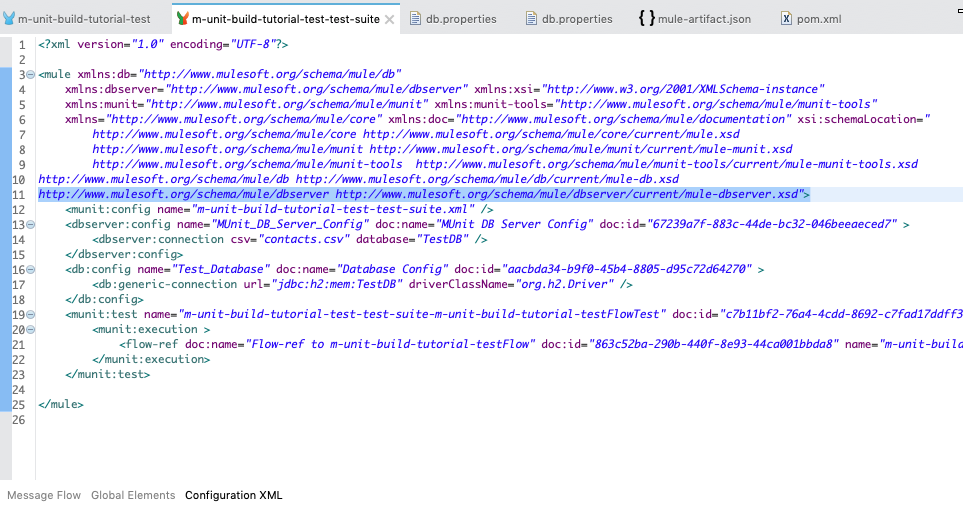
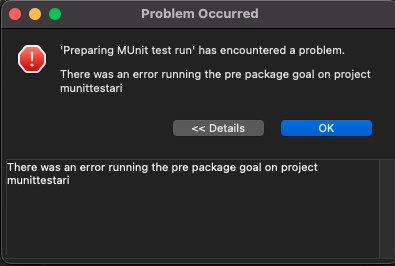
Click the OK button. Next, go into your Configuration XML on your MUnit test, confirm that your XML includes the dbserver and mule-dbserver dependencies. If it doesn’t, add the following line (reference the screenshot below to see where to copy and paste the line):
http://www.mulesoft.org/schema/mule/dbserver
http://www.mulesoft.org/schema/mule/dbserver/current/mule-dbserver.xsd
Next, we are going to create two db.properties files which will instruct Anypoint Studio which Database Config file the flow should execute. For instance, if we run an MUnit test, the flow will use the contacts.csv file according to the db.properties file under src/test/resources. However, if the flow executes with an HTTP request, the flow will hit the live production database instead of the contacts.csv file according to the db.properties file under src/main/resources.
In our Package Explorer, let’s add the two db.properties files, one in src/main/resources and one in src/test/resources. First, right-click on src/main/resources and click New -> File. Name the file db.properties and click Finish. In the file on line 1, add the line: DB_CONFIG=Database_Config and then save the file.
Next, right-click on src/test/resources and click New -> File. Name the file db.properties and click Finish. In the file on line 1, add the line: DB_CONFIG=Test_Database and then save the file.
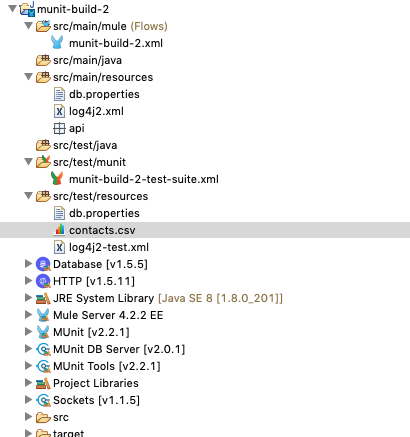
Next, click here to download contacts.csv. Add this CSV file to your src/test/resources folder along with the db.properties file you just added. Your package explorer should look similar to the screenshot below.
Next, navigate back to your main flow, and click on the Configuration XML tab. Under config-ref, change it to ${DB_CONFIG} shown in the screenshot below and save your project.

Lastly, navigate back to your main flow by going to src/main/mule and select your main projects XML file. Go to the Global Elements section and click the Create button and search for Configuration properties and click OK. Then under File, select the db.properties file under src/main/resources and click OK. Selecting this file in your configuration properties instructs Anypoint Studio to select the live database (not the test one) when the HTTP request is hit with a successful request.
By having two properties files with the same name (db.properties), MUnit will test the file under src/test/resources and will override the file in src/main/resources. This is what caused the value fo DB_CONFIG to point to the production DB when you run the App and to the Mock DB when you run the test.
Step 4: Run your test
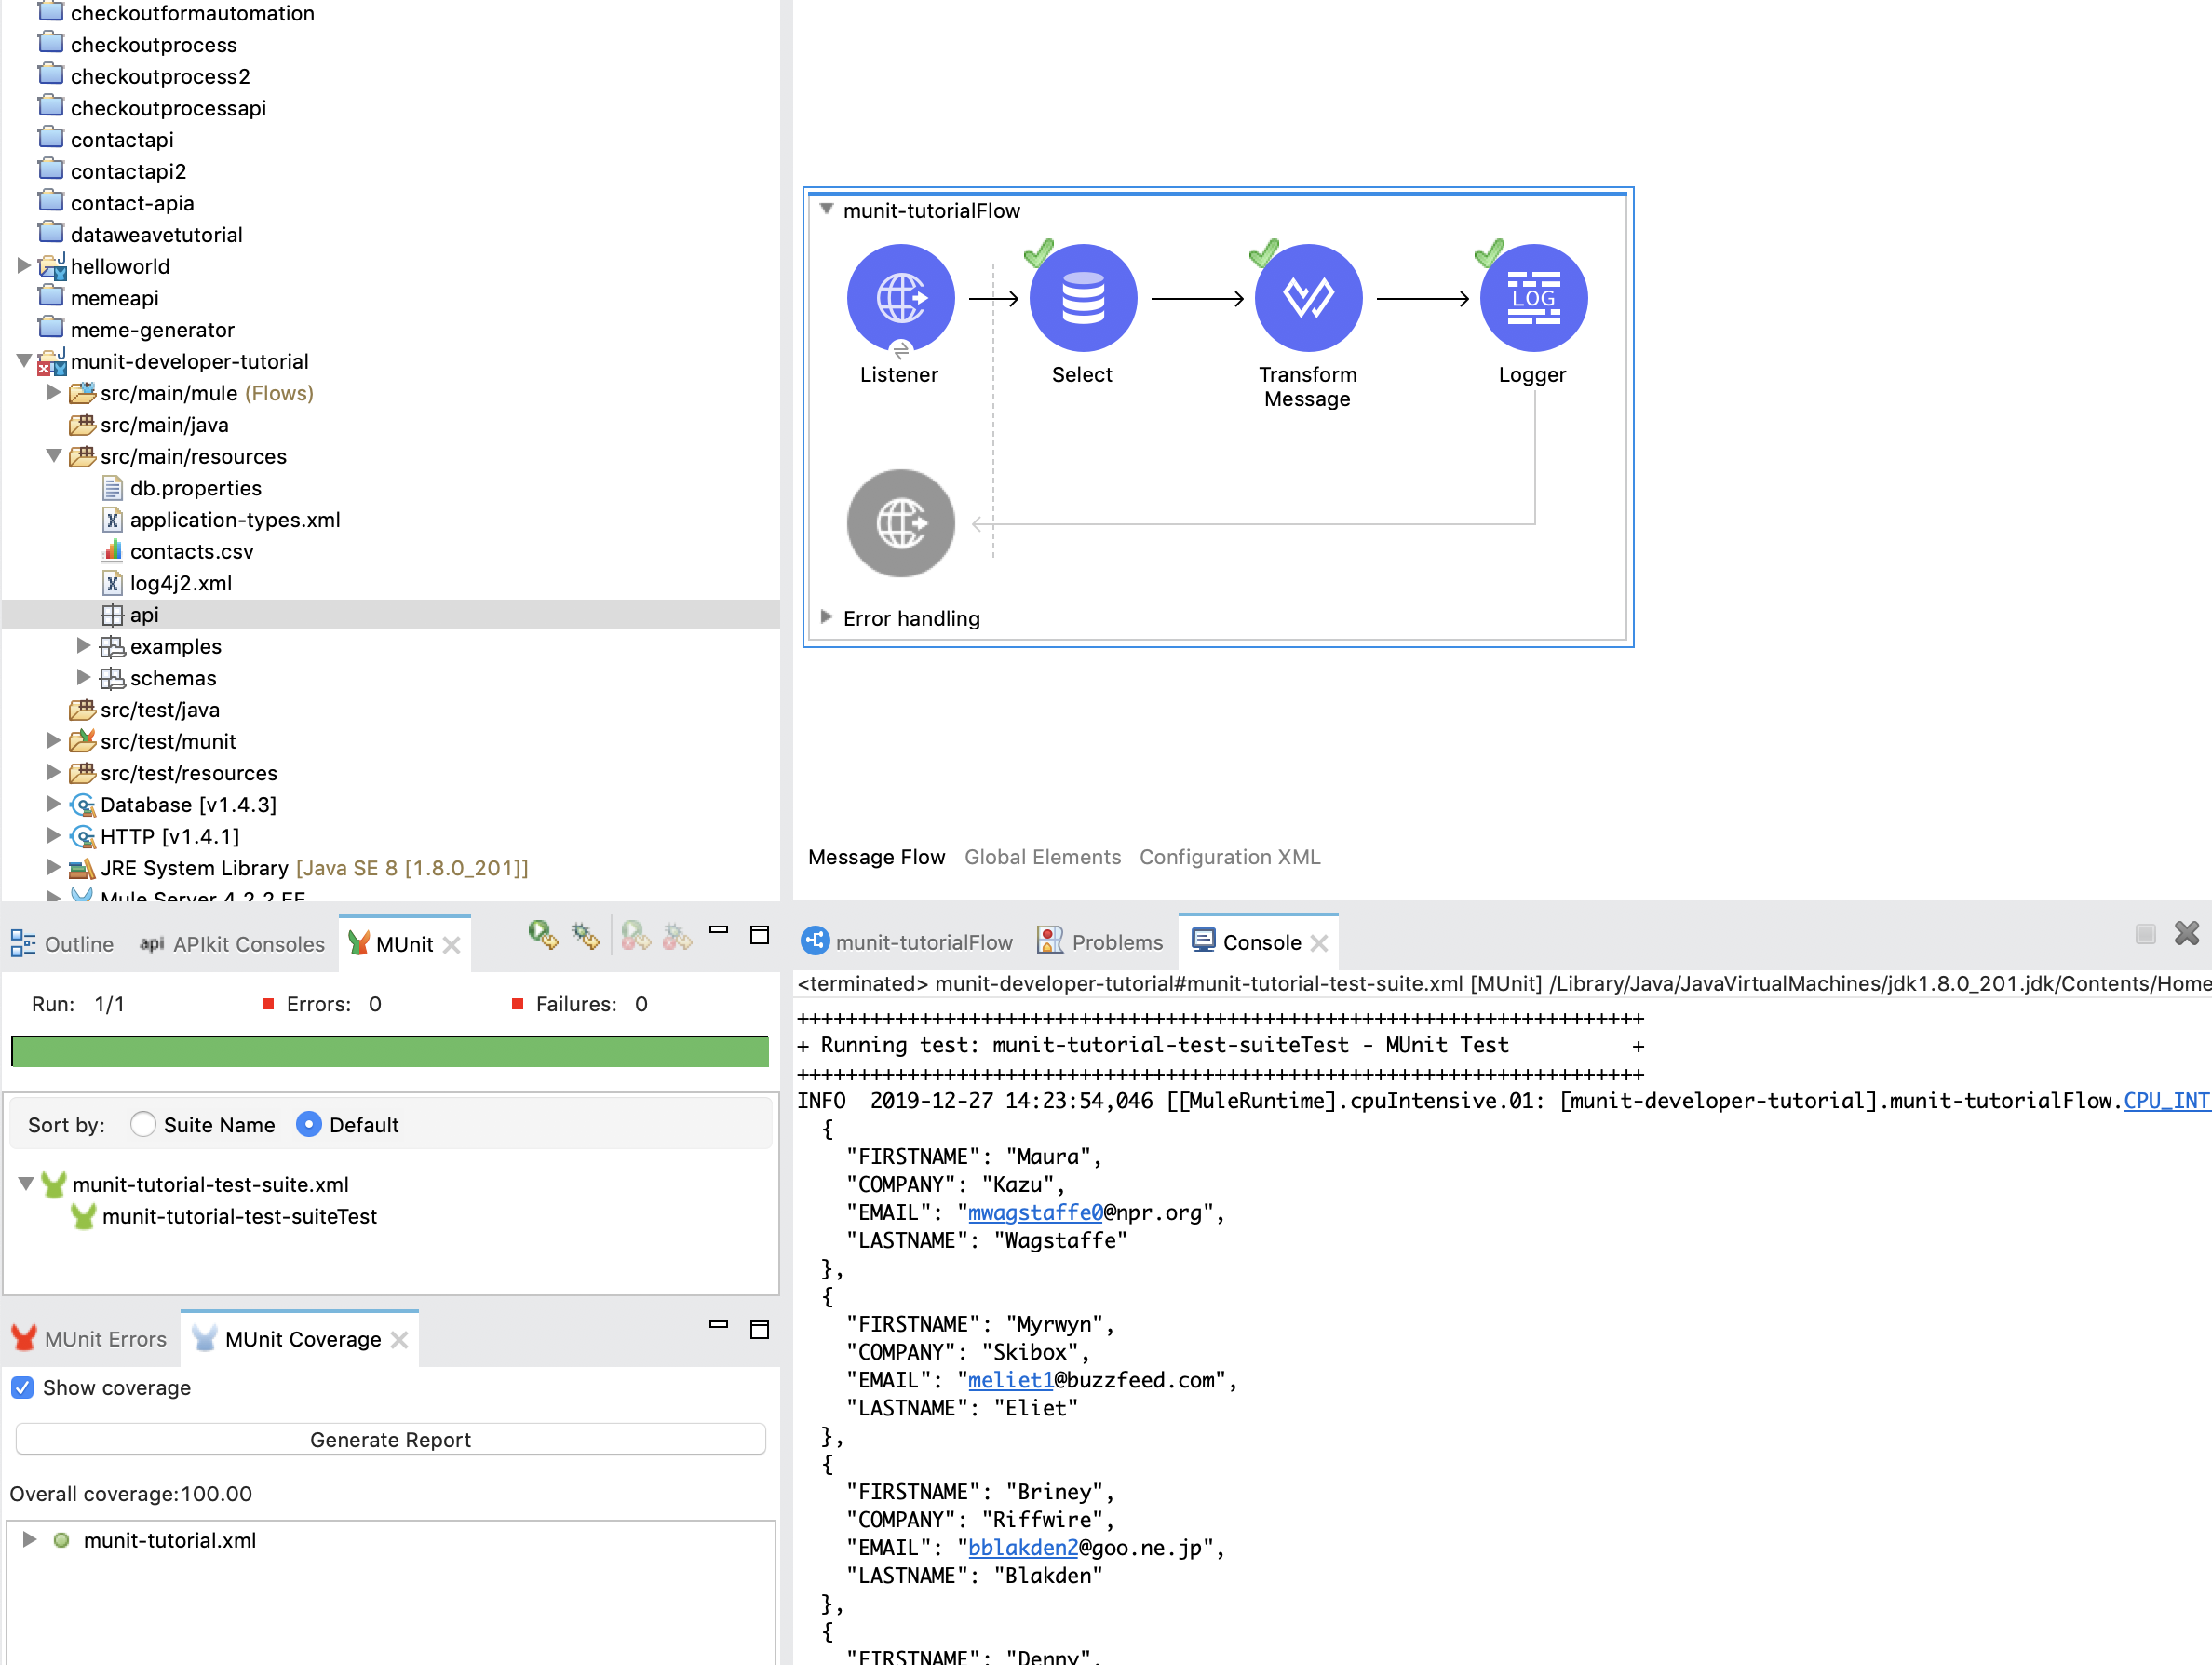
Click the run button, and you should see your flow successfully execute below! As you can see in the logs, only 15 database entries were returned in the console since it ran a unit test on the CSV file instead of the live production database. If the test would have executed on the live production server, 100 entries would have been returned.
If you go to run your Munit test and you get the below error, you need to add the
Conclusion
Hope you enjoyed this tutorial on setting up your very first MUnit test. If you found this article helpful, please rate the tutorial below. This article only covered the very basics of what’s possible with MUnit, make sure to checkout the MUnit documentation for more help on how to use each individual MUnit connector. For more tutorials, checkout our full catalog of developer tutorials by clicking here.


Try Anypoint Platform for free
Start your 30-day free trial of the #1 platform for integration, APIs, and automation. No credit card required. No software to install.
Questions? Ask an expert.
